Who Goes Blogging 5: Updates Galore!
I update the theme, hugo version, fix bugs, and add some new functionality to the website
In this article we’re going to continue making some improvements to our Hugo website. Some of the things going to be covered are:
- Upgrading our Hugo theme
- Upgrading the Hugo version
- Adding table of contents
- Adding support for title emojis
So far since this website has launched we haven’t upgraded either the Hugo version used to build our website, alongside the theme being used. Hugo is a very active project with new features and bug fixes being added all the time. By not upgrading Hugo, we are missing out on enhancements that we can make to the site.
As for upgrading the theme, improvements in the styling or even making use of said new features in Hugo can be added as part of the theme. Remember that when you execute a hugo command, turning the website from markdown to rendered HTML files, that the theme chosen will be used to render those files.
Upgrading Hugo
This varies depending on what OS you are running on, but it is pretty much identical as the steps taken to install Hugo in the first place. Even the documentation for upgrading is a one-liner:
Upgrading Hugo is as easy as downloading and replacing the executable you’ve placed in your
PATH, or runningbrew upgrade hugoif using Homebrew on macOS.
A quick execute of hugo version tells us what we’re currently running. We can then have a look at the Hugo release page to find the latest one - which at the time of writing is 0.68.3.
$ hugo version
Hugo Static Site Generator v0.58.3-4AAC02D4/extended linux/amd64 BuildDate: 2019-09-19T15:34:54Z
I run Linux so I would need to replace the executable on my PATH. This can be done with a handy script to pull the archive and install it for us.
HUGO_VERSION="0.68.3"
wget "https://github.com/gohugoio/hugo/releases/download/v${HUGO_VERSION}/hugo_extended_${HUGO_VERSION}_Linux-64bit.tar.gz"
tar -zxvf "hugo_extended_${HUGO_VERSION}_Linux-64bit.tar.gz" hugo
sudo mv -v hugo /usr/local/bin
hugo version
rm "hugo_extended_${HUGO_VERSION}_Linux-64bit.tar.gz"
Remember that the hugo-coder theme requires the extended version of Hugo in order for it to render files correctly.
You can see where
hugois currently installed on your system with the commandwhich hugo, given it is in yourPATH.
Executing hugo version one more time confirms if the upgrade took place.
$ hugo version
Hugo Static Site Generator v0.68.3-157669A0/extended linux/amd64 BuildDate: 2020-03-24T12:13:38Z
Testing For Any Issues
At this point I would advise you do some testing with the new version to determine if your site is not only rendering as expected but functioning too. You can do this with the good old hugo serve command as you would have used before when writing out articles, and fixing anything that looks out of place.
However, since I’m going to be upgrading the hugo theme too, I’ll do my testing in one hit later in this post.
Updating Hugo in CI/CD
We’ve only upgrading Hugo on our machines, but we also need to upgrade it in our CI/CD pipeline to ensure it deploys with the correct rendering too. We set this up in parts 3.1 and 3.2.
I’m using GitHub Actions for my CI/CD pipeline, so I need to head to .github/workflows/deploy.yml and change hugo-version: "0.58.3" to hugo-version: "0.68.3".
It’s as easy as that thanks to the pre-made GitHub Action!
Upgrading Hugo Theme
A git submodules recap
As mentioned before, I’m using hugo-coder as the theme for my Hugo website which is being pulled as a submodule in my git repository. I can interface with it via the command git submodules.
One of the cool things about git submodules is I don’t need to have a copy of the source code for the theme in my project. I can just reference the codebase at a particular point in time - or a commit, and git will pull in the resources for which then my Hugo website can utilise it.
We already defined this back in the first post of this series, in our root directory we created a file called .gitmodules with the following contents:
[submodule "themes/hugo-coder"]
	path = themes/hugo-coder
	url = https://github.com/luizdepra/hugo-coder.git
Line by line, we are giving the submodule a name, telling git where to check out the module to, and lastly where git can find the repository for the module when we checkout our project.
When we pull in the submodule for the first time, it creates a tree in our projects .git/modules filled with metadata about the submodule.
$ tree .git/modules/themes/hugo-coder -L 1
.git/modules/themes/hugo-coder
├── branches
├── config
├── description
├── HEAD
├── hooks
├── index
├── info
├── logs
├── objects
├── packed-refs
└── refs
The
.git/directory contains all the metadata about your repository so thatgitknows where to pull/push to/from the repository, amongst other things. It has a near identical directory structure to the one shown above.
One of the files in this directory is called HEAD, and it contains the commit of which git should checkout the submodule
$ cat .git/modules/themes/hugo-coder/HEAD
e66c1740611b15eee0069811d10b5a22b0dc4332
We can even view this commit in the repository at https://github.com/luizdepra/hugo-coder/commit/e66c1740611b15eee0069811d10b5a22b0dc4332.
Upgrading Submodules
To upgrade submodules in your project, you simply need to execute the command below:
git submodule update --recursive --remote
We can then check the value in .git/modules/themes/hugo-coder/HEAD and see what this is updated to.
$ cat .git/modules/themes/hugo-coder/HEAD
acb4bf6f2dcce51a27dc0e1f1008afb369d378d8
Nice - this has changed from the previous value. We can jump over to GitHub to verify this is indeed the latest version.
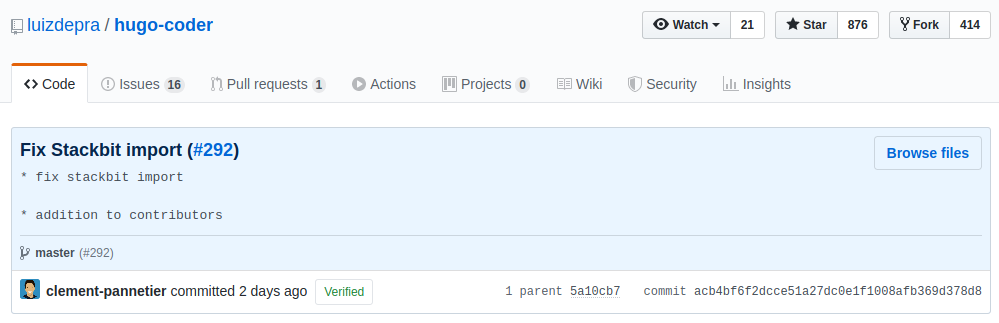
Verify at the GitHub repo page
Validation and Testing
Now comes the testing part, ensuring that everything is working as intended with both the new Hugo version and the latest hugo-coder submodule. Some of the issues I came across were:
<center> tags not rending correctly
I believe the new Hugo version broke this one, where images that were wrapped in <center> tags were simply disappearing. I had been wrapping {{< figure ... >}} shortcodes in <center> tags in order to horizontally centre images - but it looks like the new version causes these images to appear completely.
It looks like the figure shortcodes now support center as a class property. Therefore we go from…
<center>{{< figure src="image-name.png" >}}</center>
To…
{{< figure src="image-name.png" class="center" >}}
Lists not rendering as before
It turns out that my markdown for articles wasn’t as watertight as I thought; Hugo is now a whole lot more strict in ensuring your syntax is correct. Check these two before and after for comparison.
For this I just needed to fix the markdown by adding another indent to the list item.
I saw several cases of this, and including a markdown linter in the CI/CD pipeline would help to prevent this. This is something I’ll look to include in the near future.
Adding New Features
The whole reason to upgrade both Hugo and the theme was to explore some of the new features that come in both of them, so let’s get adding them.
Adding Series Links in Content Footer
The hugo-coder theme now has better support for series - these are articles that directly follow on from one another, such as this Who Goes Blogging one. Series are nothing new to Hugo and we could have done them with the version we upgraded from, only in this commit for hugo-coder has it added a layout for it to be rendered.
To create a series, we use the series front matter setting for articles. For the Who Goes Blogging articles, adding the front matter to them looks like this.
---
date: 2020-03-10
title: "Who Goes Blogging 3.2: Deployment Methods - GitHub Actions"
#...
series:
  - Who Goes Blogging
tags:
#...
---
Once this is done for all pages, hugo-coder will render the See also in … section at the article footer.

Adding Table of Contents
Okay this one isn’t exactly a new feature of the theme, but since we’re playing around we may as well make use of this opportunity. Table of contents (TOC) aren’t included by default in the hugo-coder theme, so we need to add it in ourselves.
There is some documentation on how to add TOC to your articles. Before we do that we need to revisit how layouts are organised as discussed briefly in a previous post.
Template Lookup Order Primer
The type of a markdown file (defined by the front matter setting type) tells Hugo where to look for in the layouts/ directory of your project. The Hugo theme you’re using will already have these all defined, hence why they are predefined themes! Before Hugo looks for these layout HTML files in your theme, it will check for them in your projects layouts/ directory first.
In other words, the order of precedence (or hierarchy) for HTML files is anything in the project layouts/ directory takes a higher priority than that in your theme - as described in Hugo’s documentation for template lookup order.
See below for a directory tree explaning this - a lot of content has been removed for brevity.
$ tree layouts
layouts
├── posts
│   └── single.html					# hugo will use this file to render your HTML
└── themes
    └── hugo-coder
	    └── layouts
			└── posts
			    └── single.html     # hugo will ignore this one in the themes directory
Implementation
The primer above gives a hint as to what file we need to modify. The single.html file is in charge of how articles are rendered. Since we want everything else to remain the same about this file, we can take a copy of the file as it currently stands and place it into our project root.
mkdir layouts/posts
cp -v themes/hugo-coder/layouts/posts/single.html layouts/posts
I won’t go into the details here, I’ll leave that to you to make changes to see how they affect the rendering of the page.
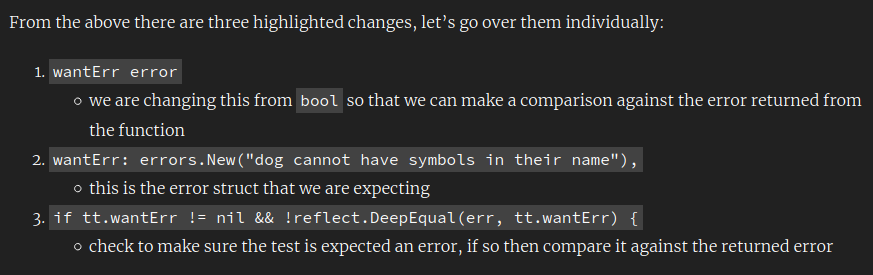
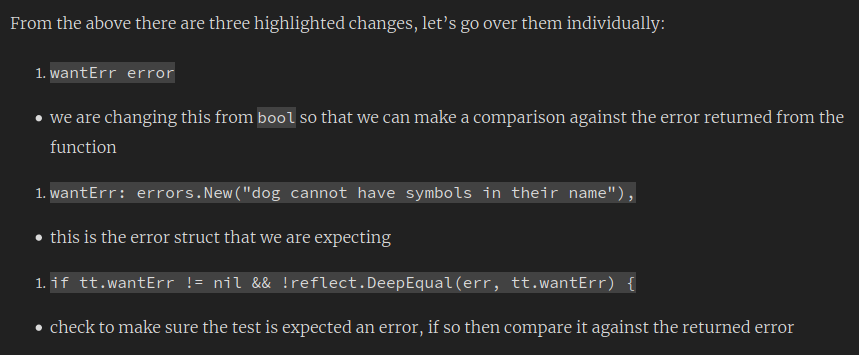
I want the TOC to appear before the main content, but after the featured image for the article (if there is any). Based on this the files is going to need the highlighted change below.
| |
We’re not done there - we’ve referenced a partial template file here. These allow us to reuse HTML files in multiple places, or to break up a large HTML file into smaller, more easier to manage chunks.
Partial templates are found under the layouts/partials directory and follow the same principle as defined in the primer for template lookups, and are referenced back as {{ partial "<partial_name>.html" . }}.
Let’s go ahead and create the layouts/partials/toc.html file and populate it as below.
{{ if and (gt .WordCount 400 ) (.Site.Params.toc) }}
<aside>
  {{.TableOfContents}}
</aside>
{{ end }}
This is similar to Hugo’s example but just tweaked a bit. I’m not looking to do anything too fancy with the styling just yet, but maybe later on.
Previewing it by hugo serve we should get something that appears as below.
Bugs Along The Way
As the heading suggests, there were a few extra things I needed to change before releasing it into the wild.
Fix Improper Headings
Per Table of Contents Usage documentation, Hugo will render from <h2> headings, which are defined as ## in markdown. So # Introduction would not be included in the TOC, but ## Introduction will.
This is a problem for some of my articles since I’ve been writing headings liberally at the wrong level.
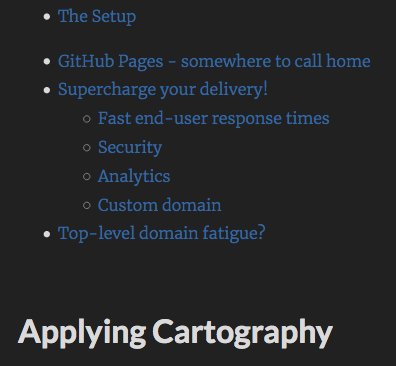
Notice the Applying Cartography heading doesn’t appear in the TOC
The given example above shows what happens when we use # Heading Name instead of ## Heading Name. To fix this I just need to go through each heading and make sure top-level headings begin with ## and any subheadings have an additional #.

Much better!
Fix Emojis
Who doesn’t love the use of emojis ⁉️ Well I don’t when they render badly. Before this exercise I was using a custom shortcode to render them.
# layouts/shortcodes/emoji.html
{{ .Get 0 | emojify }}
Shortcodes are similar to partial templates in that they contain HTML, but they are usually for referring to one HTML element as opposed to multiple.
Then in my markdown I would refer back to them such as {{< emoji ":wave:" >}}. However in headings they rendered as below…

Hugo clearly finds this hysterical
It’s a weird one for sure - especially since they render fine in the headings themselves already…


There is a fix for these, and it’s called rendering emojis the correct way! 😅
Firstly in the site config.toml I added enableEmoji = true at the root level and then proceeded to change all occurrence of {{< emoji ":emoji_name:" >}} to :emoji_name:. With that I can then remove layouts/shortcodes/emoji.html since it’s not being referred back to anymore.

Nicely done
Markdown Not Rendering
I also noticed that markdown wasn’t rendering properly too. Given the markdown ## Spice Up Your ~~Life~~ Python :snake:, which renders as a heading in the screenshot below…

But in the table of contents it appears without the tilde strikethrough (~) rendering.

This looks to be a bug within Hugo itself, since I was able to get strong and emphasise to render fine - I raised an issue on the project - I can live with it for now.
Emojify Everything!
Continuing on the theme of emojis; we were able to get them to appear in the Table of Contents fine. But what about in the titles of the articles themselves? We can add them in the title front matter setting like below:
---
date: 2019-07-05
title: ":snake: Three Ways To Spice Up Your Python Code"
# ...
---
Having a look around the site we see these aren’t getting rendered correctly in a number of places…
(1) Post title

(2) Browser title

(3) Type list entry

This is all to do with how the theme is rendering these, they are not “emojifying” the text it is receiving. This is easy to fix but it involves us copying over the respective files where they are being rendered from in hugo-coder and overwriting thme in our project root (back to template ordering again!).
Fix Post & Browser Title
We can kill two birds with one stone since these are both found in the same file, the layouts/posts/single.html file - this is the main file used to render the article page. If you followed above, you’ll notice we already copied across that file to our project root in order to add a TOC.
We need to go back to that file and emojify both the main article heading, alongside the browser title to change any occurrence of {{ .Title }} to {{ .Title | emojify }}.
By doing this we will always emojify the titles even if in our config.toml we specified enableEmoji = false, or didn’t specify it at all. This will conflict with the default state of the setting which is false. We could do some conditional logic on the enableEmoji setting, but unfortunately this isn’t exposed to us to be able to perform something like {{ if .Site.enableEmoji }}. Because of this we cannot create a pull request (PR) to merge it in with the hugo-coder theme. I’ve raised a couple of issues against Hugo requesting these features.
Since this is just for my website I am okay with the overriding behaviour of emojiying the title.
See the Gist below for my completed single.html file, including the TOC addition earlier.
You’ll notice I’m emojifying (surely I’ve said this enough times to make it into the Oxford Dictionary?!) the site title too. This is incase myself (or even yourselves) wish to add emojis there too.
The end result for the title will look like this:

And the browser title is fixed accordingly:

Fix Type List Entry
We need to find the file in the theme that determines how to render a list entry for a page of type posts and make the modification there - layouts/posts/li.html. We’ll need to do the same here as we did for single.html and copy it to our project root.
cp -v themes/hugo-coder/layouts/posts/li.html layouts/posts
Likewise for the title in the previous section, we need to emojify the title of the article as it’s being listed out.
Once done, we can see it reflect nicely in the list:

Conclusion
There was a lot covered in this post, to recap we…
- Upgraded the Hugo version used to render the website locally, as well as in the CI/CD pipeline
- Also updated the version of the theme we’re using
- Made use of new features that came with it such as series links
- Added a table of contents to our longer articles
- Added support for emojis in post titles
You can view all the changes made in this post at this pull request.
Thanks for reading! 🌝