Who Goes Blogging 3.2: Deployment Methods - GitHub Actions
Migrating to GitHub Actions as our CI tool
From TravisCI to GitHub Actions
In the previous post we looked at moving to a CI/CD model by moving from the deploy.sh script to TravisCI.
In this post we will look at how we can migrate from TravisCI to GitHub Actions, GitHub’s own CI/CD tool.
This post will also be useful if you are looking to onboard GitHub Actions as your CI/CD pipeline! 🚀
Benefits ✅
Let’s talk about why we want to migrate away from TravisCI in the first place.
Firstly and most importantly, there is a whole community of shared actions (a set of build instructions) which can save you a huge amount of time when it comes to piecing together a CI pipeline. If the TravisCI config seemed a bit intimidating, then these will be a whole lot more gentler to you.
Whereas in our Travis config we had to define the individual commands needed to set up our environment and then how to build it, there’s an action for that! Want to include some markdown linting? There’s an action for that!
I think you folks get the picture now. There’s an awesome-actions repository worth checking out for more actions.
Secondly, all your DevOps tools are in one place! I’m a big sucker for GitLab and while I don’t use it for my personal projects, I’ve used it in a past life and found its seamless integration with all other tools second-to-none. Not having to worry about integrating between multiple services can only increase your productivity - allowing you to focus more on the application you’re writing.
Lastly, all configuration is managed in the workflow configuration file. One enhancement in particular that we will be introducing can be achieved with an additional setting in the workflow config file; for us to achieve the same in Travis would have to be done via the GUI. I’m a big sucker for having configuration baked into code so this is a very good plus.
Pricing ⏰
However - one downsides to GitHub Actions is how many build minutes you get. Remember Travis allowed unlimited build minutes for a public repository? With Actions - you are limited to 2,000 minutes in their free plan.
If you’ve been building your project in Travis already, you’ll notice it has been building (in my case at least) in ~30 seconds. With a bit of maths we can then say we will have 4,000 builds in a month on GitHub Actions.
Given that this isn’t a huge project with multiple contributors working on it, I think it’s safe to say we won’t ever reach this limit - unless you’re churning out blog posts left right and centre!
Sound good? Let’s go.
Creating Our Workflow
Like all great services in the world, there is great documentation to go along with them. Take a look over there if you’d like the detailed version.
What I will be focusing on is the documentation for two sets of predefined actions; actions-hugo for building our website, and actions-gh-pages for deploying it to GitHub Pages.
Deployment Keys Setup
The very first thing we need to do is set up some keys that will allow our source repository (where the workflow will reside on) to push the built project to the GitHub Pages repo.
In your terminal, create those keys now and copy the contents of the public key to your clipboard.
$ ssh-keygen -t rsa -b 4096 -C "$(git config user.email)" -f ~/.ssh/gh-pages -N ""
Generating public/private rsa key pair.
Your identification has been saved in /home/jdheyburn/.ssh/gh-pages.
Your public key has been saved in /home/jdheyburn/.ssh/gh-pages.pub
# ...

$ pbcopy < ~/.ssh/gh-pages.pub
macOS has a handy terminal command to copy file contents to the clipboard called
pbcopy. I’ve created an alias on my Linux laptop that does the same.
alias pbcopy="xclip -selection clipboard"
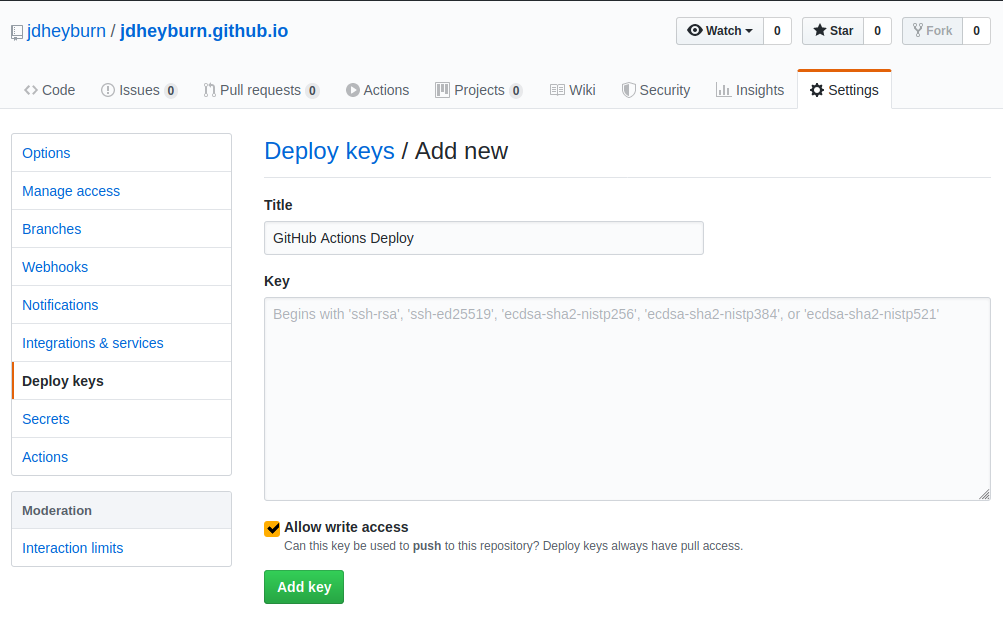
In GitHub load up your GitHub Pages repo and navigate to Settings and then Deploy keys. Give it an appropriate name, and paste in the public key. Make sure you check Allow write access.
Copy the contents of the private key you created earlier (perhaps using your new command?! 😏) and navigate to the source code repository’s Settings page, then Secrets. You’ll need to give it a sensible name as this then referred to later in the workflow configuration. Paste the private key in the value field.
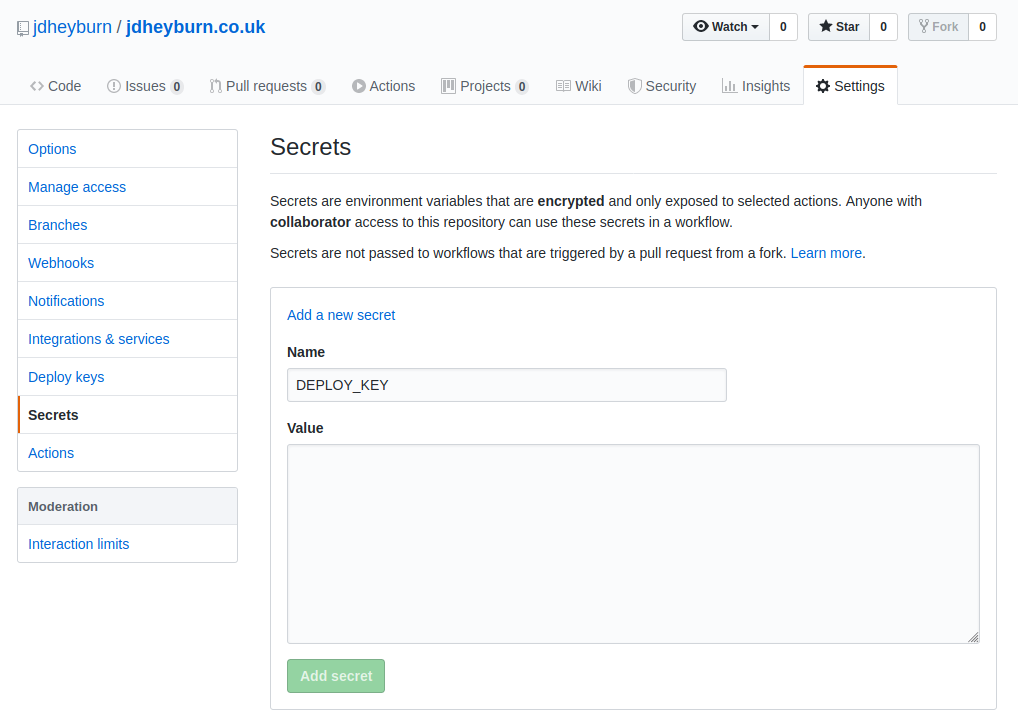
No secrets here!
Workflow Configuration
In the root directory of your source code repo, create a directory called .github/workflows. In this directory is where GitHub Actions will look for jobs to do. Create a yml file in this directory to contain your build job definition. I went ahead and named mine deploy.yml, but you can name it whatever you like.
I used the example provided in the actions-gh-pages documentation as a base for my build definition.
This config is much simpler to understand than the Travis one - let’s break it down once more.
Build Metadata and Environment
name: Build and deploy to jdheyburn.github.io

on:
  push:
    branches:
      - master
  schedule:
    - cron:  "0 10 * * *"

jobs:
  deploy:
    runs-on: ubuntu-18.04
This is pretty box standard at this point. We’re simply giving the name to the workflow and saying to run it on every push to the master branch.
An enhancement that we’re adding is the on.schedule.cron setting. This tells Actions not only to build the project on every push to the master branch but on a timed schedule too - in my example this is at 10am everyday. We could have done the same via Travis, but that can only be configured via the GUI.
The benefit to this is the way in which Hugo generates content. Hugo will only build content pages where the date on the content is either today or in the past, and is not a draft.
Therefore if you had written a post due to be published in the future, you can define that date and have the daily Hugo build publish it when that date has been reached - which is exactly how this blog post was published!
jobs is the field that contains the work we want to run. We’re giving the job a name of deploy and telling it to run on ubuntu-18.04 - which is the equivalent to bionic in Ubuntu.
In order to keep our build the same as Travis’s, we could instruct the job to run on
ubuntu-16.04, nonetheless I’m pretty confident it will run on the next LTS of Ubuntu.
Project Checkout
# ...
steps:
  - uses: actions/checkout@v2

  - name: Checkout submodules
    shell: bash
    run: |
      auth_header="$(git config --local --get http.https://github.com/.extraheader)"
      git submodule sync --recursive
      git -c "http.extraheader=$auth_header" -c protocol.version=2 submodule update --init --force --recursive --depth=1
Here we’re executing the GitHub checkout action which will pull the repo to the build server. It’s worth noting that this action version I’m using here doesn’t checkout git submodules too - which is a problem for us as that’s how we’re currently pulling the theme for our Hugo site. We can workaround it with the next step in the build - Checkout submodules.
This functionality was available in v1 of the action, so you can use that if you’d prefer:
steps:
  - uses: actions/checkout@v2
    with:
      submodules: true
It’s worth noting that we didn’t have to do this step for Travis - since it will checkout the repository with submodules already.
This is because GitHub Actions can be used for many more things than just repository code manipulation where you may not necessarily need the repo checked out.
Build and Deploy Setup
- name: Setup Hugo
  uses: peaceiris/actions-hugo@v2
  with:
    hugo-version: "0.58.3"
    extended: true
As stated we’re going to be using the Action actions-hugo to set up hugo on our build server. It can take in a number of parameters to allow us to customise it; for us we’re only concerned with hardcoding the version of Hugo, and to use the Hugo Extended binary as required by our theme.
At the time of writing 0.58.3 is not the latest version of Hugo, whereas when I wrote
.travis.ymlit was. I want the GitHub Actions build to be as close as possible to the TravisCI build in order to make them as similar as possible to prevent any unexpected build errors.Once I’ve achieved a successful build - I’ll look to upgrade to a newer version, and then iron out any issues from there.
- name: Build
  run: hugo --gc --minify
Once hugo is set up we can then build it easily enough, as self-documented in the code.
- name: Copy CNAME
  run: cp CNAME ./public/
Lastly, we can’t forget to copy the CNAME file we made in part 2.
Deployment to GitHub Pages
- name: Deploy
  uses: peaceiris/actions-gh-pages@v3
  with:
    deploy_key: ${{ secrets.DEPLOY_KEY }}
    external_repository: jdheyburn/jdheyburn.github.io
    publish_branch: master
    publish_dir: ./public
    commit_message: ${{ github.event.head_commit.message }}
For the deployment to GitHub Pages I’m using the action actions-gh-pages. Again it only requires a bare minimum of parameters to work; an explanation of what I’m using is:
deploy_keyis the private key we set up earlier in this post inSettings->Secrets- If you didn’t name yours
DEPLOY_KEYthen you’ll need to change it here too.
- If you didn’t name yours
external_repositorytells the action where we want the built website to go to - we set this to our GitHub Pages repopublish_branchis the branch of the repo we publish topublish_diris the directory on the build server that we want to push to the repo- Remember that
hugobuilds the website to thepublicdirectory locally
- Remember that
commit_messageallows us to specify a custom commit message to the target repo- Here I am telling it to inherit the commit message used in the source repo
Bringing It All Together (Again)
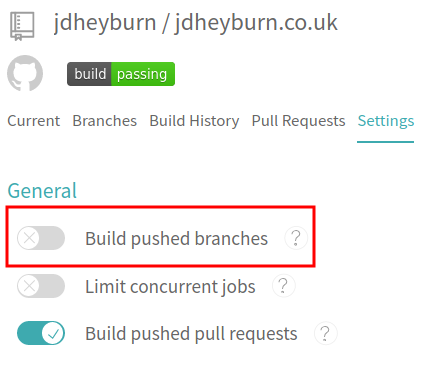
If you’re migrating from a previous CI tool (perhaps Travis?) then you’ll need to disable the builds on there since you may cause a conflict either build process.
For Travis, you can do that by navigating to your source code repo settings on Travis (https://travis-ci.com/jdheyburn/jdheyburn.co.uk/settings for me) and disabling Build pushed branches.
Now that’s done, go ahead and check in your new GitHub Actions workflow file and then navigate to the Actions tab of your source code repo on GitHub.
git add --all
git commit -m 'Migrate to GitHub Actions'
git push
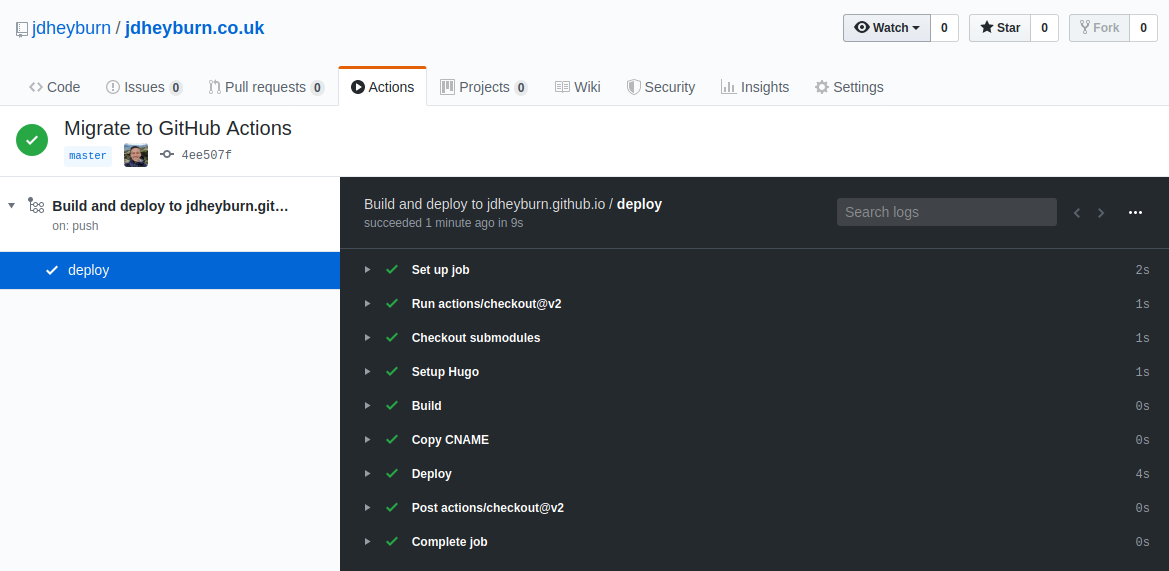
Great success!
Hopefully your build went to success! If it didn’t have a look through the logs and see what the issue was. It took me a few builds to determine my finalised workflow config. You can even see it at my source code repo Actions page.
Conclusion
Now that we’ve migrated across over to GitHub Actions, we can close out the permissions that TravisCI has on our projects, and demise any secret keys we gave it.
From the tone of my writing you can probably tell which one I favour. That’s not to say I do not like TravisCI - each service has its own pros and cons. For this particular project, I prefer the one platform approach for which I am used to in GitLab. The number of build minutes available for GA is a concern, but not one I will have to worry about for now.
Thanks for reading! 🌝