Who Goes Blogging 3.1: Deployment Methods - TravisCI
Apply DevOps practices by continuously deploying your website on any new changes, with an introduction to TravisCI
Recap
Since part 1, we have been using a simple bash script called deploy.sh to build our Hugo website and upload it to our GitHub Pages repo. In part 2 we modified it slightly to include the CNAME file post-build to ensure GitHub Pages uses the custom domain we set up in that same part.
For this part, I will tell you about how I migrated from deploying via a script, to a CI/CD tool - namely TravisCI. Then I will document how I migrated from this, to the new GitHub Actions; GitHub’s offering into the CI/CD space.
CI/CDis an acronym for Continuous Integration / Continuous Deployment which is a very important concept in the DevOps culture. If you would like to find out more about that and DevOps culture, check out these resources 👇
I had originally planned this to be one post, but it soon became far too long - and I’m a fan of taking in content in sizeable chunks.
So this post will focus on migrating to TravisCI from the deploy.sh script. Whereas the next post will focus on migrating to, and setting up GitHub Actions. If you’re only interested in using that as your CI tool then I’ll provide a link to that here when it is posted.
Moving Away From deploy.sh
There’s nothing necessarily wrong with using deploy.sh to push our code, however we want to get all the bells and whistles that Continuous Integration can provide to us such as running a series of tests and checks automatically against every commit to our repository. Once those tests and checks pass then we can automate the deployment of our website.
Now there are many CI tools out there with the most well known likely to be Jenkins, but there are also hosted solutions available which will take your code and perform your pipelines against them.
One of those hosted solutions is TravisCI, where they integrate quite nicely with GitHub repositories to attach webhooks against them. They have several pricing options available, but for public open source projects, it is completely free!
So it is a good idea to set your source code repository on GitHub to be public. TravisCI does include (at the time of writing) private projects in their free plan, but you are capped in some shape or form on how much the platform will do for you.

Free is definitely a thing you love to see
TravisCI Account Setup
The TravisCI account setup for TravisCI is very streamlined - instead of creating another account for you to manage, it integrates in with GitHub, so this is the account you use to sign-up with. Head over to https://travis-ci.com/ and click on Sign in with GitHub.

You can’t resist a big green button…
GitHub will ask you if you really want to share some of your GitHub data with Travis.
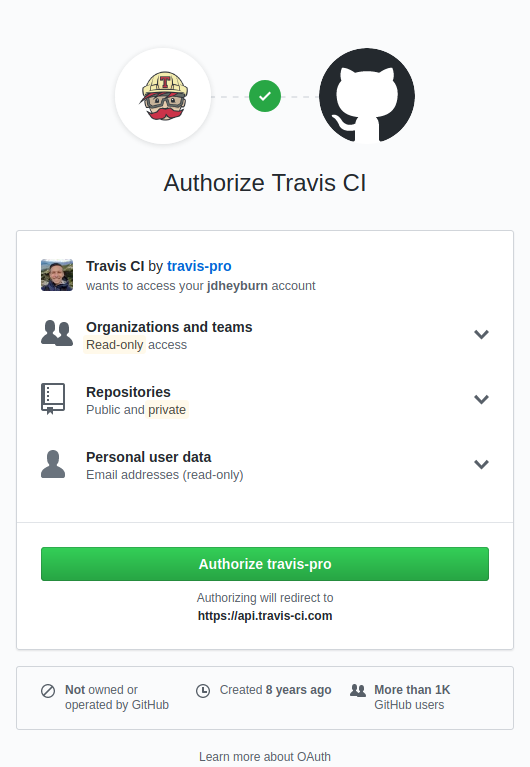
Another green button? Why not!
Once you’ve done that, you’ll be redirected to your new Travis Dashboard which… is looking rather lonely 😦 - let’s fix that!
All we’ve done so far is allowed Travis to reach GitHub for creating an account for us - we now need to activate GitHub Apps integration to permit it to read and write to our repositories. The https://travis-ci.com/account/repositories page is what you need for that - then click on the Activate button.
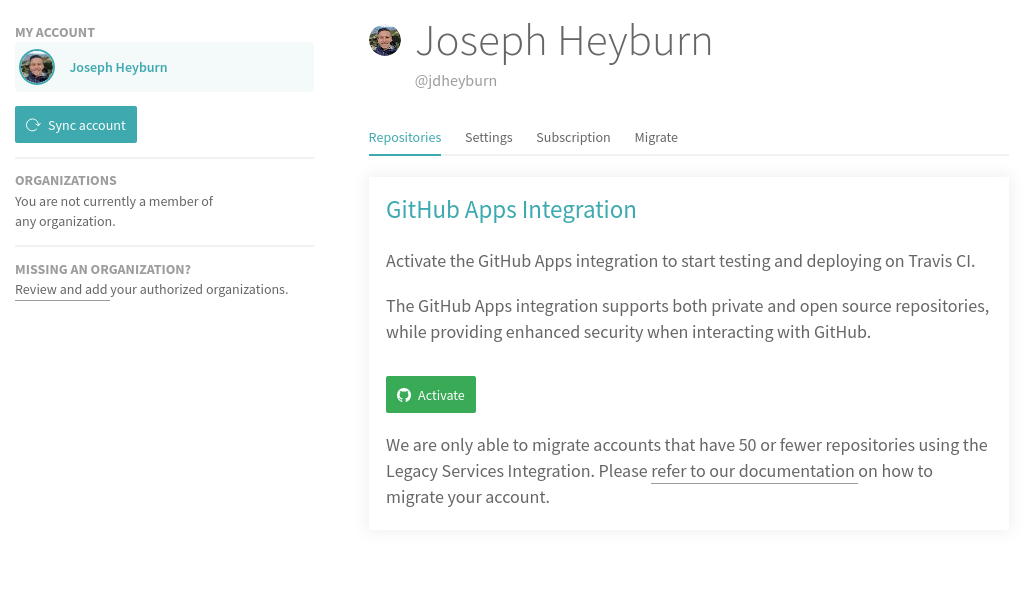
…More green buttons?!
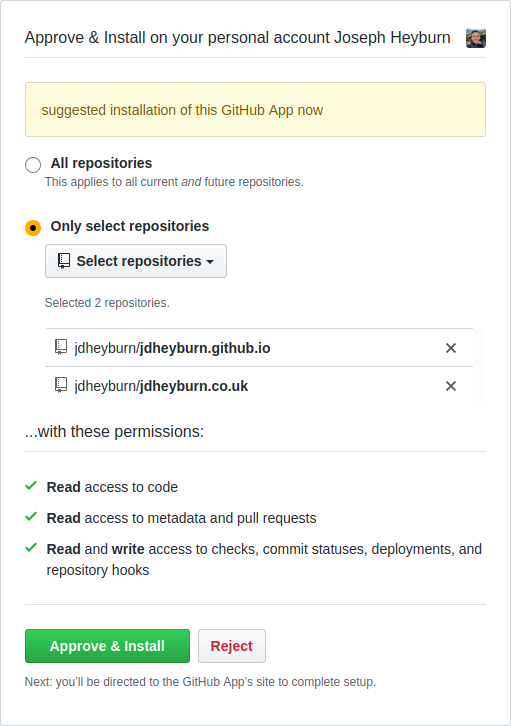
Now on the next screen you may or may not want the default selection of All repositories which will give Travis read and write access to all your repos. I completely trust Travis if I were to select this, however it is a best practice to follow the principle of least privilege (POLP); not just for users but for services too.
For the scope of this effort we’re only wanting Travis to read and manipulate against two repos, jdheyburn.co.uk and jdheyburn.github.io - it also gives you a cleaner Travis dashboard too.
Back to GitHub
The next step is required to permit Travis to push the built project to our GitHub Pages repo. We need to generate a secret with the permissions that Travis requires and keep it aside for the Travis config file later.
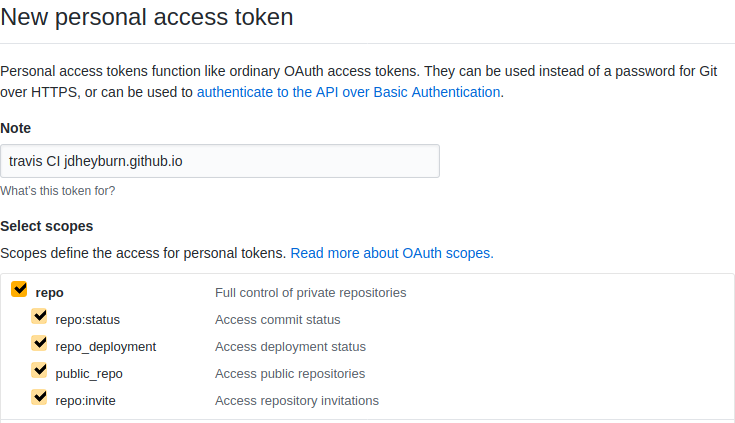
Navigate to the GitHub Personal Access Tokens page and click on Generate new token.
You’ll come across a page asking for the name of the token being created. It doesn’t matter what you call it, but it may be useful to link it back to what it is being used for. You’re also going to want to select the repo checkbox as done so below.
After this you don’t need to provide any more permissions to the token. Scroll down to the end of the page and click Generate token.
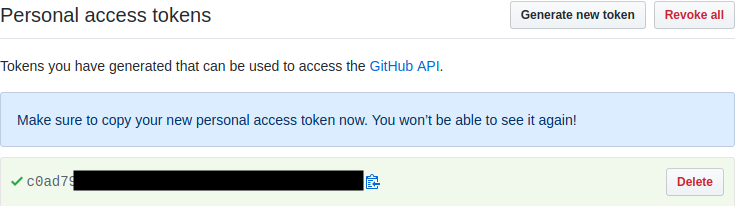
The token’s secret will display on the next screen. Make sure you copy it and place it somewhere you can refer back to it later such as a text editor like Notepad - we’ll need it again in the next section.
TravisCI Configuration
Once we have our Travis account set up, we need to add in a configuration file that Travis will read from to determine what steps we’d like it to perform.
In our source code repository (jdheyburn.co.uk in my case) we want to create a file at the root directory and call it .travis.yml. See below for an example of how I configured mine.
Let’s break it down section by section.
Build Environment
These settings here all refer to the build environment that we’d like our project to build on.
dist: xenial

git:
  depth: false

env:
  global:
    - HUGO_VERSION="0.58.3"
  matrix:
    secure: REDACTED
dist specifies what platform Travis should build the project on. In this case xenial refers to Ubuntu 16.04, which is a Linux distribution. There are several others to choose from and more likely than not you’ll want the platform to be Linux. However if you had a Windows application written in .NET then you would likely want it built on a Windows Server since that is what supports it.
git.depth tells Travis how many commits of your project to check out. This is passed directory to the git parameter --depth (more info on that here). For our use case we’re not interested in this option so we set it to false to disable the flag being passed to git.
env.global allows us to define what variables should be set in the environment. This is done in the form of an array of strings in the format key=value. So given the example, HUGO_VERSION will be set to 0.58.3. We’ll come back to this later.
env.matrix is the encrypted value that gets passed to the GITHUB_TOKEN environment variable which is used to allow Travis to commit the built project to our GitHub Pages repo.
- You’re going to want to take the personal access token generated from GitHub in the earlier step and encrypt it using this method, then add it back to this setting
External Dependencies
Once the build environment is defined, we can tell Travis to pull in some additional dependencies or files required for our project. Now remember this is a hugo project and we needed to install it on our local machines to run deploy.sh, we need to do the same for Travis too.
install:
- wget -q https://github.com/gohugoio/hugo/releases/download/v${HUGO_VERSION}/hugo_extended_${HUGO_VERSION}_Linux-64bit.tar.gz
- tar xf hugo_extended_${HUGO_VERSION}_Linux-64bit.tar.gz
- mv hugo ~/bin/
Remember we defined HUGO_VERSION earlier? This is where it is called back again. In order, the steps we’re performing are:
- Downloading the archive containing the specified
hugoversion - Extracting all contents of the archive
- Moving the
hugobinary to the~/bin/directory- This directory is on the build servers
PATH, which enables us to execute the binary using just thehugocommand later
- This directory is on the build servers
Previous Issues
In a previous version of hugo I used, there was an additional dependency I needed to include. The hugo-coder theme requires to be built with Hugo Extended since it requires Sass/SCSS support.
For this particular Hugo Extended version, it required a library which was not included in the build server distribution in the past. On the plus side - Travis allows us to define additional build steps to ensure all required libraries are on the build server beforehand.
before_install:
  # This workaround is required to avoid libstdc++ errors while running "extended" hugo with SASS support.
 - wget -q -O libstdc++6 http://security.ubuntu.com/ubuntu/pool/main/g/gcc-5/libstdc++6_5.4.0-6ubuntu1~16.04.10_amd64.deb
 - sudo dpkg --force-all -i libstdc++6
However in later versions of Hugo (including the one I am using today) this dependency is no longer required, hence why it is commented out in .travis.yml.
You may not need this stage in your pipeline, I know my project no longer requires it. However this may come in handy later knowing that you have the option of specifying more pipeline steps if the build distribution you’re using requires some additional dependencies.
Build Script
Now onto the juicy stuff - building the project. This is pretty much where the deploy.sh starts from, since on our local machines we already had the hugo binary installed.
script:
- hugo version
- hugo --gc --minify
- cp CNAME public/
Not a lot is going on here, but to detail what each step is doing:
Print out the version of
hugobeing used- This is helpful for debugging the build. By printing out the version used we can try to replicate the bug locally for troubleshooting.
Build the project
- We do this with two flags,
--gcand--minify. These weren’t defined in thedeploy.shscript we used earlier so let’s cover them here.--gctellshugoto cleanup some unused cache files after the build- This helps keep a tidy environment for the build server.
--minifyperforms minification on your website to reduce the size of the generated content, enabling it to load faster on your users’ devices- Coupled with a CDN like in the previous part, your website will load almost instantly
- We do this with two flags,
Copy the
CNAMEfile from the project root to the generatedpublic/directory.
This ensures that the custom domain name we set up in the previous part continues to be set in the generated website code that gets pushed to our GitHub Pages repo. See here for a refresher.
This section is effectively the ‘CI’ part of ‘CI/CD’. We could stop here and just use Travis as a build server to determine whether the website is able to be built successfully. Any errors in the pipeline would have resulted in a failed build.
The next section details the Continuous Deployment, ensuring that on the successful build of a project we deploy it to our production environment.
Deploy to GitHub Pages
Once the project has been built, we need to push it to the GitHub Pages repository. Travis has good documentation on this. My setup follows the below:
deploy:
  provider: pages
  skip-cleanup: true
  github-token: "$GITHUB_TOKEN"
  keep-history: true
  local-dir: public
  repo: jdheyburn/jdheyburn.github.io
  target-branch: master
  verbose: true
For the last time, let’s walk through what each of these is doing.
providertells Travis this is a GitHub Pages deploymentskip-cleanupset totrue, so that Travis does not delete the build before we’ve got the chance to upload itgithub-tokenis set to the environment variable$GITHUB_TOKENwhich was set for us earlier on in the build environment.- This is passed to the provider so that it has valid credentials to push the code to the GitHub Pages repo.
keep-historyperforms an incremental commit against the project- Setting it to
trueallows us to view back the changes in the commit history such as this one
- Setting it to
local-dirspecifies the directory that should be pushed to the target repo- We set it to
publicbecause that is the name of the generated website directory from the previousscriptstep
- We set it to
repois the target repo where we should be deploying totarget-branchis the branch that we wantlocal-dirto be pushed to- For our setup we are using
master
- For our setup we are using
verbosespecifies how much detail Travis will log about its deploy activities
That concludes the configuration section. Remember to change it or add in some other functionality needed for your project and save it to .travis.yml.
Bringing It All Together
Now you’ve completed your config file, let’s check it all in to GitHub.
git add --all
git commit -m 'Adding CI'
git push
Travis will automatically detect that a new change has been made against your repo. And with the inclusion of .travis.yml, it will now work against that file.
You can view the status of your repository’s build by navigating to it from the dashboard and clicking on it.
If any of the commands in the script section of the config return a nonzero status code, the build will fail. If this happens then have a look at a build log and investigate the issue. More likely than not someone else has encountered the problem before, so Google is your gatekeeper to solutions!
Once you’ve got a successful build, that means your website has been deployed to the GitHub Pages repo and will be available on the web to view. In a browser you can now view your changes on the website.
If they aren’t there then your browser is most likely caching an older version. By default, websites served by GitHub Pages have a browser cache TTL set to 10 minutes. So you can either wait 10 minutes, or clear your browser cache!
Conclusion
You’re on the way to DevOps masterclass. As mentioned the next post will focus on migrating to GitHub Actions so if you’re happy with TravisCI then there’s no more you need to do! Go ahead and add other repositories you may have to Travis and build up multiple pipelines 🙌