Who Goes Blogging 1: Getting Started
Create your own portfolio site with no hassle using Hugo and GitHub Pages
I’ve done a lot of talking about how this website is currently, but let’s talk about how you can get set up with the same as I have done here. Let’s recap exactly what that is:
- A GitHub repo with the site source code
- Another GitHub project with the rendered site
- Hosted on GitHub Pages
- Fronted by a custom domain
- Globally cached by a CDN
- Redirecting multiple domains
We’ll cover the first three points in this post, with the remainder to come in a follow up post.
Pre-requisites & Assumptions
These series of posts is aimed at between the newcomer, to intermediate programmer. There may be some concepts which I won’t be covering to due brevity, and because there are several guides out there who have explained these concepts better than I could.
Having said that, I assume you are comfortable with the following:
- Navigating your way through a terminal
- Happy with the basic set of
gitcommands - Understand how website requests are made (though this isn’t crucial)
Hugo Static Site Builder
There are many website building platforms out there for your static sites. There is no one platform to rule them all, you should decide on which one works best for you. For myself, I wanted to explore further into the realm of Golang as a learning opportunity. I’ve built websites from scratch before from basic HTML, CSS, and JavaScript all the way to using frameworks such as React and Angular.
However while using these frameworks provide you with the highest flexibility in terms of customisability, they can take a while to get something out there and hosted, when really you just want something to generate the HTML and CSS for you and allow you to focus on the content.
That’s where static site frameworks come in. They usually have some opinionated folder structure and some nuances on how things in a website should be, but comply by these rules and the website will be generated for you! Once such example is Hugo - which is what this website is built on; it’s opensource and written in Golang, you can even check out the source code to see how it works!
While Hugo itself is free and comes with a bunch of themes you can use for free, there are fancier and more feature-rich themes available to purchase from designers which may have a cost attached to them.
Hugo isn’t the only static site framework out there, there are plenty more too each with their own pros and cons. I won’t aim to reproduce a complete list of comparisons against other platforms, other people have already made the comparisons much better than I could! But nevertheless, some that I am aware of off the top of my head are Jekyll, Ghost, and the infamous WordPress - so investigate using your search engine of choice if you wish to know the differences.
UPDATE 2019-11-30
I came across this thread on HackerNews which ultimately lead me to these comparison websites for static site generators:
All set on Hugo? Awesome - let’s get started on some project foundations.
Git Set Up
I mentioned before I split my website into two repos:
- jdheyburn.co.uk holds all the source code
- jdheyburn.github.io holds the rendered website
For the first repo, it doesn’t really matter what you call it - you can call it your destined domain name, or blog-source, or dogs-are-great. It’s the second one which you will need to think about, where it must be <YOUR_USERNAME>.github.io - which will ultimately be made available at https://<YOUR_USERNAME>.github.io.
Create two empty Github repos now, then clone both to your environment. If you don’t have git available in your terminal, check out this guide to get set up.
mkdir ~/projects
cd projects
git clone https://github.com/<USERNAME>/blog-source.git
git clone https://github.com/<USERNAME>/<USERNAME>.github.io.git
Now that we have the repos set up, let’s get started on building the website templates.
Blog Bootstrapping
Before you get started, you’re going to need to install Hugo - head to this page for instructions on going so. Once done continue on below.
Firstly you would need to create your Hugo template. You can do this from either executing hugo new <site|theme> and building up from there - or do what I did which was to browse the Hugo themes and git clone the example site for the chosen theme and then make your changes around that. It may entirely depend on your learning approach which way works best for you.
In my case, I wanted to get up and running in the smallest time possible (isn’t that the point of static site generators?), so I followed the approach above.
Serves Up!
The theme this blog uses as of publication is hugo-coder, written by Luiz de Prá. You may wish to use it, or something else. It’s entirely up to you! Let’s get started by laying down the foundations and cloning the theme.
cd ~/projects
git clone https://github.com/luizdepra/hugo-coder.git
cp -r hugo-coder/exampleSite blog-source
mkdir blog-source/themes
ln -s ~/projects/hugo-coder blog-source/themes/hugo-coder
cd blog-source
hugo serve
That last command will locally serve the example site, so that you can view it at http://localhost:1313/.
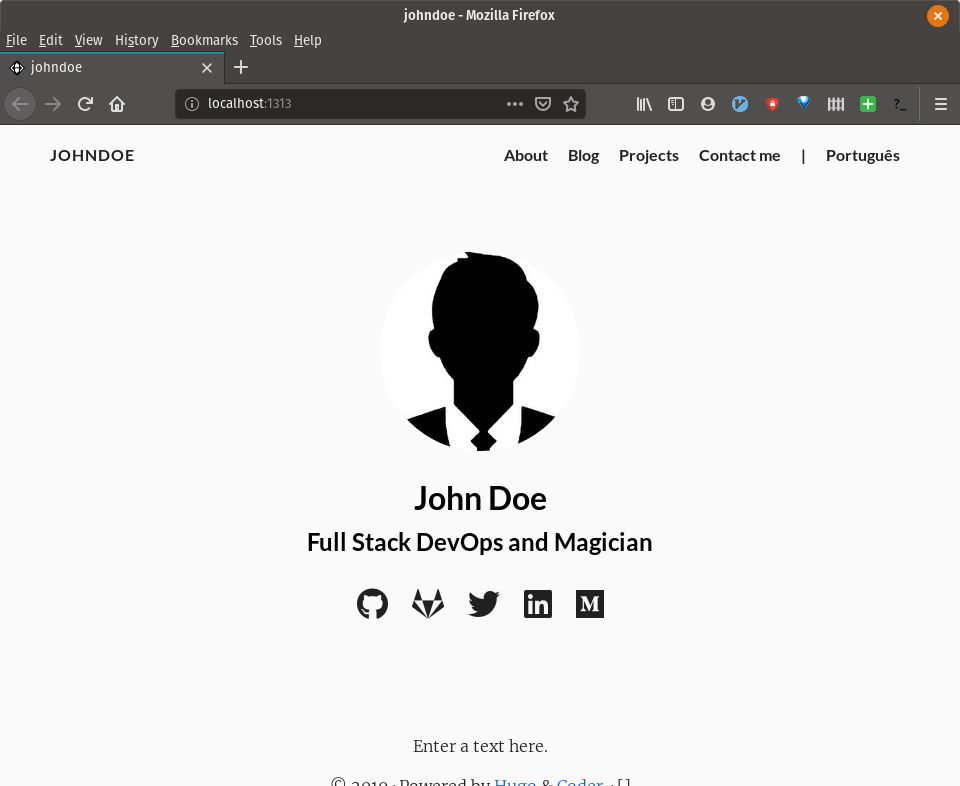
Success!
Experimenting
Once you have the site hosted locally, feel free to make as many changes as you like to gain an understanding of how everything plugs together.
The blog-template/config.toml file will contain the majority of configurations that are used to generate the site. Go ahead and even comment out some config and see what affect that has. You can even be nosey at my config file if you’re looking for some inspiration! The hugo serve command will watch all files in the directory for any changes you make, rebuild them, and refresh your webpage too with the changes - making for hasty development!
The Hugo config file will be a source of many informations, and the documentation for it is very thorough. While we’re on the subject, the rest of the Hugo documentation is great, so check the rest of it out if you haven’t done so already - particularly how the directories are structured, and how content is managed.
I advise you now go off and explore all the customisation options for your site, when you’re ready to have it deployed, continue on reading.
Theme Git Submodules
When we were setting up the exampleSite locally, we created a symlink from ~/projects/blog-source/themes/hugo-coder -> ~/projects/hugo-coder. This is okay for local development, however not particularly the best practice in the real world. We want to take an existing git repo (hugo-coder) and apply that to a directory in our project, but what we don’t want to do is duplicate the code in our own repo.
This problem is solved exactly by git submodules, and we define it within the .gitmodules file of our source code repo.
# .gitmodules
[submodule "themes/hugo-coder"]
	path = themes/hugo-coder
	url = https://github.com/luizdepra/hugo-coder.git
Now when this file is checked into the repo, any future clones will also include the hugo theme as a submodule in the themes/hugo-coder directory.
Once you’ve done this, your source code is all set! Why not share it with the rest of the world?
Releasing into the wild
So far we have only been playing with the hugo serve command, which is great for local development but not for production. There is a more appropriate command for building hugo projects - aptly named hugo; pretty simple right?
hugo
This renders the HTML and CSS files from your config and markdown for the theme and places them in the public/ directory of your source code repo. In theory once you’ve executed this command you can host a webserver at that address and everything would operate as normal. Why not give it a try?
cd public/
python -m SimpleHTTPServer 8080
We can even go one step further by adding flags to the hugo command, such as --minify which will minimalise all the supported files into a much smaller size, resulting in faster load times for your users.
Since we are still in our source code repo, we want to make sure that public/ directory doesn’t get included in future commits. This is because the blog-source repo should be entirely for source code, our other repo is the one that holds the rendered code.
For this we can utilise a .gitignore file, instructing git to ignore any files that match the terms in the contents. Let’s get one created now and check our code into the repo.
echo "public/\nresources/" > .gitignore
git add .
git commit -m 'Initial commit'
git push
We’re currently committing to one repo, however we want GitHub Pages to host it for us. As mentioned earlier, GP can only host repos at the domain github.io, so we need to get our rendered website into that repo.
Bash Script Deploying
Now the original way I did this was through a simple bash script which largely followed this process as documented by the Hugo team. Note that this is largely the process we have followed thus far, with the exception of step 6 onwards - so ensure you follow those steps.
I’ve since moved over onto a CI/CD platform which I will discuss in a future post.
After following the process in the link prior, you should be able to invoke your deploy script at ./deploy.sh, which will push the built public/ directory to your <USERNAME>.github.io. GitHub should pick up that this is a GitHub Pages repo and have your site ready for you at https://<USERNAME>.github.io!
Conclusion
In this post, we have done the following:
- Created two GitHub repos:
- one for storing the source code for the website
- another containing the rendered web pages
- Built Hugo locally for development using
hugo serve - Written a script for deployment
- Deployed to GitHub Pages
Next up, we’ll be adding a custom domain to the site, front it with a CDN, and redirect multiple domains to it.