Automate Instance Hygiene with AWS SSM: Automation Documents
Introducing checks in our automation workflow to reduce the spread of broken patches to our estate
In part two of this series we looked at how we can automate SSM command documents using SSM Maintenance Windows.
This part will now explore another type of SSM Document; Automation.
tl;dr
- Automation documents can allow us to combine command documents together
- With this, we can utilise maintenance window error thresholds to stop further invocations
- Dynamic invocation of command documents can also be achieved with automation documents
Prerequisites
All the code for this post can be found on GitHub.
You’ll notice that we have changed some things around in this post, so if you’ve been using terraform apply in other posts to deploy to your AWS environment, you will notice some destructions.
Instead of having 1 Windows and 1 Linux EC2 instance, we’re now using 3 Linux EC2 instances - to emulate an application running across multiple instances for redundancy. You don’t actually need anything to be running on these instances, just have them visible in the Managed Instances console.
Note that the EC2 instances are tagged with the key
Appand valueHelloWorld- we’ll be using this to specify our automation document targets.
Automation Documents
Back in part one I gave a brief intro to automation documents. To save the click:
Automation document can call and orchestrate AWS API endpoints on your behalf, including executing Command documents on instances
Essentially we can combine two command documents into one with an automation document. But why would we want to do this?
Introducing proactive healthchecks
Well in the last post, we set up a maintenance window with two tasks; one for invoking AWS-RunPatchBaseline and another for PerformHealthcheckS3 (our healthcheck SSM Document) - both of these are command documents. Say if we had a policy that wanted to ensure that after AWS-RunPatchBaseline was invoked, we would always want the PerformHealthcheckS3 invoked afterward… the Automation Document would help us get there.
Not only that, the way that our maintenance window is currently structured is it will invoke AWS-RunPatchBaseline across all instances in scope at the same time. Once they are all done then it will invoke PerformHealthcheckS3 across all instances at the same time. This looks like this:
Given we have 2 instances; i-111, i-222

T+0: Invoke AWS-RunPatchBaseline on i-111, i-222
T+1: AWS-RunPatchBaseline finishes: i-111, i-222
T+2: Invoke PerformHealthcheckS3 on i-111, i-222
T+3: PerformHealthcheckS3 finishes: i-111, i-222
Say if you wanted to limit the rate of patching across these instances so that only one instance at a time was patched, and any healthcheck failures aborted the rest of patching, then simply changing max_concurrency from 100% to 1 for each maintenance window task will not achieve this.
Maintenance windows complete one task across all instances in scope before moving onto the next task. If we have Task 1 for Patching and Task 2 for Healthchecking (is that even a word?), then the maintenance window is going to patch all instances first before it performs healthchecks on the instances. There is no way to execute the tasks synchronously on one instance at a time.
This means that if a bad patch were to be installed in your estate, you could have this order of events:
Given we have 2 instances; i-111, i-222

T+0: Invoke AWS-RunPatchBaseline on i-111
T+1: AWS-RunPatchBaseline finishes: i-111
T+2: Invoke AWS-RunPatchBaseline on i-222
T+3: AWS-RunPatchBaseline finishes: i-222
T+4: Invoke PerformHealthcheckS3 on i-111
T+5: PerformHealthcheckS3 FAILS: i-111
T+6: Invoke PerformHealthcheckS3 on i-222
T+7: PerformHealthcheckS3 FAILS: i-222
Now the healthcheck has failed for i-222 as well because the bad patch landed on both instances, and production now has an outage.
Solution
Thankfully, Automation Documents help us avoid that - by combining the two command documents (AWS-RunPatchBaseline and PerformHealthcheckS3), we can mark this new automation document as a solo maintenance window task and have it invoked one at a time on instances, and have it abort further invocations if any sub-documents failed within in:
Given we have 2 instances; i-111, i-222

T+0: Invoke AWS-RunPatchBaseline on i-111
T+1: AWS-RunPatchBaseline finishes: i-111
T+2: Invoke PerformHealthcheckS3 on i-111
T+3: PerformHealthcheckS3 FAILS: i-111
T+4: Abort invoking AWS-RunPatchBaseline on i-222
T+5: Abort invoking PerformHealthcheckS3 on i-222
Notice how the failed healthcheck on the first instance caused the rest of task invocations to abort? Here is the order of events for a happy path.
Given we have 2 instances; i-111, i-222

T+0: Invoke AWS-RunPatchBaseline on i-111
T+1: AWS-RunPatchBaseline finishes: i-111
T+2: Invoke PerformHealthcheckS3 on i-111
T+3: PerformHealthcheckS3 succeeds: i-111
T+4: Invoke AWS-RunPatchBaseline on i-222
T+5: AWS-RunPatchBaseline finishes: i-222
T+6: Invoke PerformHealthcheckS3 on i-222
T+7: PerformHealthcheckS3 succeeds: i-222
So we know that automation documents allow us to combine command documents together - this is done using the aws:runCommand action, though there are many more actions available to you, some of which we’ll explore later.
Combining command docs into automation
We combine command documents as below in YAML; like command documents they can also be defined in JSON.
For the first time we are defining a parameter called InstanceIds, which takes in a list of instance IDs to then pass down to the command documents, as they will need to know what instances to invoke the commands on. The value assigned to this parameter is retrieved back with the notation "{{ InstanceIds }}", which you can see being passed into the inputs of the sub-documents.
InstanceIdsis a special parameter name that AWS recognises and so will provide an instance picker in the GUI of Execute Automation, as shown below.
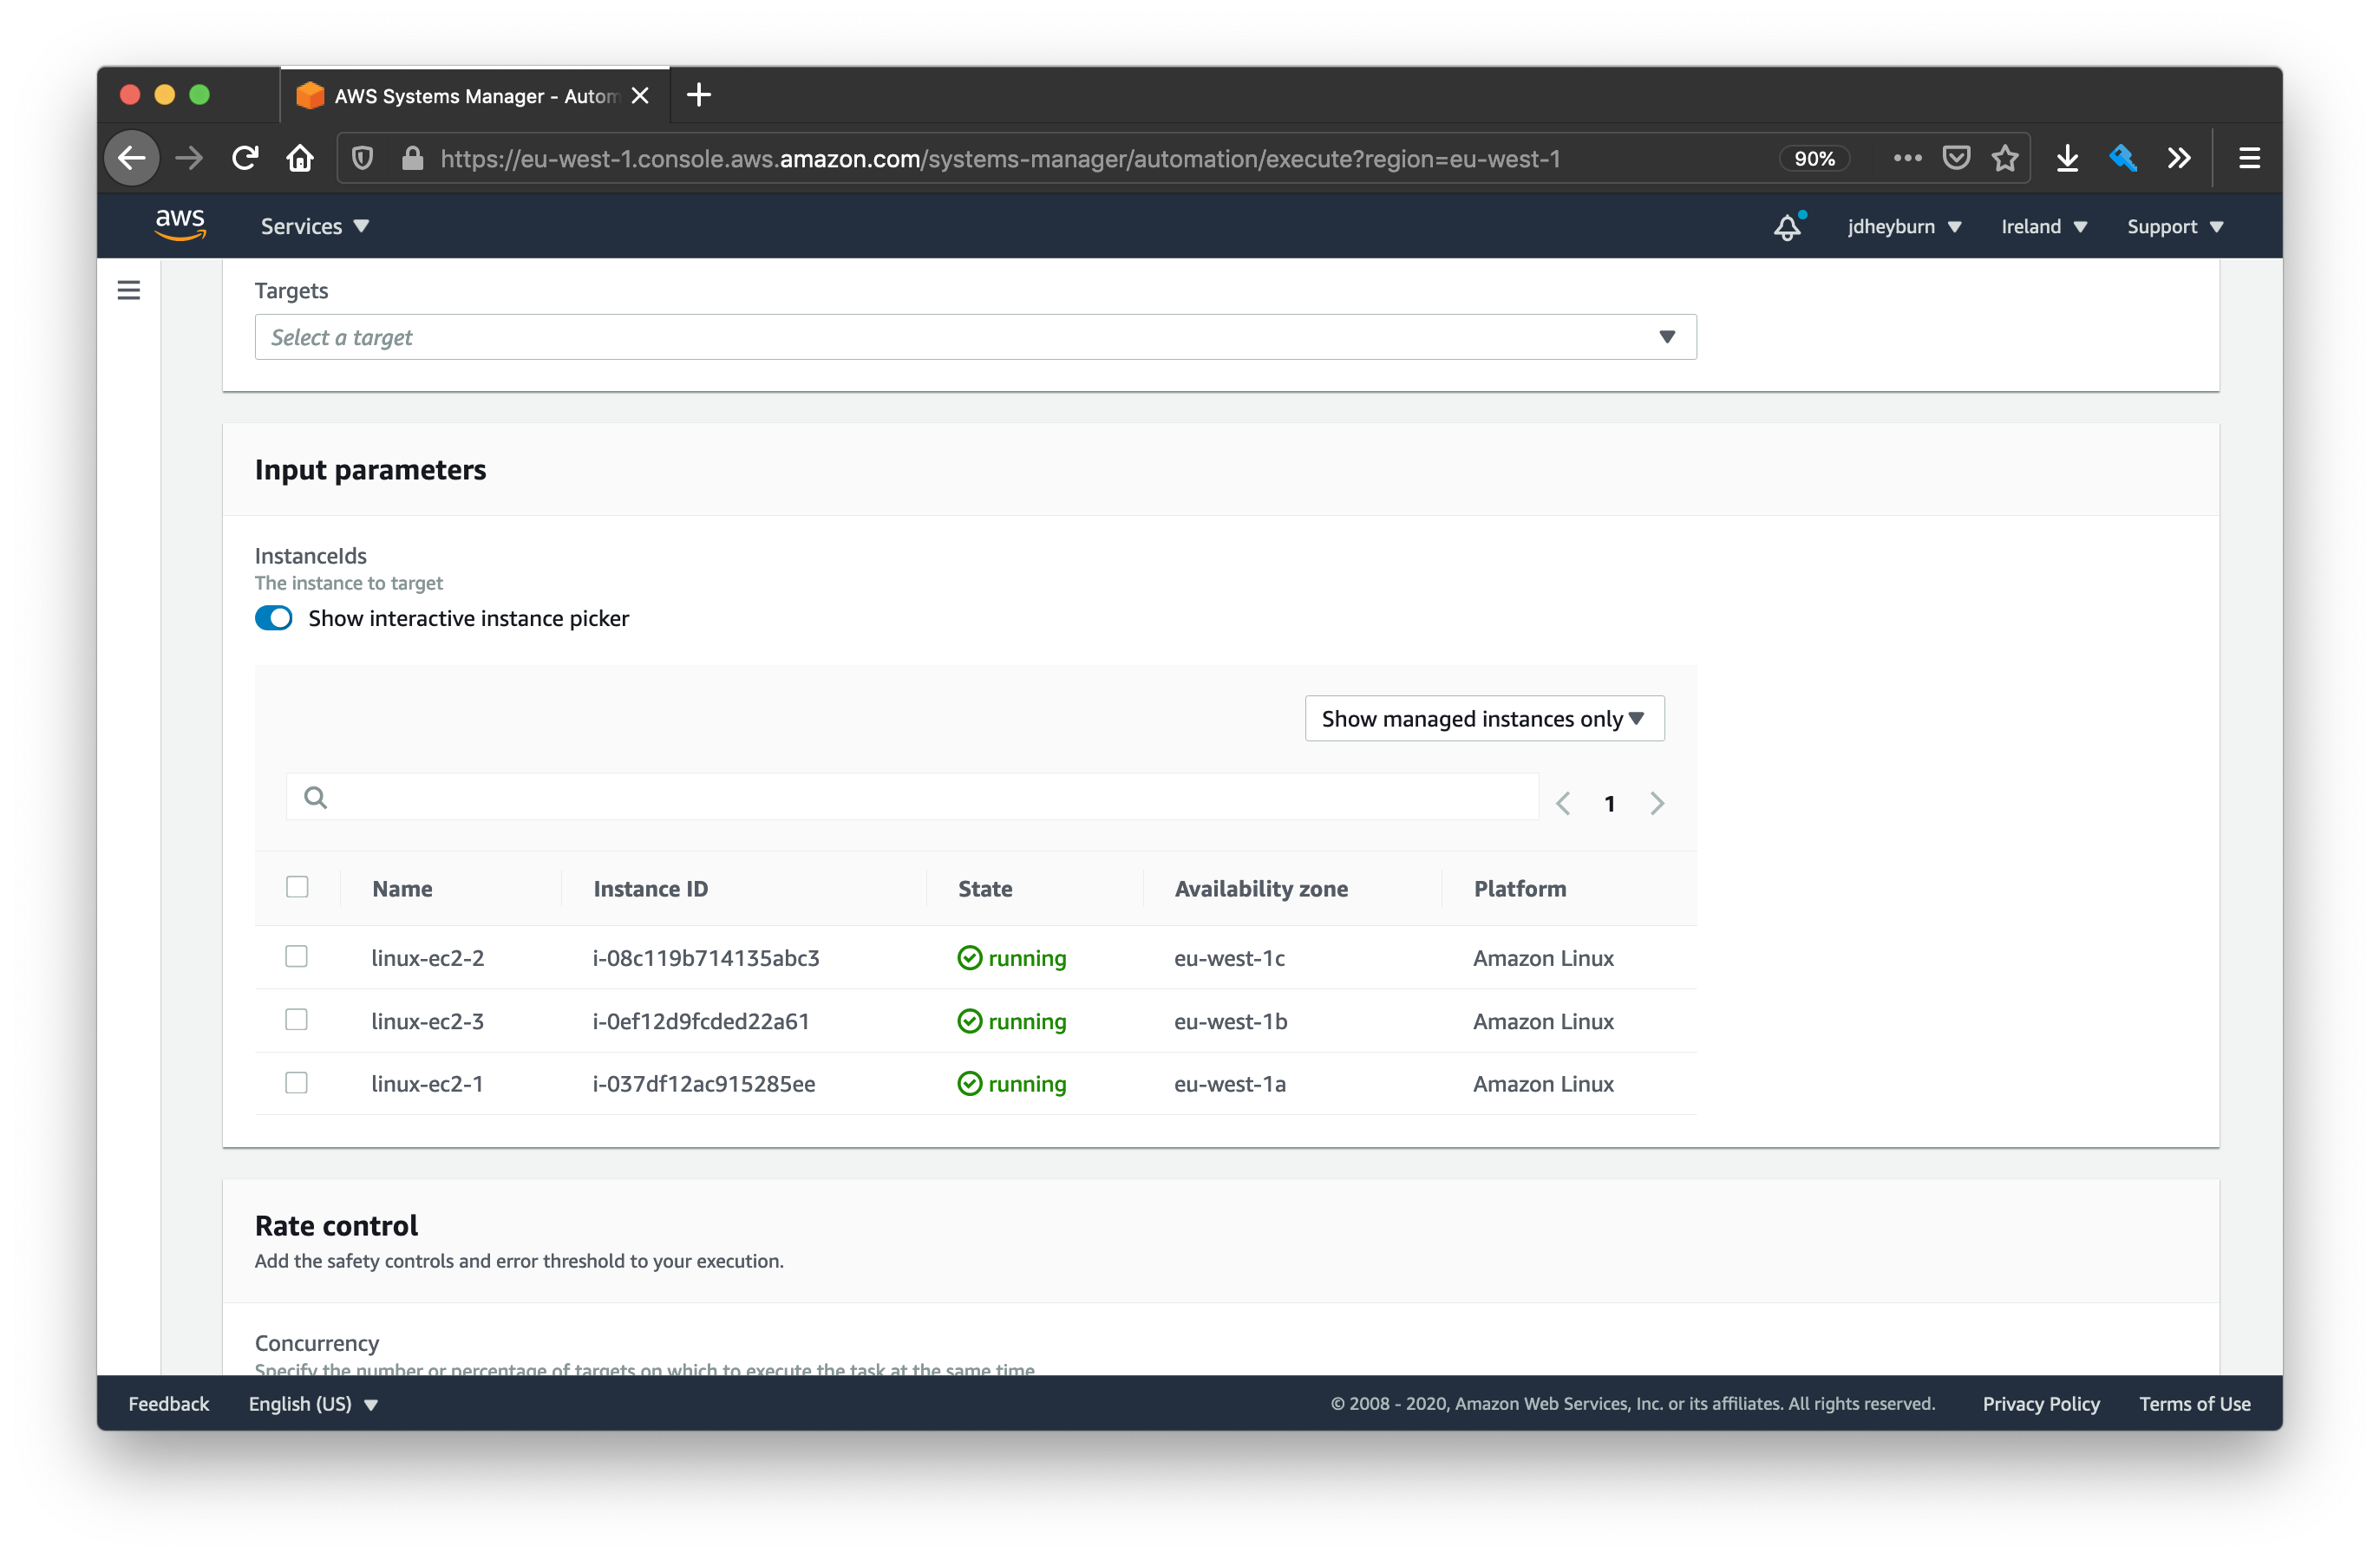
The instance picker can be helpful if you only want to target a subset of instances in your estate.
We’re also following logging best practices by having the command output logged to S3.
Other than that, there’s not really a whole lot of difference between this and a command document, so far!
It’s important to note the
schemaVersionmust be0.3for automation documents.
---
schemaVersion: "0.3"
description: Executes a patching event on the instance followed by a healthcheck
parameters:
  InstanceIds:
    type: StringList
    description: The instance to target
mainSteps:
  - name: InvokePatchEvent
    action: aws:runCommand
    inputs:
      DocumentName: AWS-RunPatchBaseline
      InstanceIds: "{{ InstanceIds }}"
      OutputS3BucketName: jdheyburn-scripts
      OutputS3KeyPrefix: ssm_output/
      Parameters:
        Operation: Scan
  - name: ExecuteHealthcheck
    action: aws:runCommand
    inputs:
      DocumentName: PerformHealthcheckS3
      InstanceIds: "{{ InstanceIds }}"
      OutputS3BucketName: jdheyburn-scripts
      OutputS3KeyPrefix: ssm_output/
Terraform automation documents
We can deploy these to AWS using Terraform once again. Note that the document_type is Automation and that we’re using templating to set the variables in the document, such as referencing the PerformHealthcheckS3 command document ARN.
You can see the templated version of the document in GitHub.
resource "aws_ssm_document" "patch_with_healthcheck" {
  name            = "PatchWithHealthcheck"
  document_type   = "Automation"
  document_format = "YAML"

  content = templatefile(
    "documents/patch_with_healthcheck_template.yml",
    {
      healthcheck_document_arn = aws_ssm_document.perform_healthcheck_s3.arn,
      output_s3_bucket_name    = aws_s3_bucket.script_bucket.id,
      output_s3_key_prefix     = "ssm_output/",
    }
  )
}
View the above resource in GitHub.
Testing automation documents
Now let’s go and test this by manually invoking it. This can be done by navigating to Automation within Systems Manager and clicking Execute Automation.
For a shortcut of invoking the commands, you can use the below command to invoke the below CLI command. Then you may skip to the results.
aws ssm start-automation-execution \
  --document-name "PatchWithHealthcheck" \
  --document-version "\$DEFAULT" \
  --target-parameter-name InstanceIds \
  --max-errors "0" \
  --max-concurrency "1" \
  --region eu-west-1
Setup
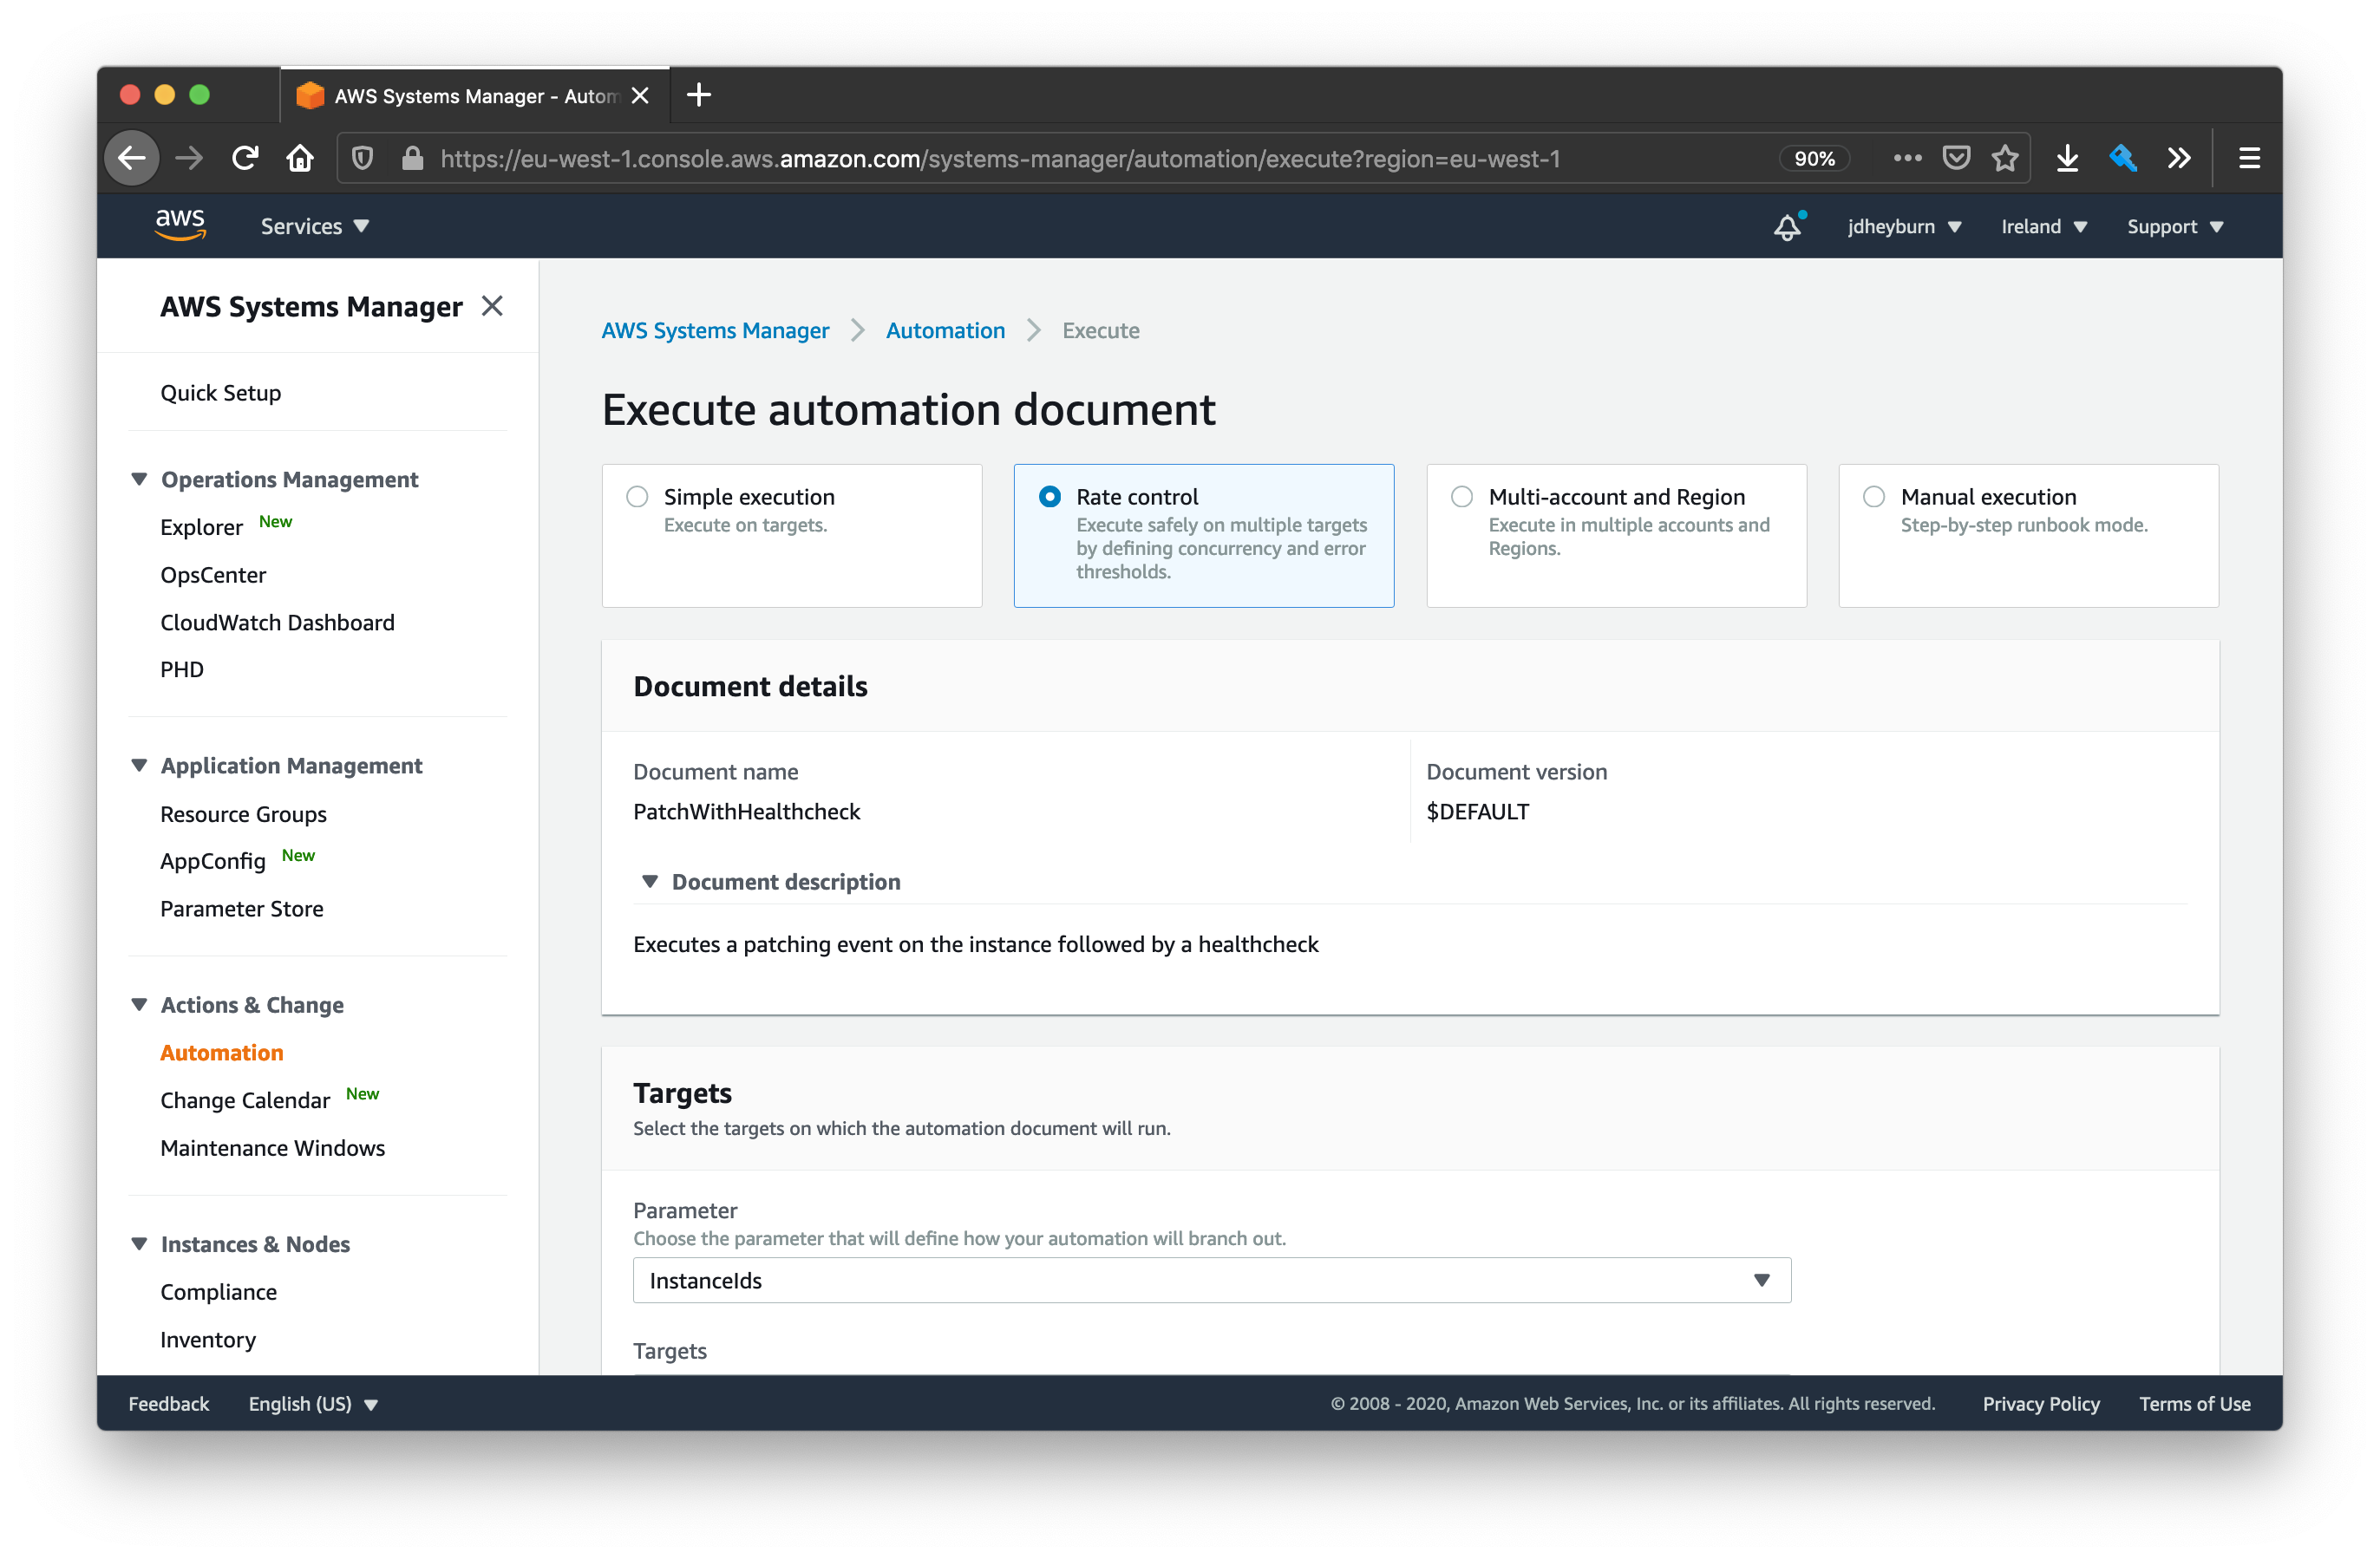
Navigate to the Owned by me tab and select the name of your created document, PatchWithHealthcheck, then click Next.
Because we want to test this document executing one at a time on an instance, we’ll need to select the Rate control option.
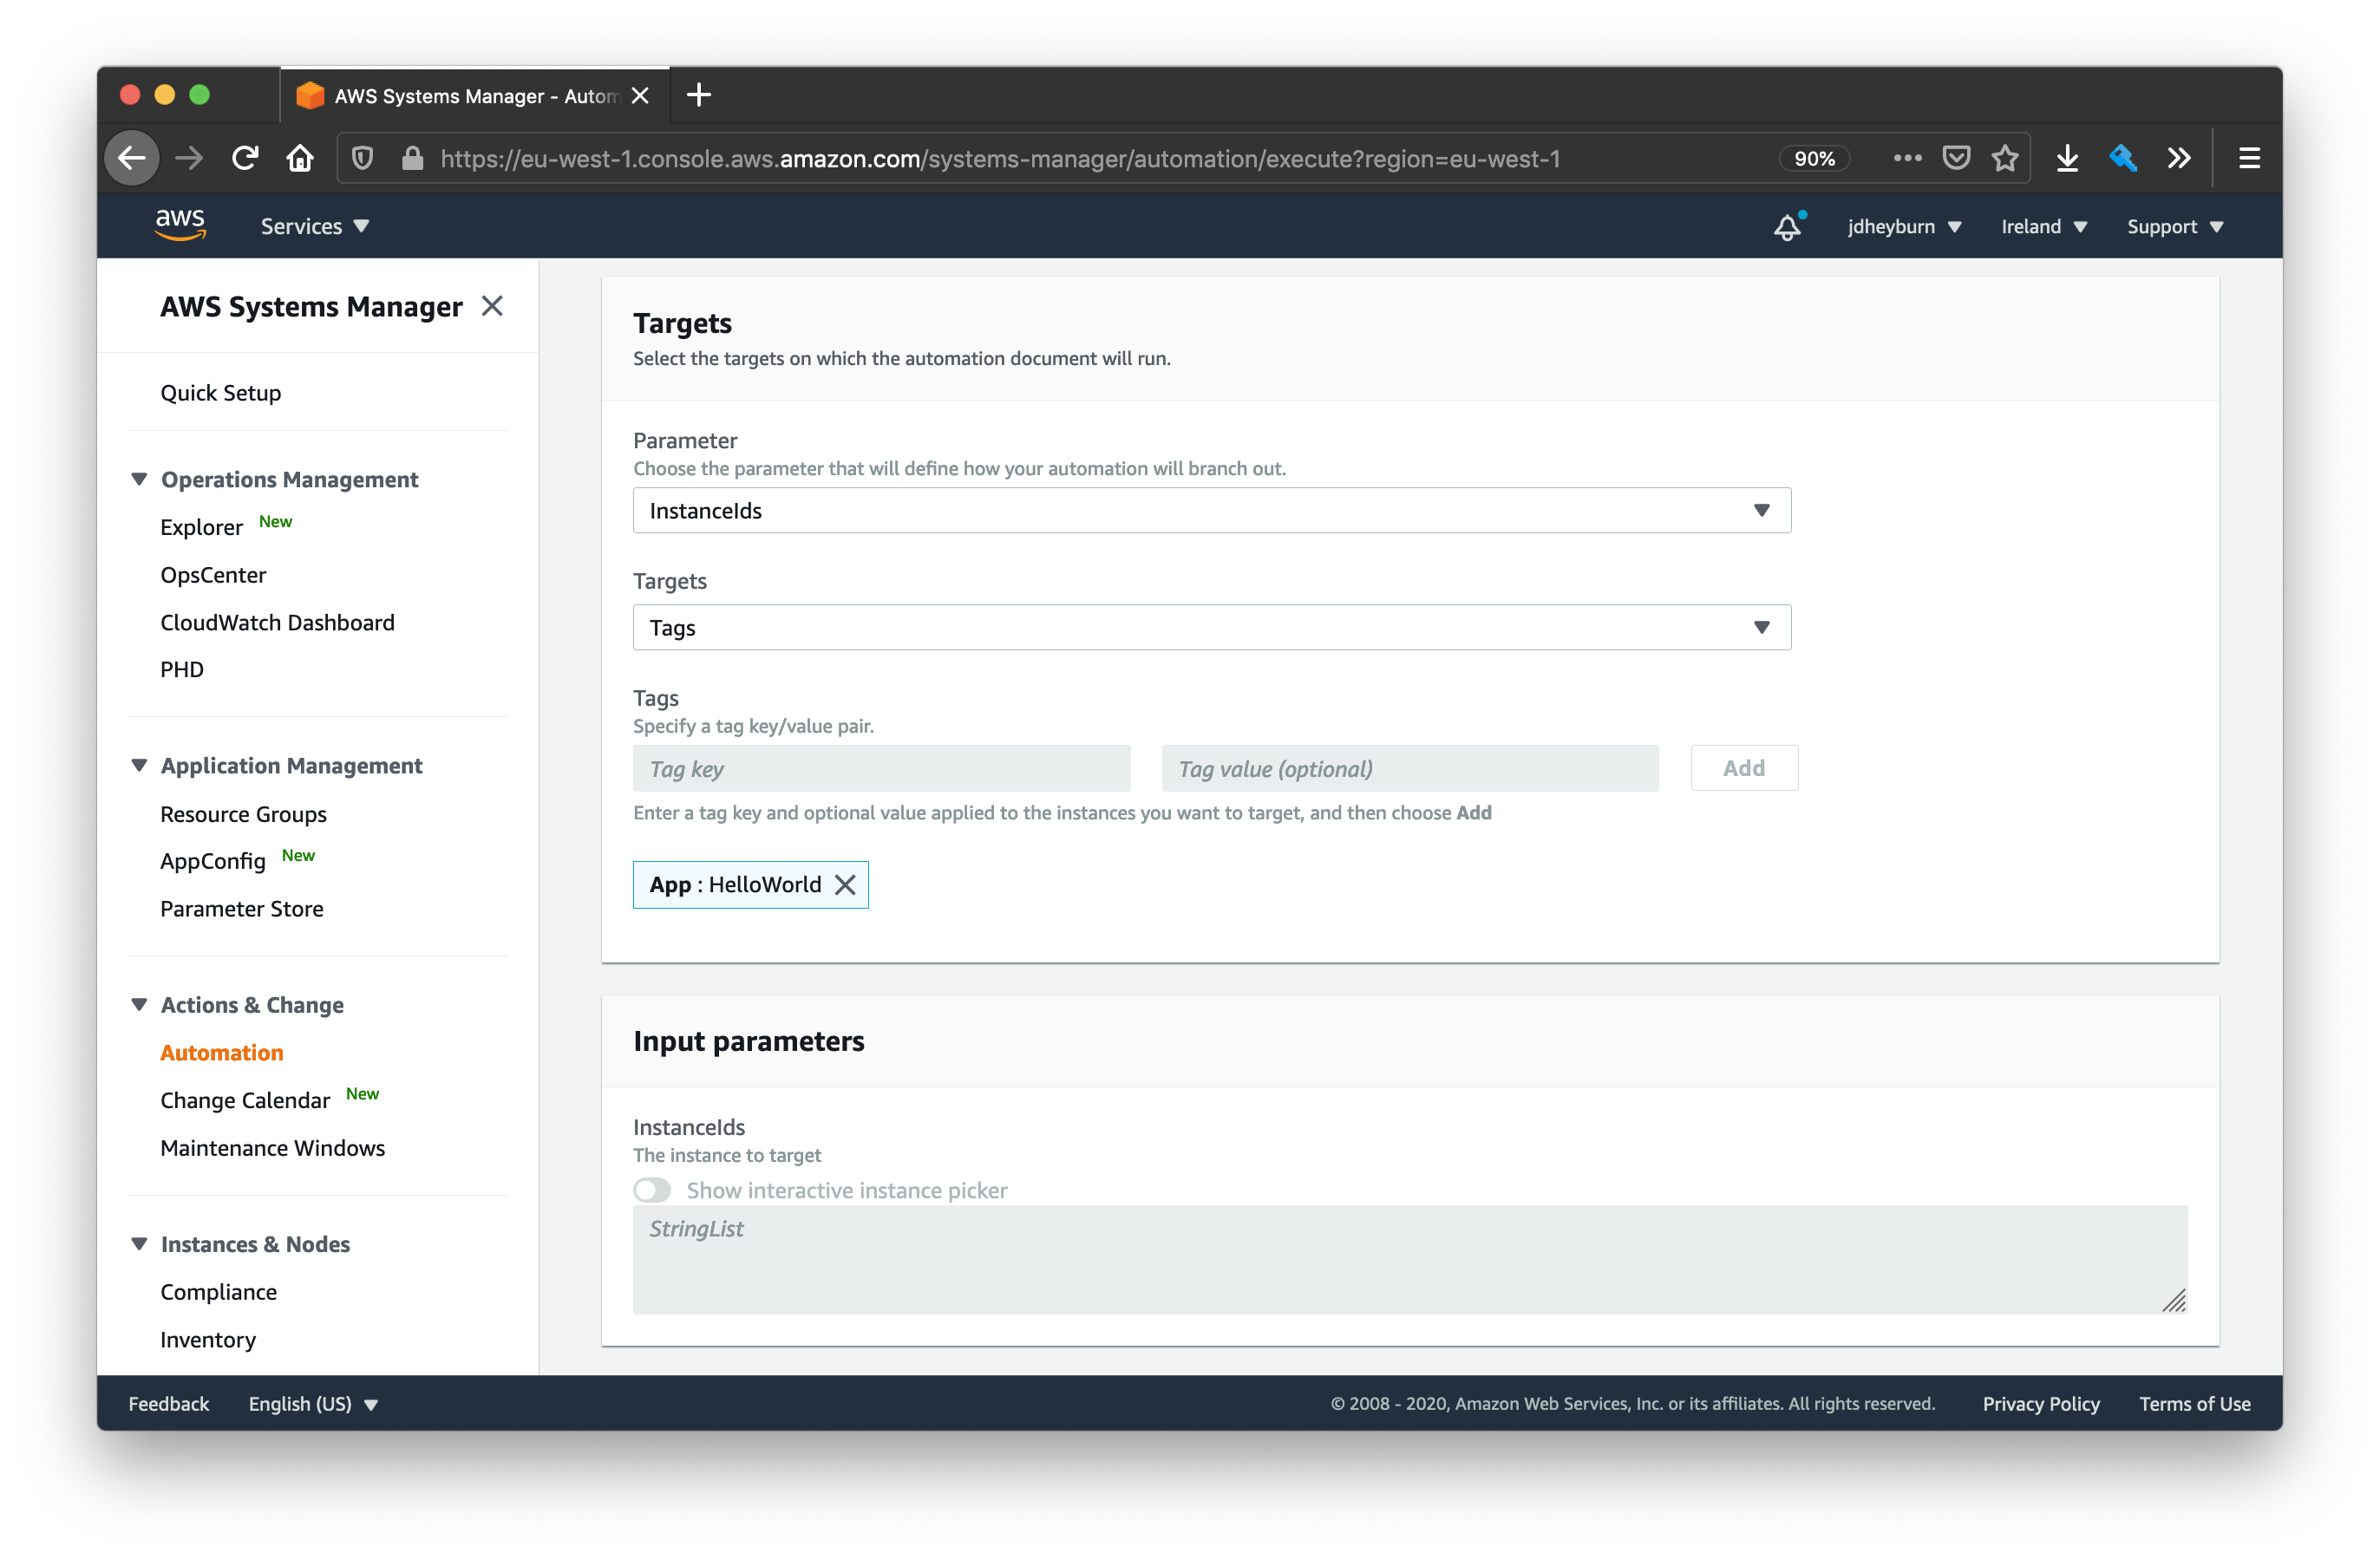
We’ll need to select what instances are our targets. The instances in scope for this document are tagged with the key App with the value HelloWorld, so let’s use that as our criteria. Note this is the most scalable solution for targeting instances.
Then we need to specify how the rate of invocation should be controlled. Our criteria for this is:
- Execute on 1 instance at a time
- Abort further invocations if any produce a error
Therefore we need to set the concurrency to 1 and the error threshold to 0.
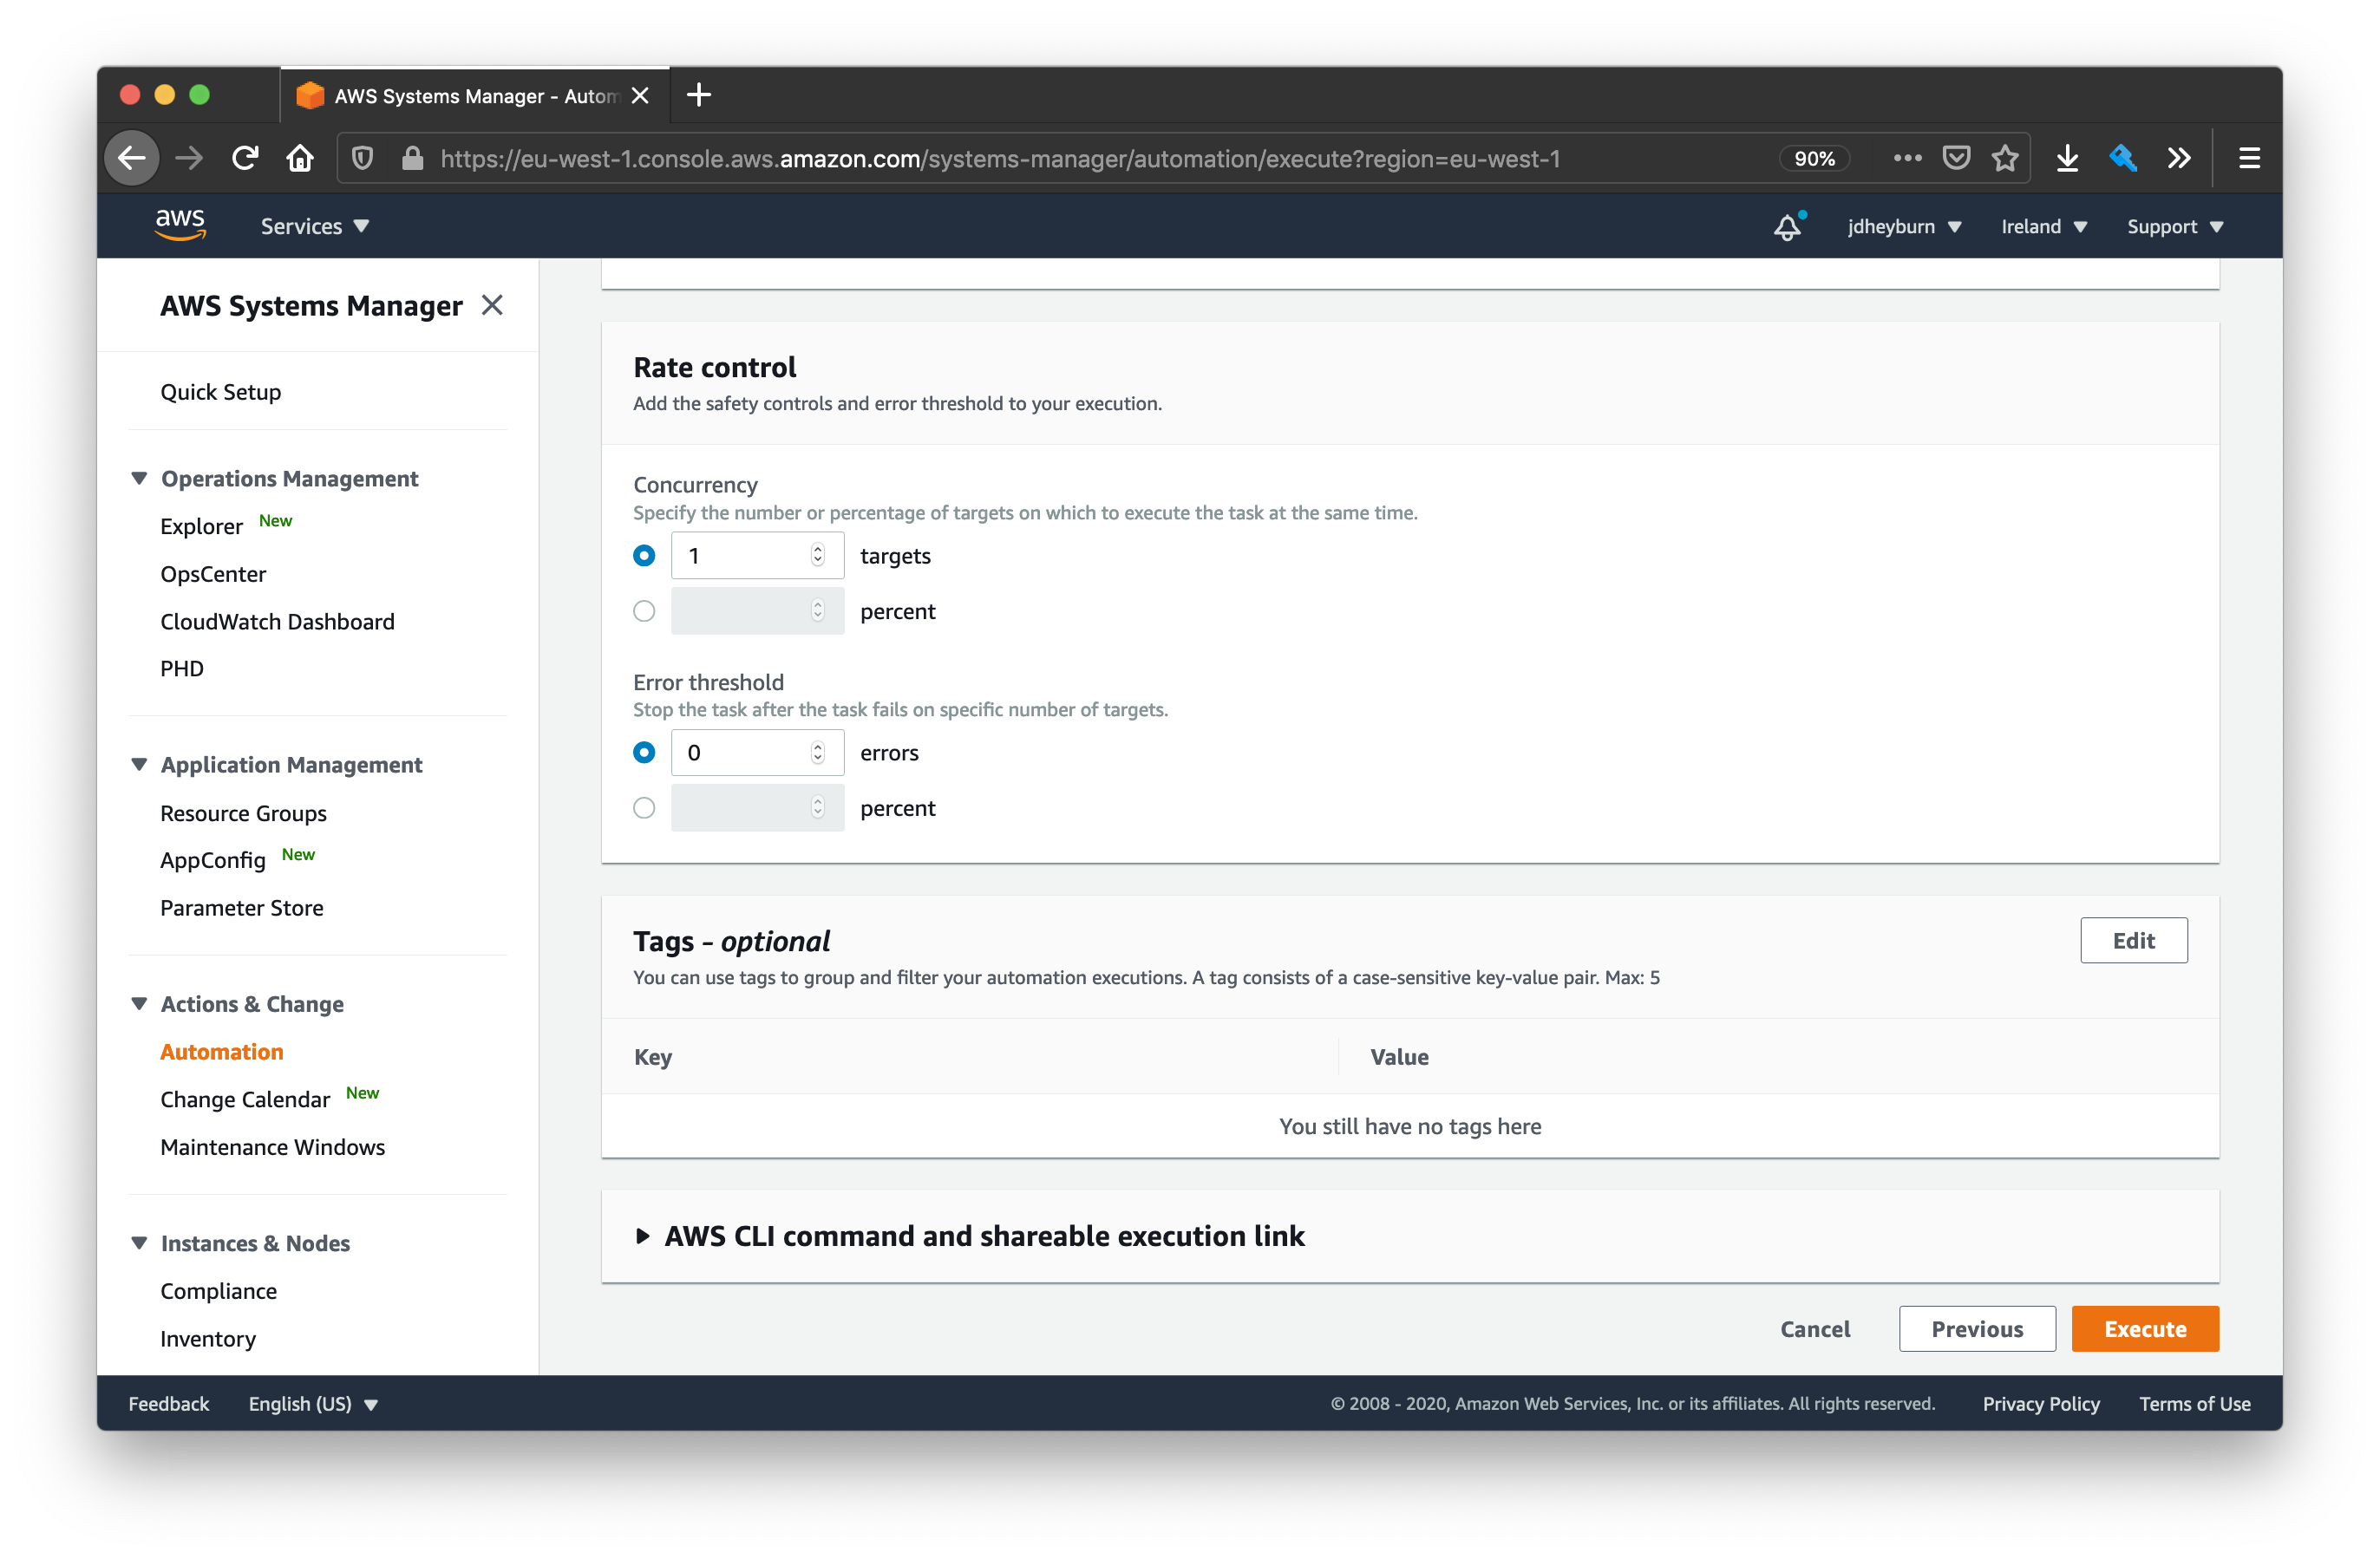
Once all done then click Execute.
Results
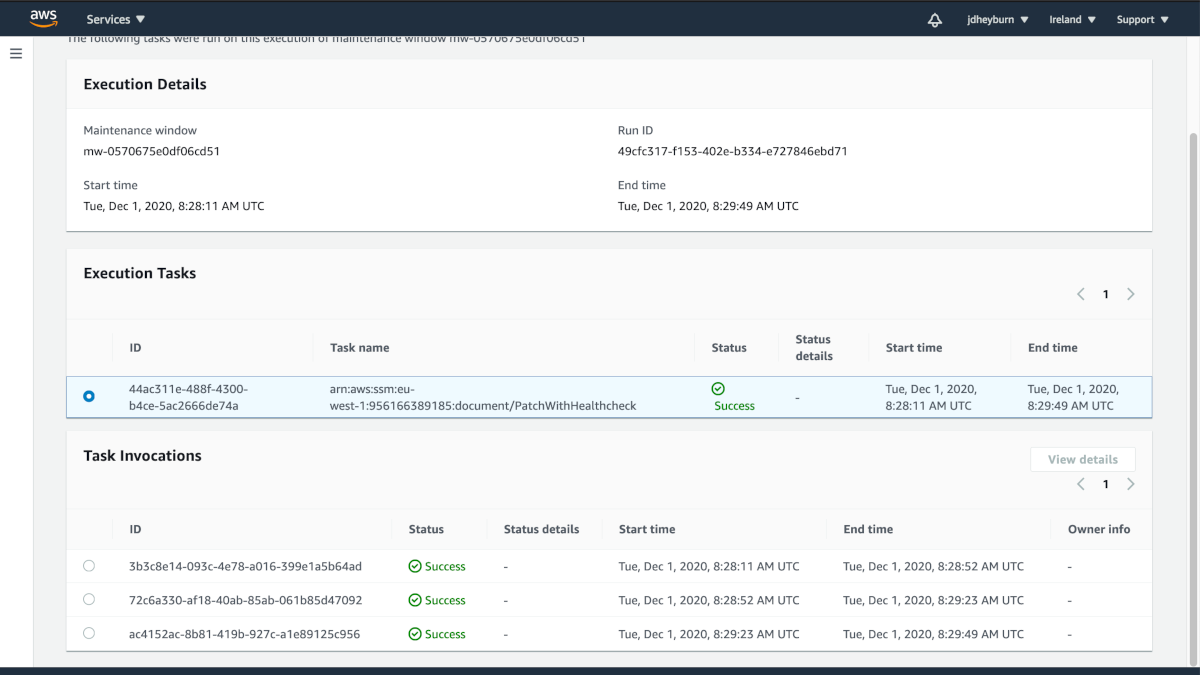
As the execution progresses you’ll notice it invokes the document on one instance at a time. As it completes you’ll have a screen that looks like the below as you click onto the execution detail page. Notice that the start and end times of each instance invocation do not overlap with one another.
Step name is the same as the instance ID in this case
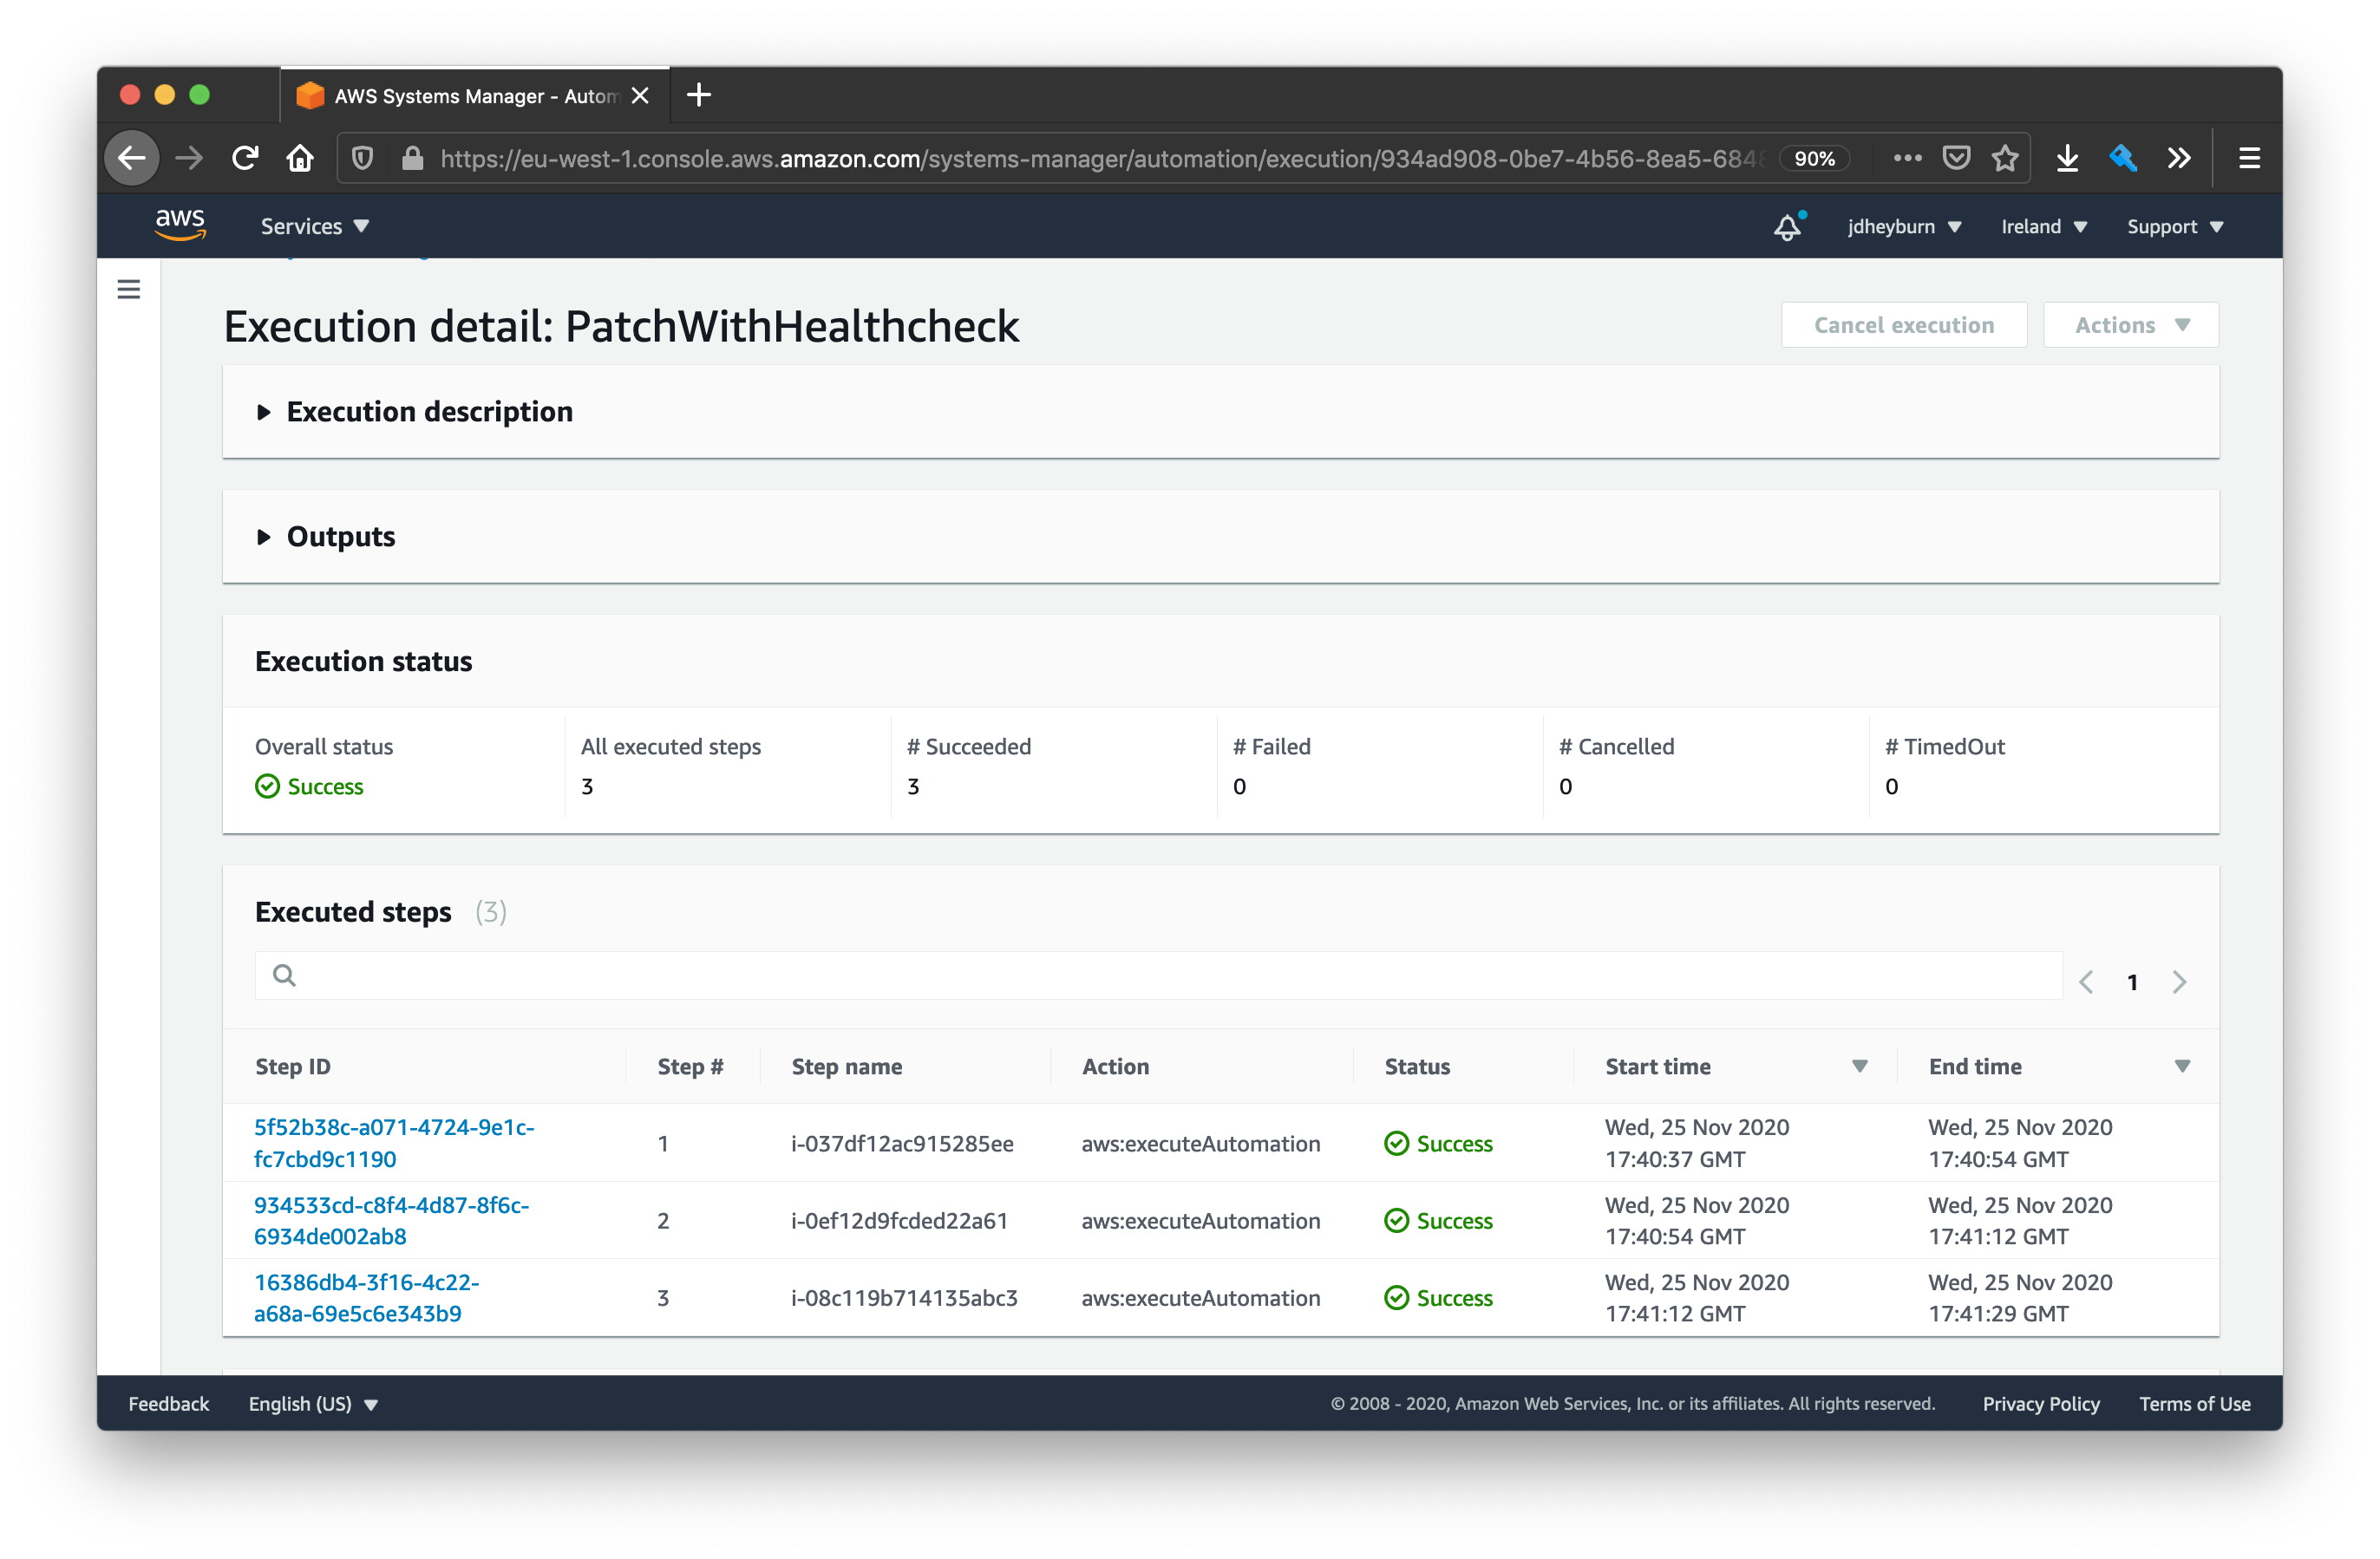
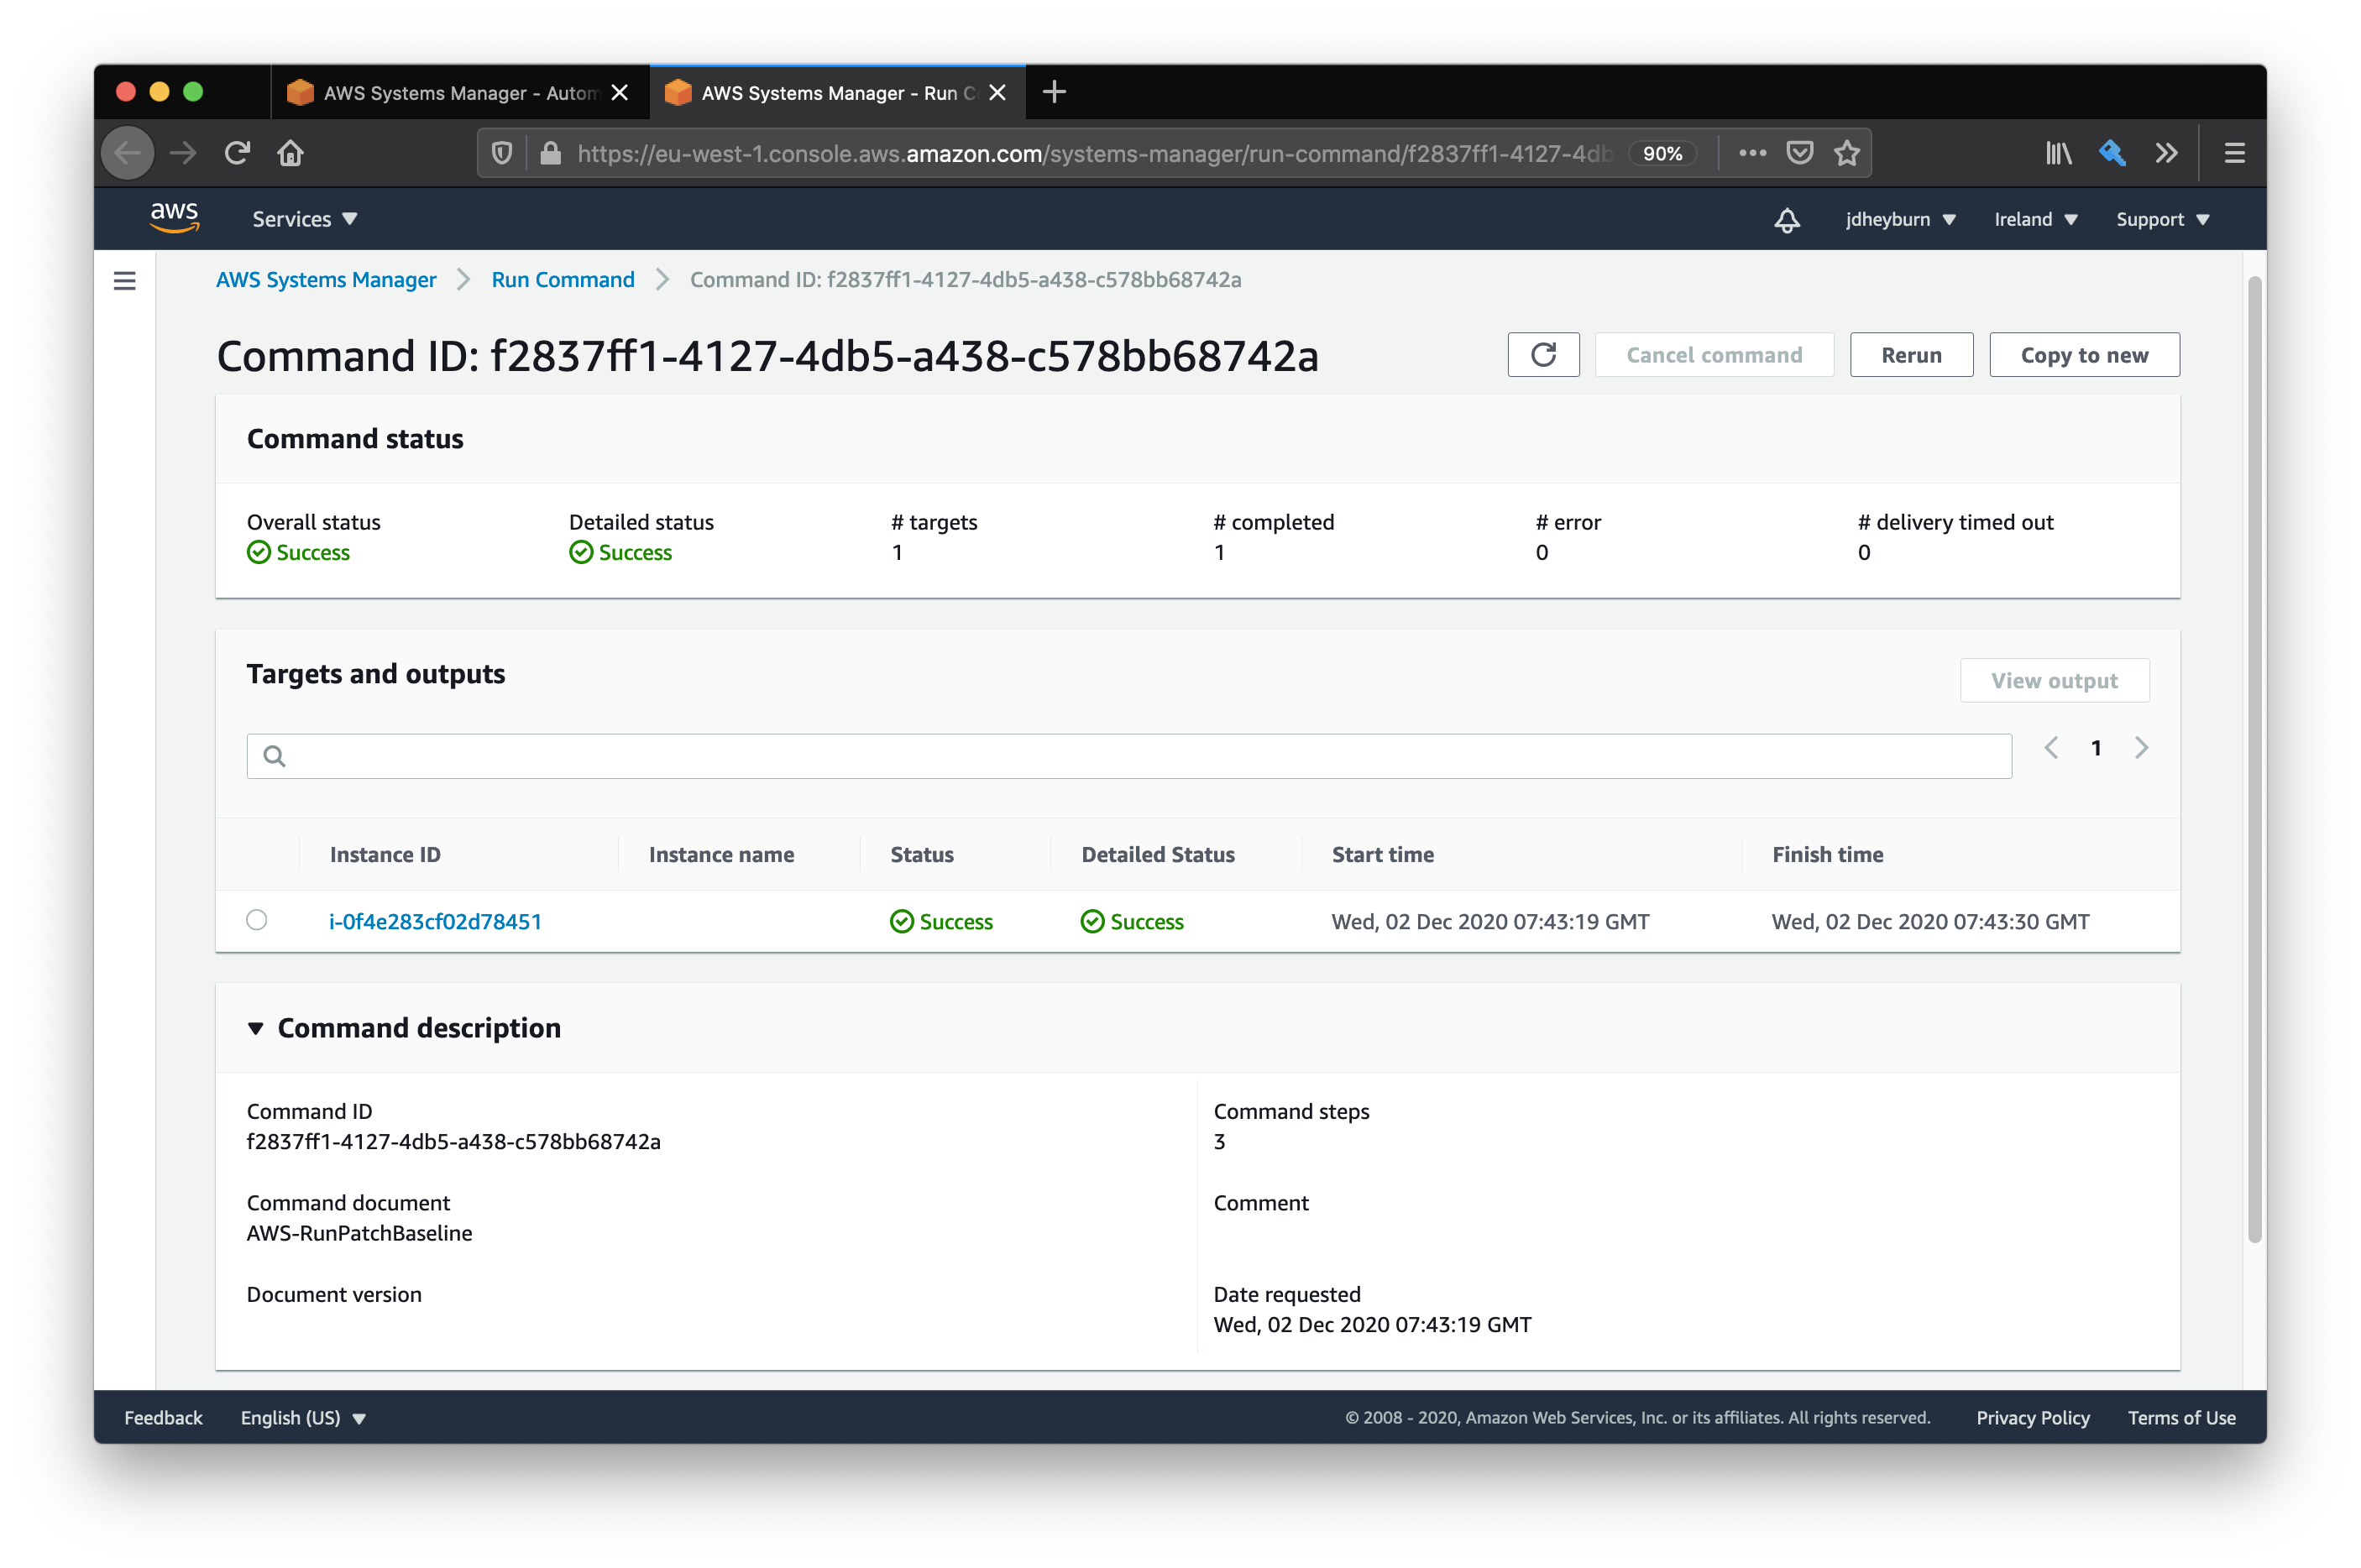
We can dive into each step invocation (the blue text in the above screenshot) to view the commands that were invoked.
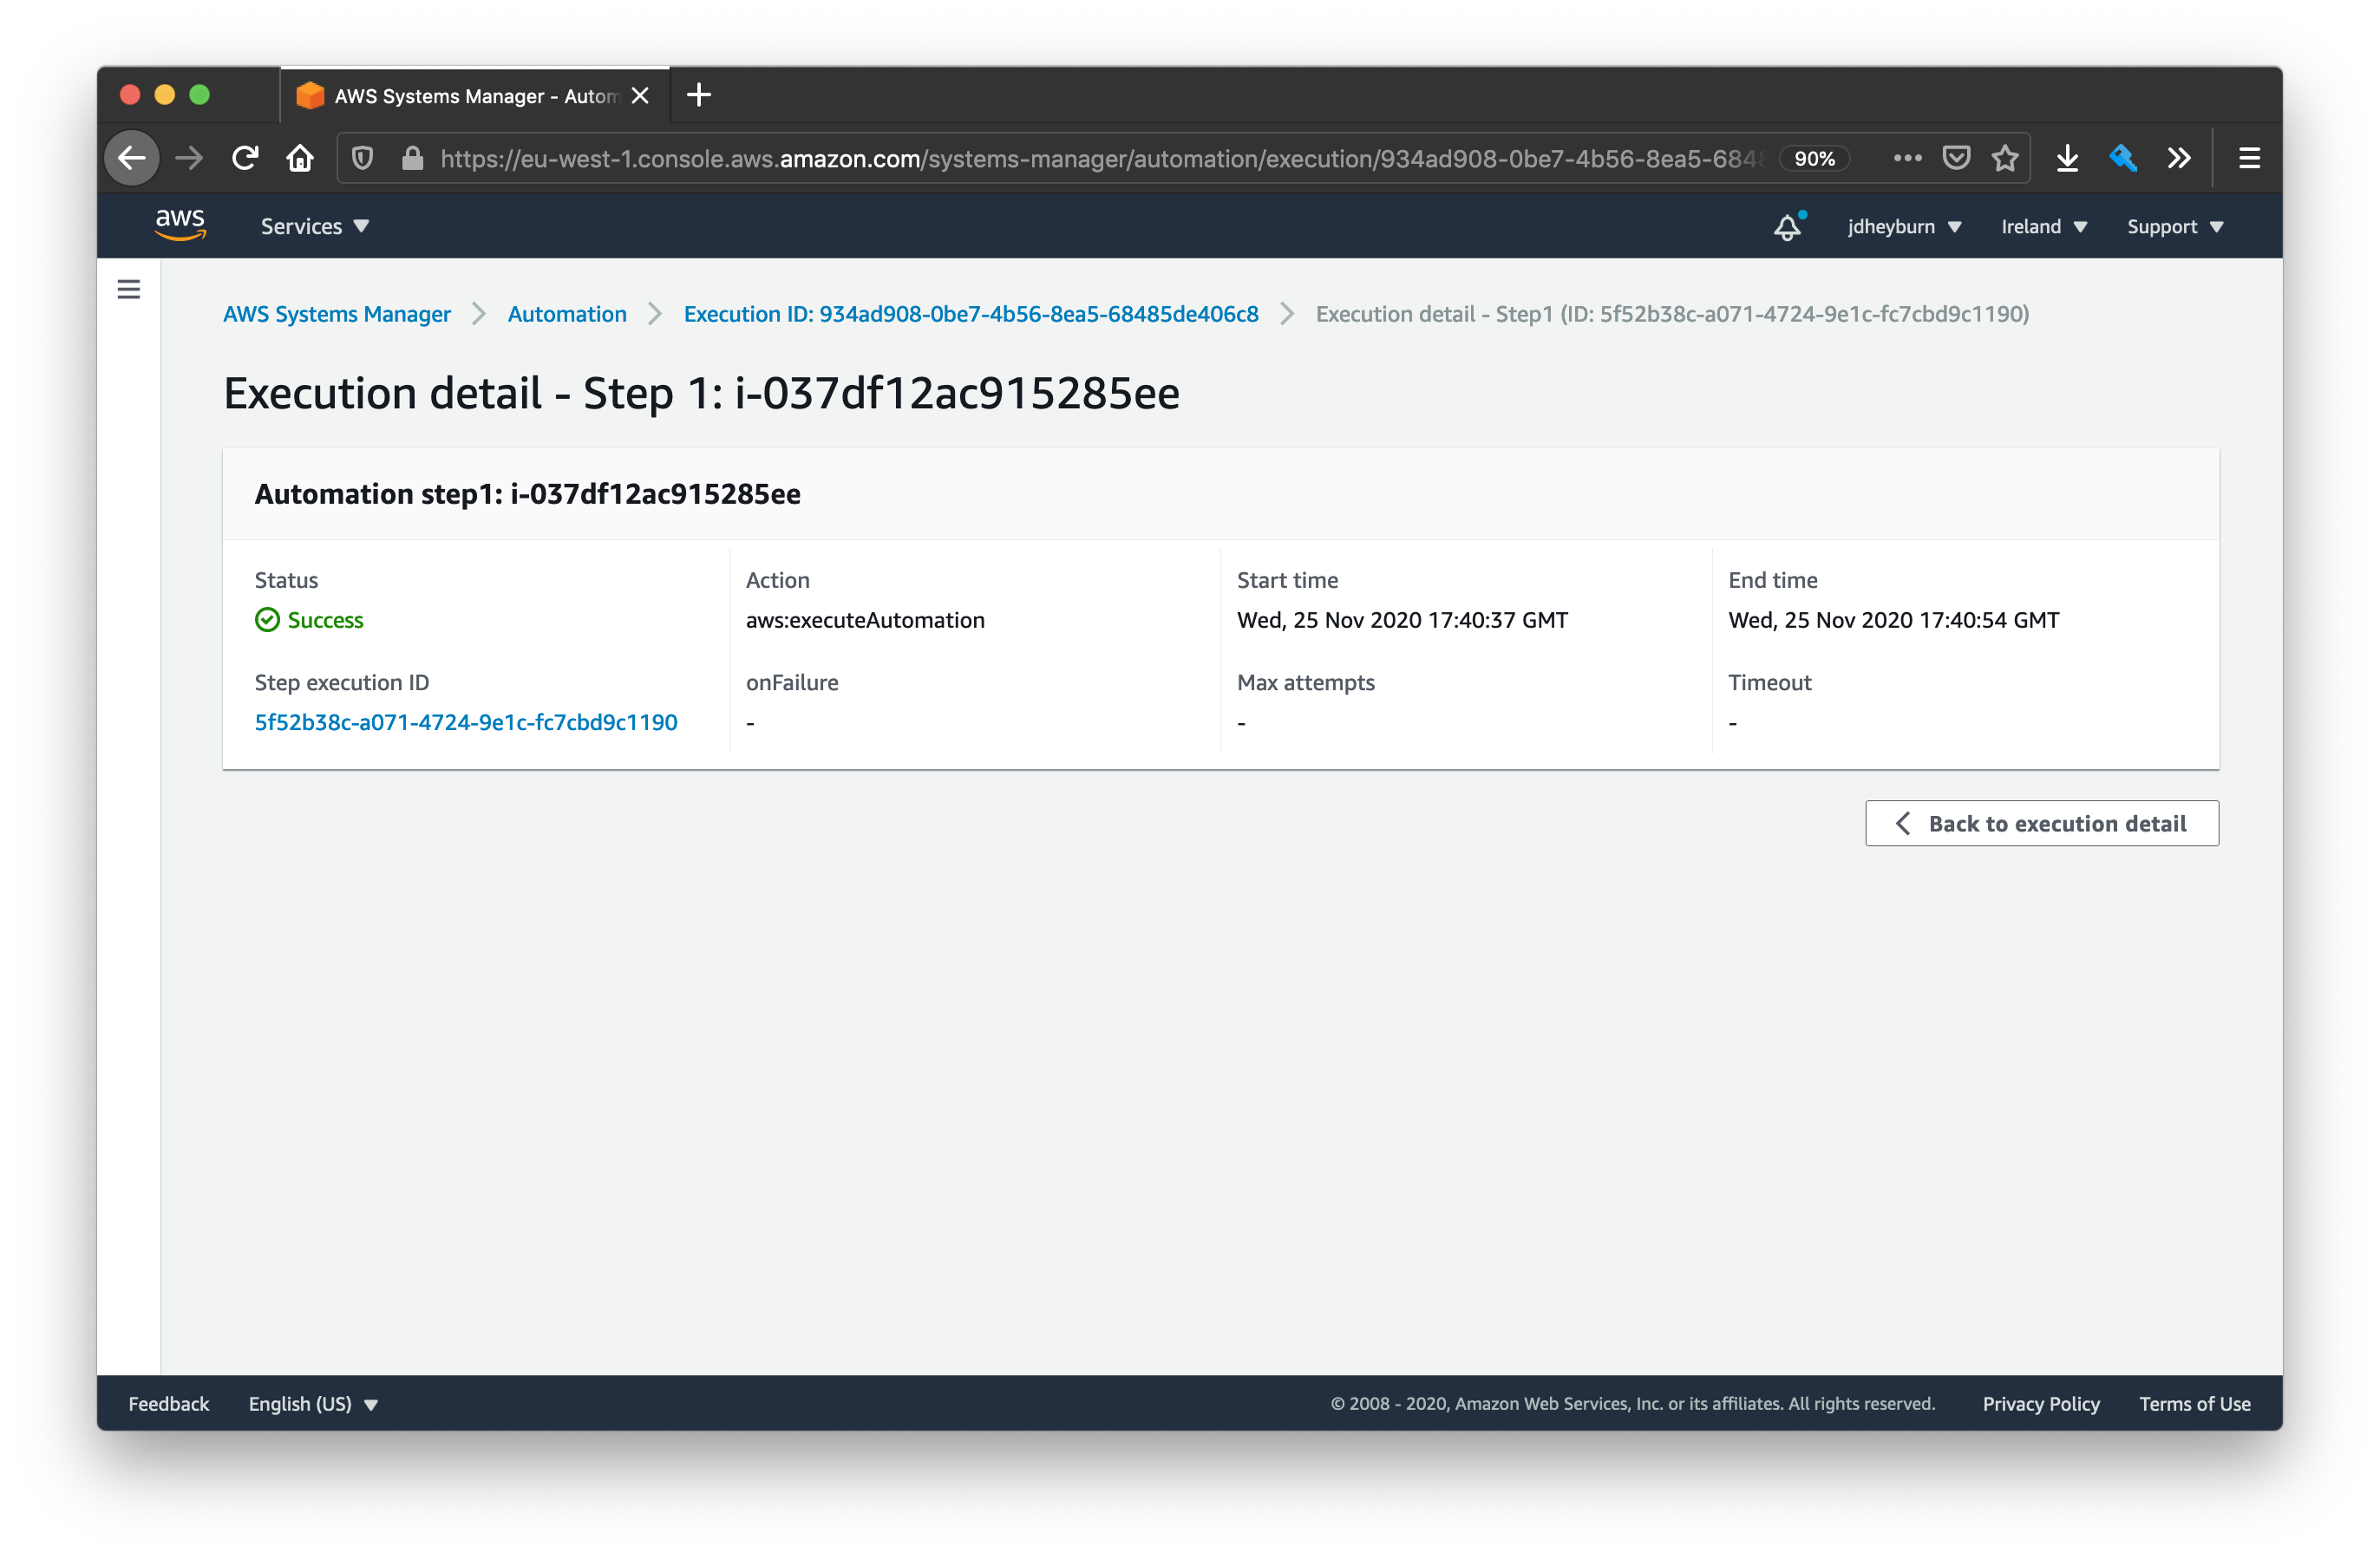
At this detail we can see the individual aws:runCommand actions performed on the instance.
Failure testing
Okay so we’ve confirmed the document now only invokes synchronously. Let’s now test to see if further invocations are aborted when there is a failure.
To simulate the failure, we can borrow a trick from the first post in this series by flipping the healthcheck script from > to <. Once that change is deployed we can re-run the document using the same method as above.
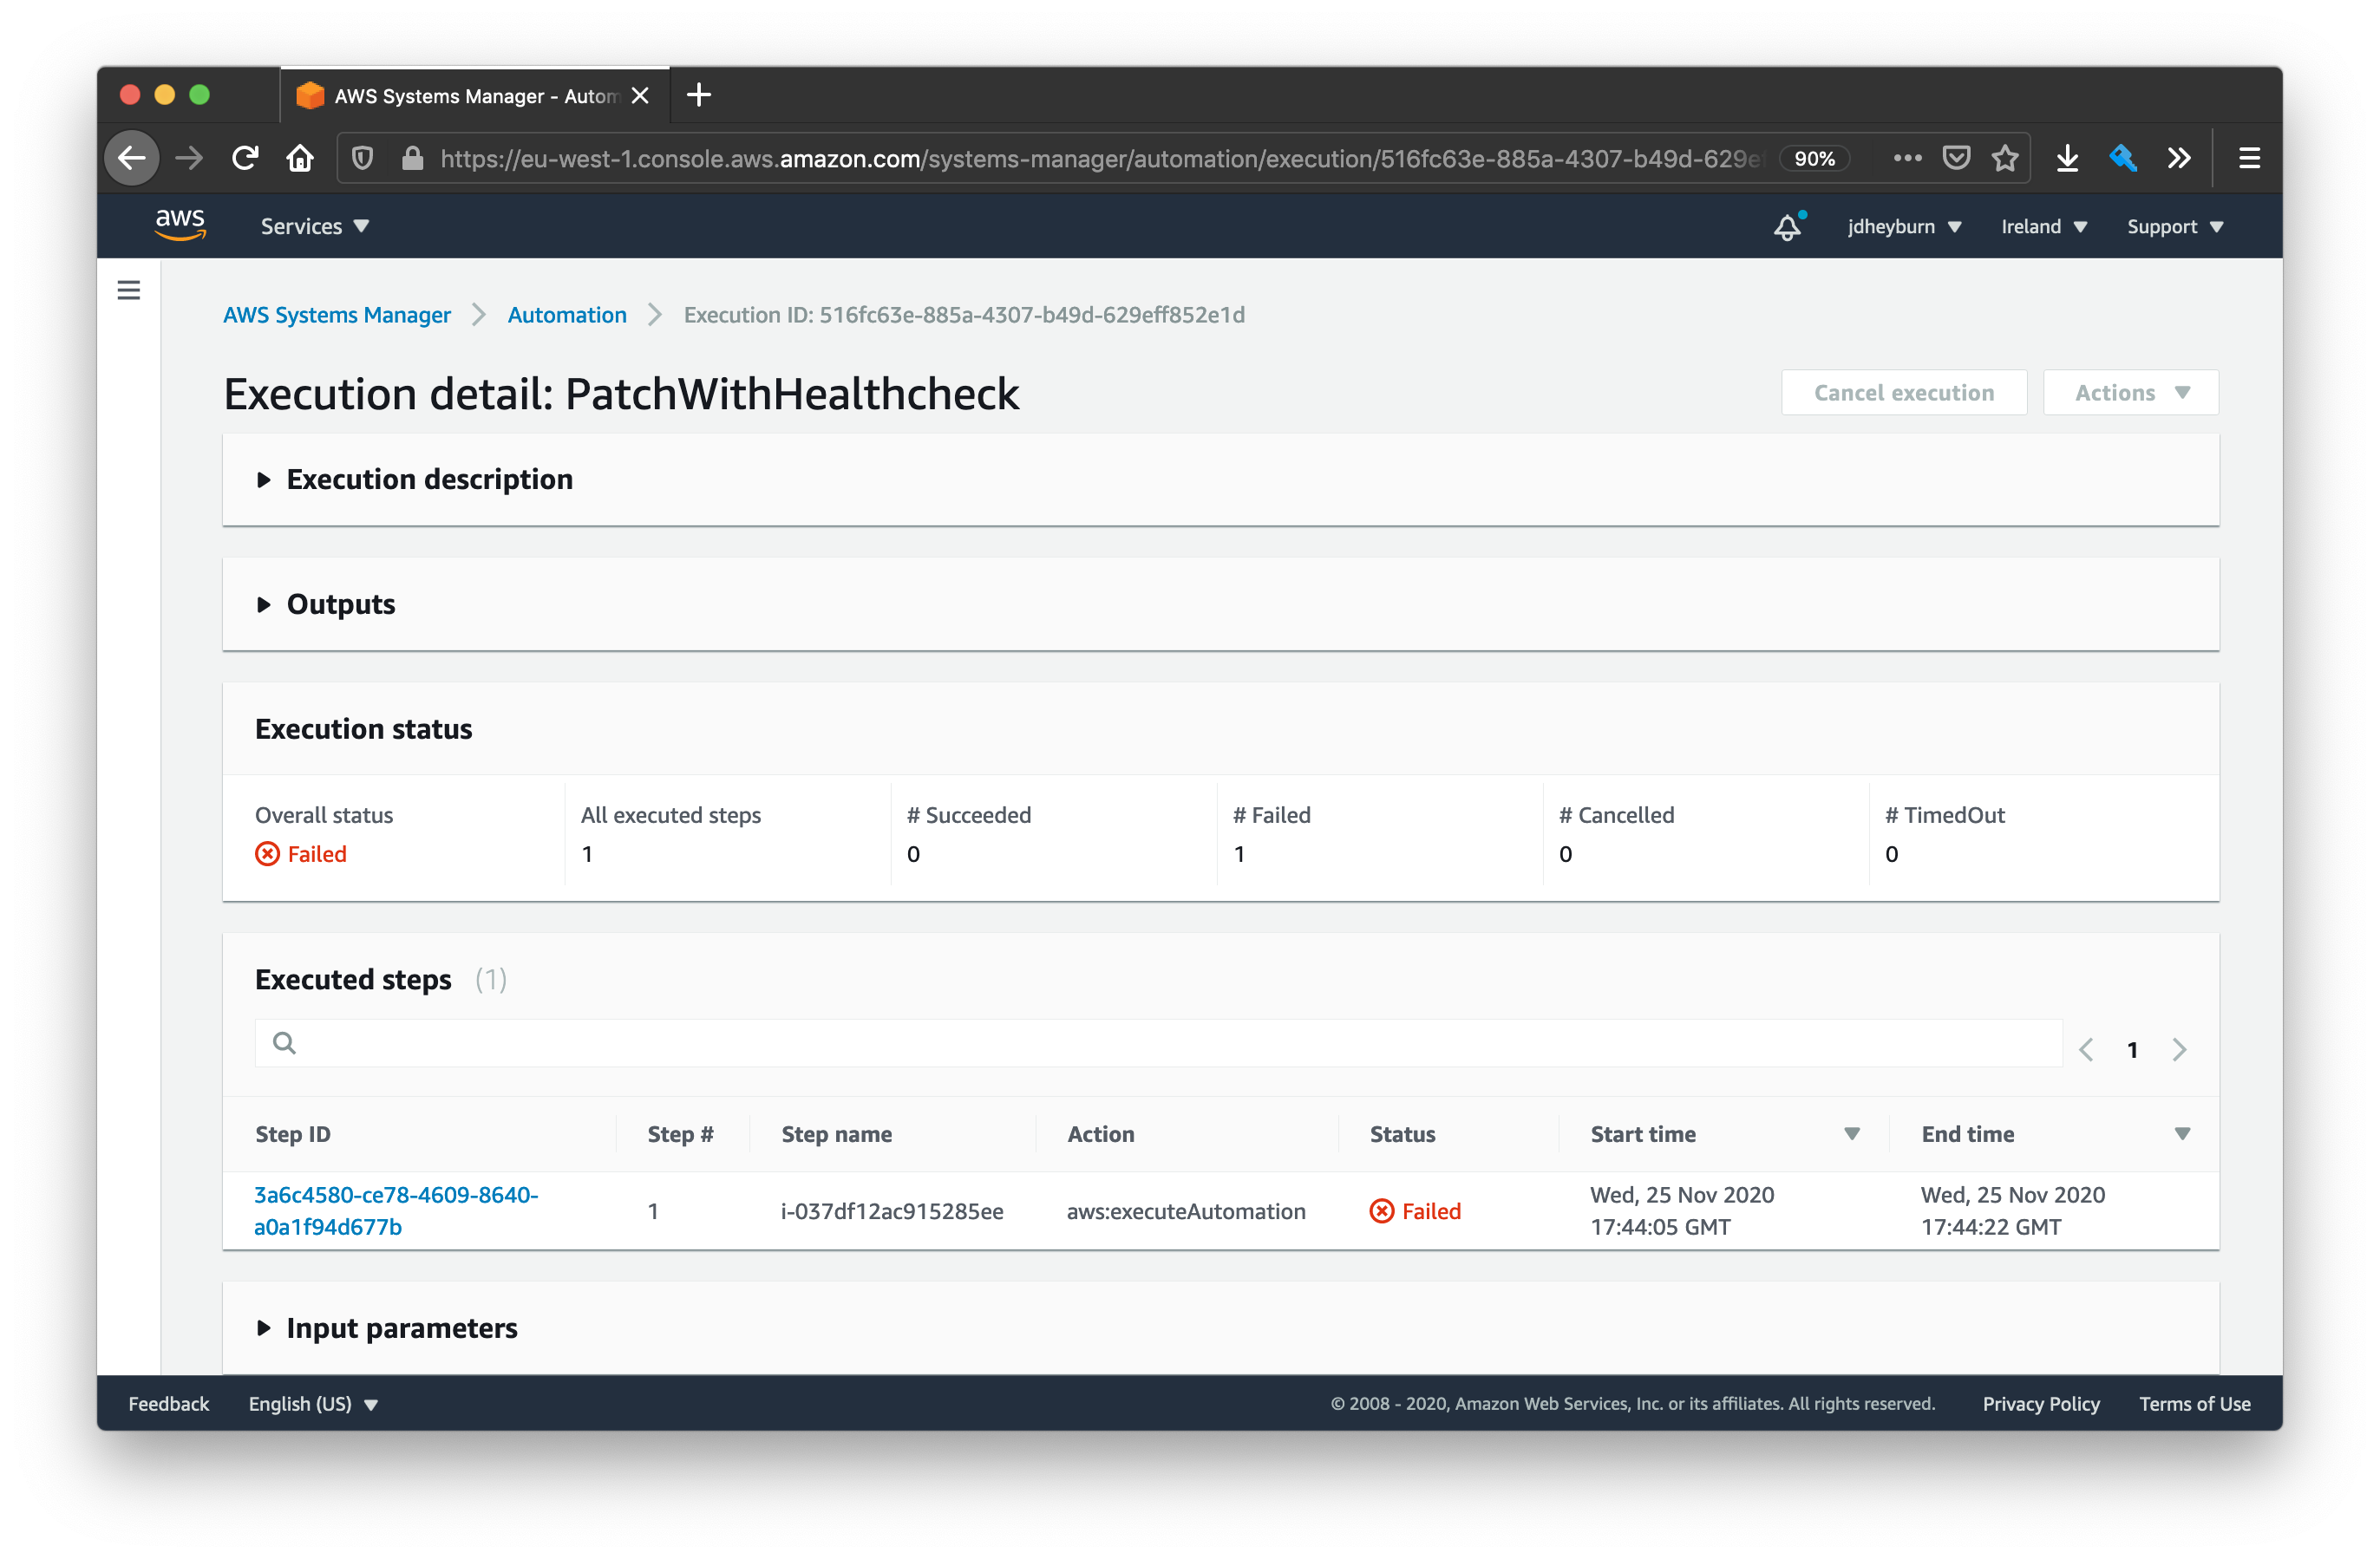
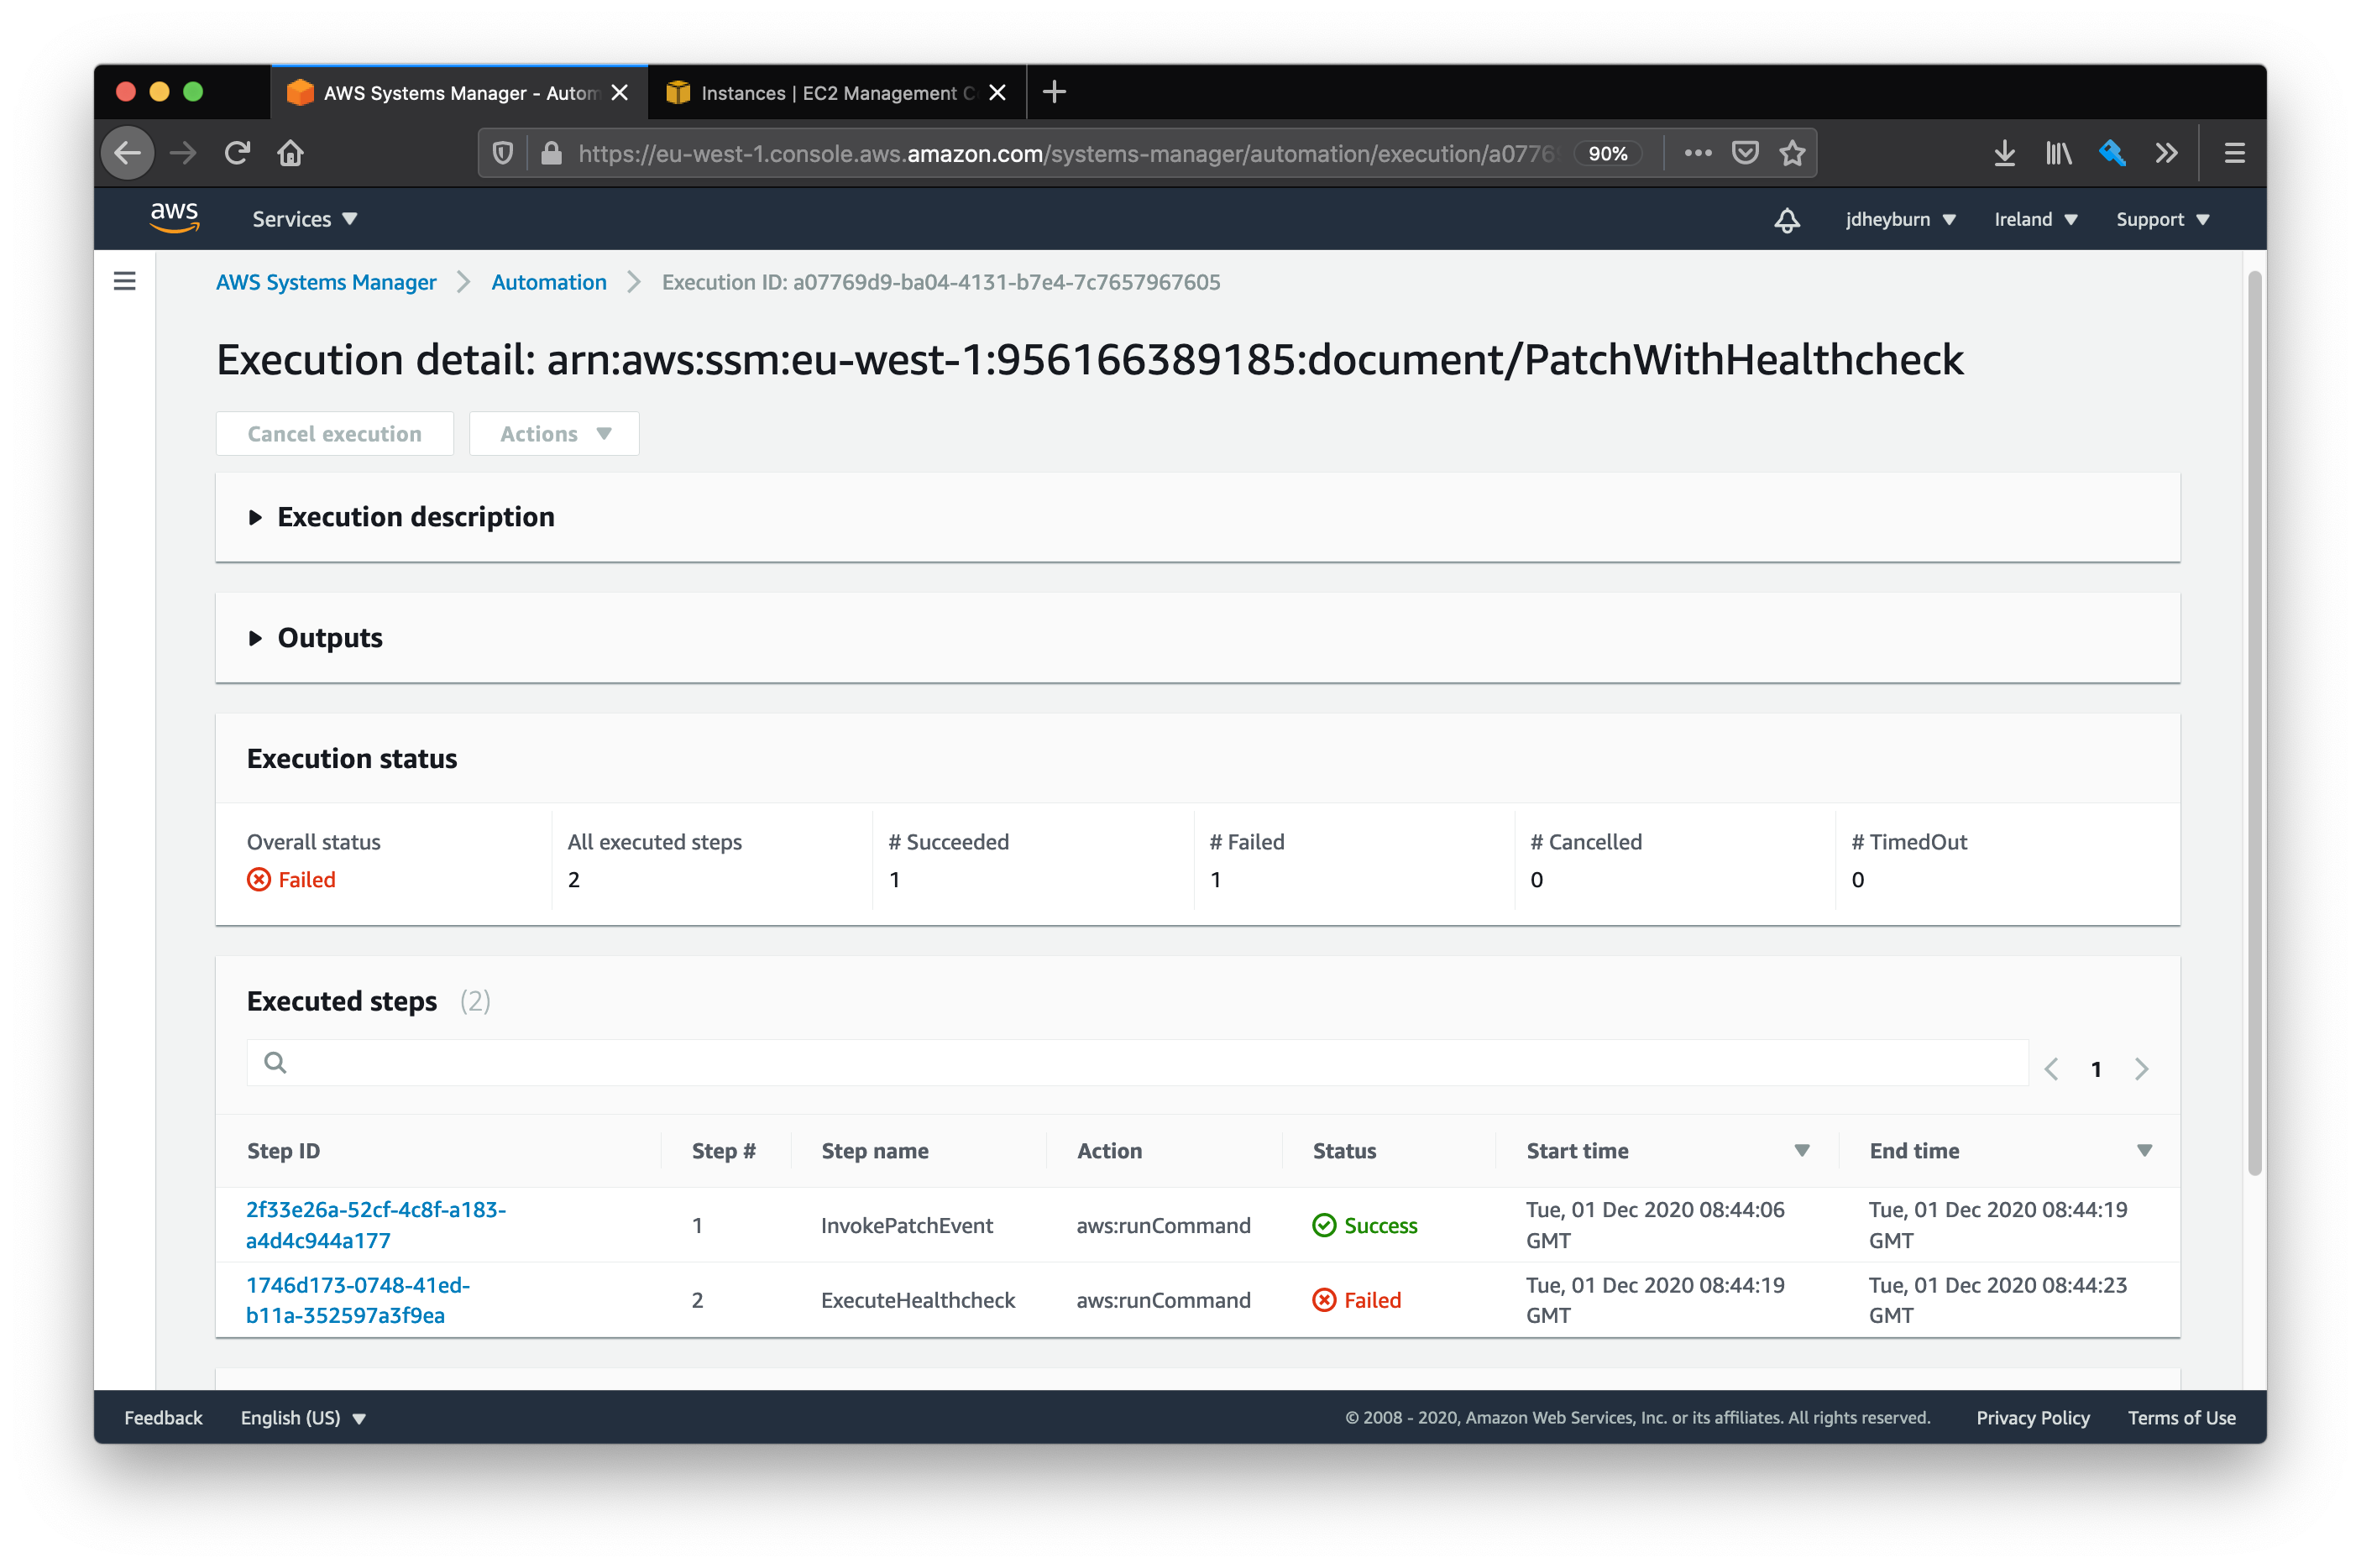
We can see the failure, and that the automation did not invoke on more instances! We can drill down into the invocation to see why it failed.
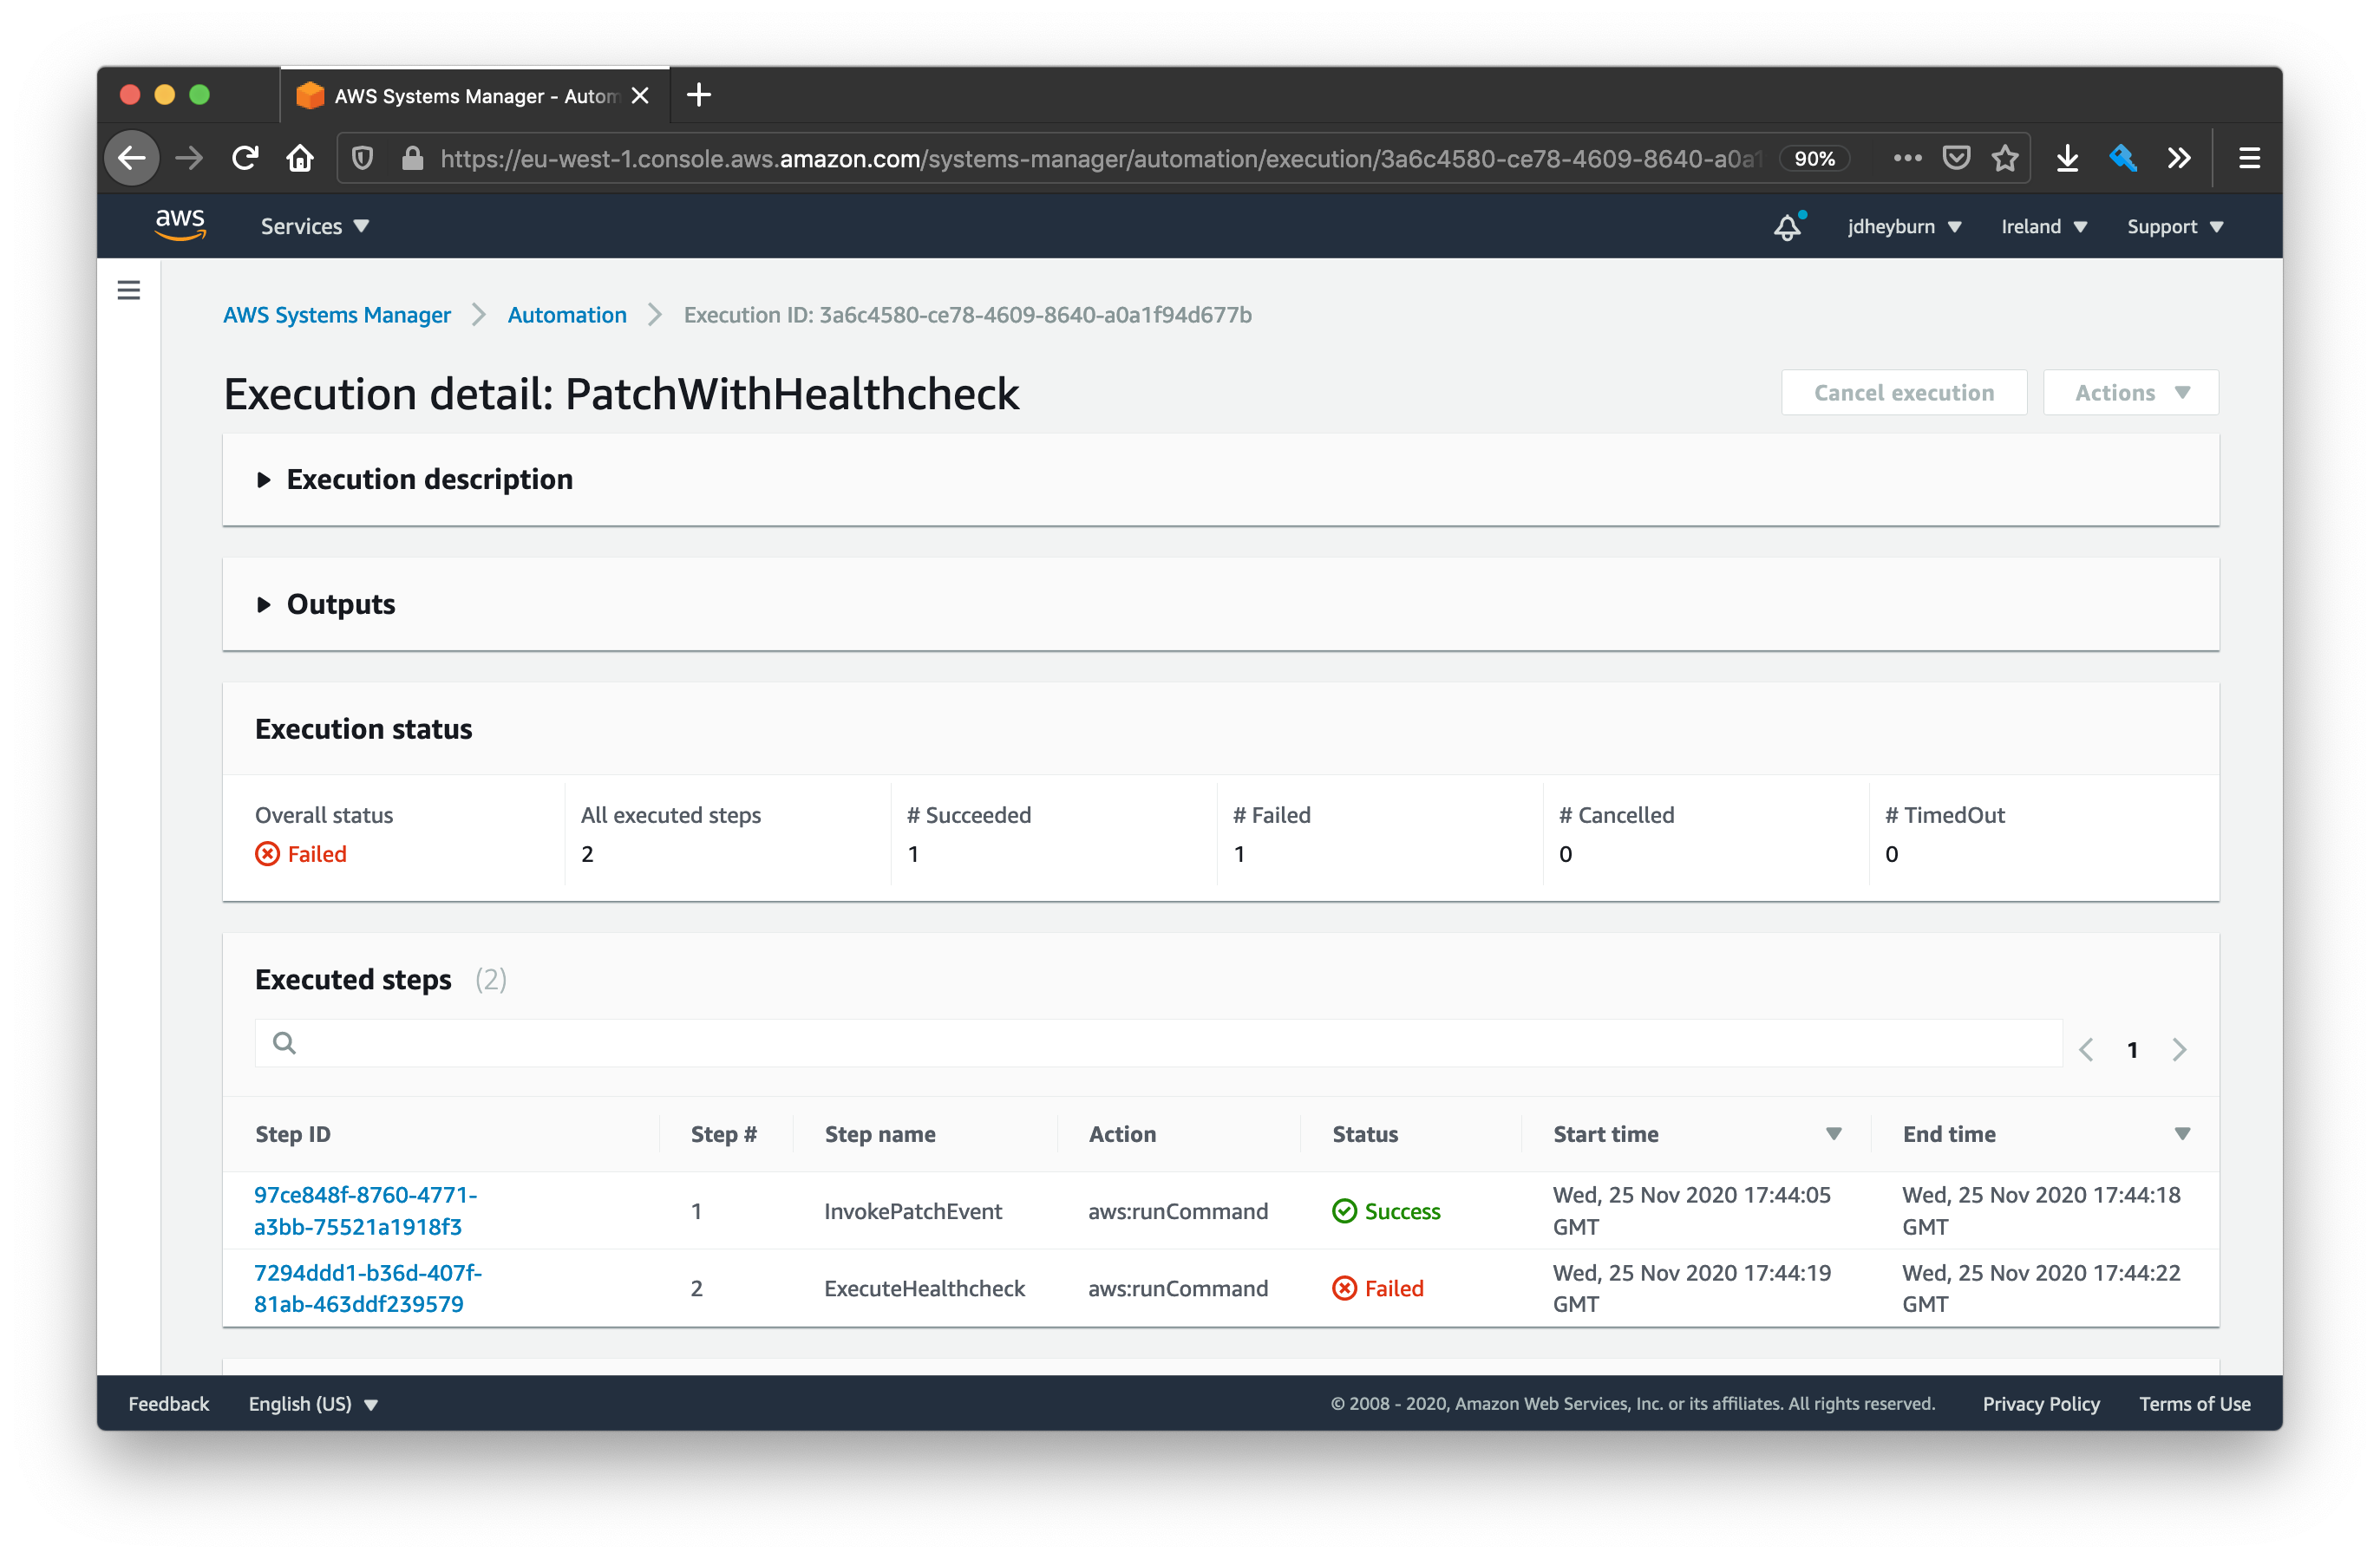
From this page you can then continue to drill down to the run command output to determine the cause of the failure.
Configuring automation tasks for maintenance windows
Now that we’ve tested the automation document and we’re happy to have it automated, let’s get this added to a maintenance window task. We can reuse the same maintenance window as we created last time, but with some differences.
Maintenance window task
Since we are targeting an automation document, there are some differences we need to account for when compared to command tasks.
- Specify the
task_typeasAUTOMATION - Update the
task_arnto our new document accordingly - Ensure our new combined document is only invoked on one instance at a time, so
max_concurrencyis set to1 - Within
task_invocation_parameterswe useautomation_parametersas opposed torun_command_parameters.document_versionallows us to target a specific document version- any parameters required by the document are defined within
parameter
Remember that our document takes in InstanceIds as a parameter? Well you’ll notice that the value is set to "{{ TARGET_ID }}". This is known in AWS as a pseudo parameter, whereby the instance ID returned by WindowTargetIds will be passed into the automation document.
Depending on what
resource_typeyouraws_ssm_maintenance_window_targetis set up as will result in a different value to{{ TARGET_ID }}- in our case ours isINSTANCE, so this becomes the instance ID.See the AWS docs for a full breakdown.
resource "aws_ssm_maintenance_window_task" "patch_with_healthcheck" {
  window_id        = aws_ssm_maintenance_window.patch_with_healthcheck.id
  task_type        = "AUTOMATION"
  task_arn         = aws_ssm_document.patch_with_healthcheck.arn
  priority         = 10
  service_role_arn = aws_iam_role.patch_mw_role.arn

  max_concurrency = "1"
  max_errors      = "0"

  targets {
    key    = "WindowTargetIds"
    values = [aws_ssm_maintenance_window_target.patch_with_healthcheck_target.id]
  }

  task_invocation_parameters {
    automation_parameters {
      document_version = "$LATEST"

      parameter {
        name   = "InstanceIds"
        values = ["{{ TARGET_ID }}"]
      }
    }
  }
}
You can view the above resource in GitHub.
Maintenance window target
We need to update the target to use tag lookups against the instances - this mimics how we tested our automation document earlier on.
resource "aws_ssm_maintenance_window_target" "patch_with_healthcheck_target" {
  window_id     = aws_ssm_maintenance_window.patch_with_healthcheck.id
  name          = "PatchWithHealthcheckTargets"
  description   = "All instances that should be patched with a healthcheck after"
  resource_type = "INSTANCE"

  targets {
    key    = "tag:App"
    values = ["HelloWorld"]
  }
}
You can view the above resource in GitHub.
Additional IAM policies
We’ll need to also attach some new permissions to the IAM role for the maintenance window, aws_iam_role.patch_mw_role.arn, to allow the automation document to perform a lookup on instances by their tag as defined in the updated aws_ssm_maintenance_window_target.patch_with_healthcheck_target resource.
data "aws_iam_policy_document" "mw_role_additional" {
  statement {
    sid    = "AllowSSM"
    effect = "Allow"

    actions = [
      "ssm:DescribeInstanceInformation",
      "ssm:ListCommandInvocations",
    ]

    resources = ["*"]
  }
}

resource "aws_iam_policy" "mw_role_add" {
  name        = "MwRoleAdd"
  description = "Additonal permissions needed for MW"

  policy = data.aws_iam_policy_document.mw_role_additional.json
}

resource "aws_iam_role_policy_attachment" "mw_role_add" {
  role       = aws_iam_role.patch_mw_role.name
  policy_arn = aws_iam_policy.mw_role_add.arn
}
You can view the above resources in GitHub.
Simply put, we’re creating an new IAM policy with anything additional that the maintenance window requires for it to operate. We’ll use this policy to add any new actions if we need to in the future.
Testing automation documents in maintenance windows
Once you’ve got the config above applied you’ll need to run a test. Just like last time, you can do this by changing the maintenance window execution time to something relatively close to your current time.
Once the execution is complete (and hopefully it was successful, if not then check back at the configuration), you’ll see that there will be 3 task invocations, one for each instance, and that none of them overlapped one another.
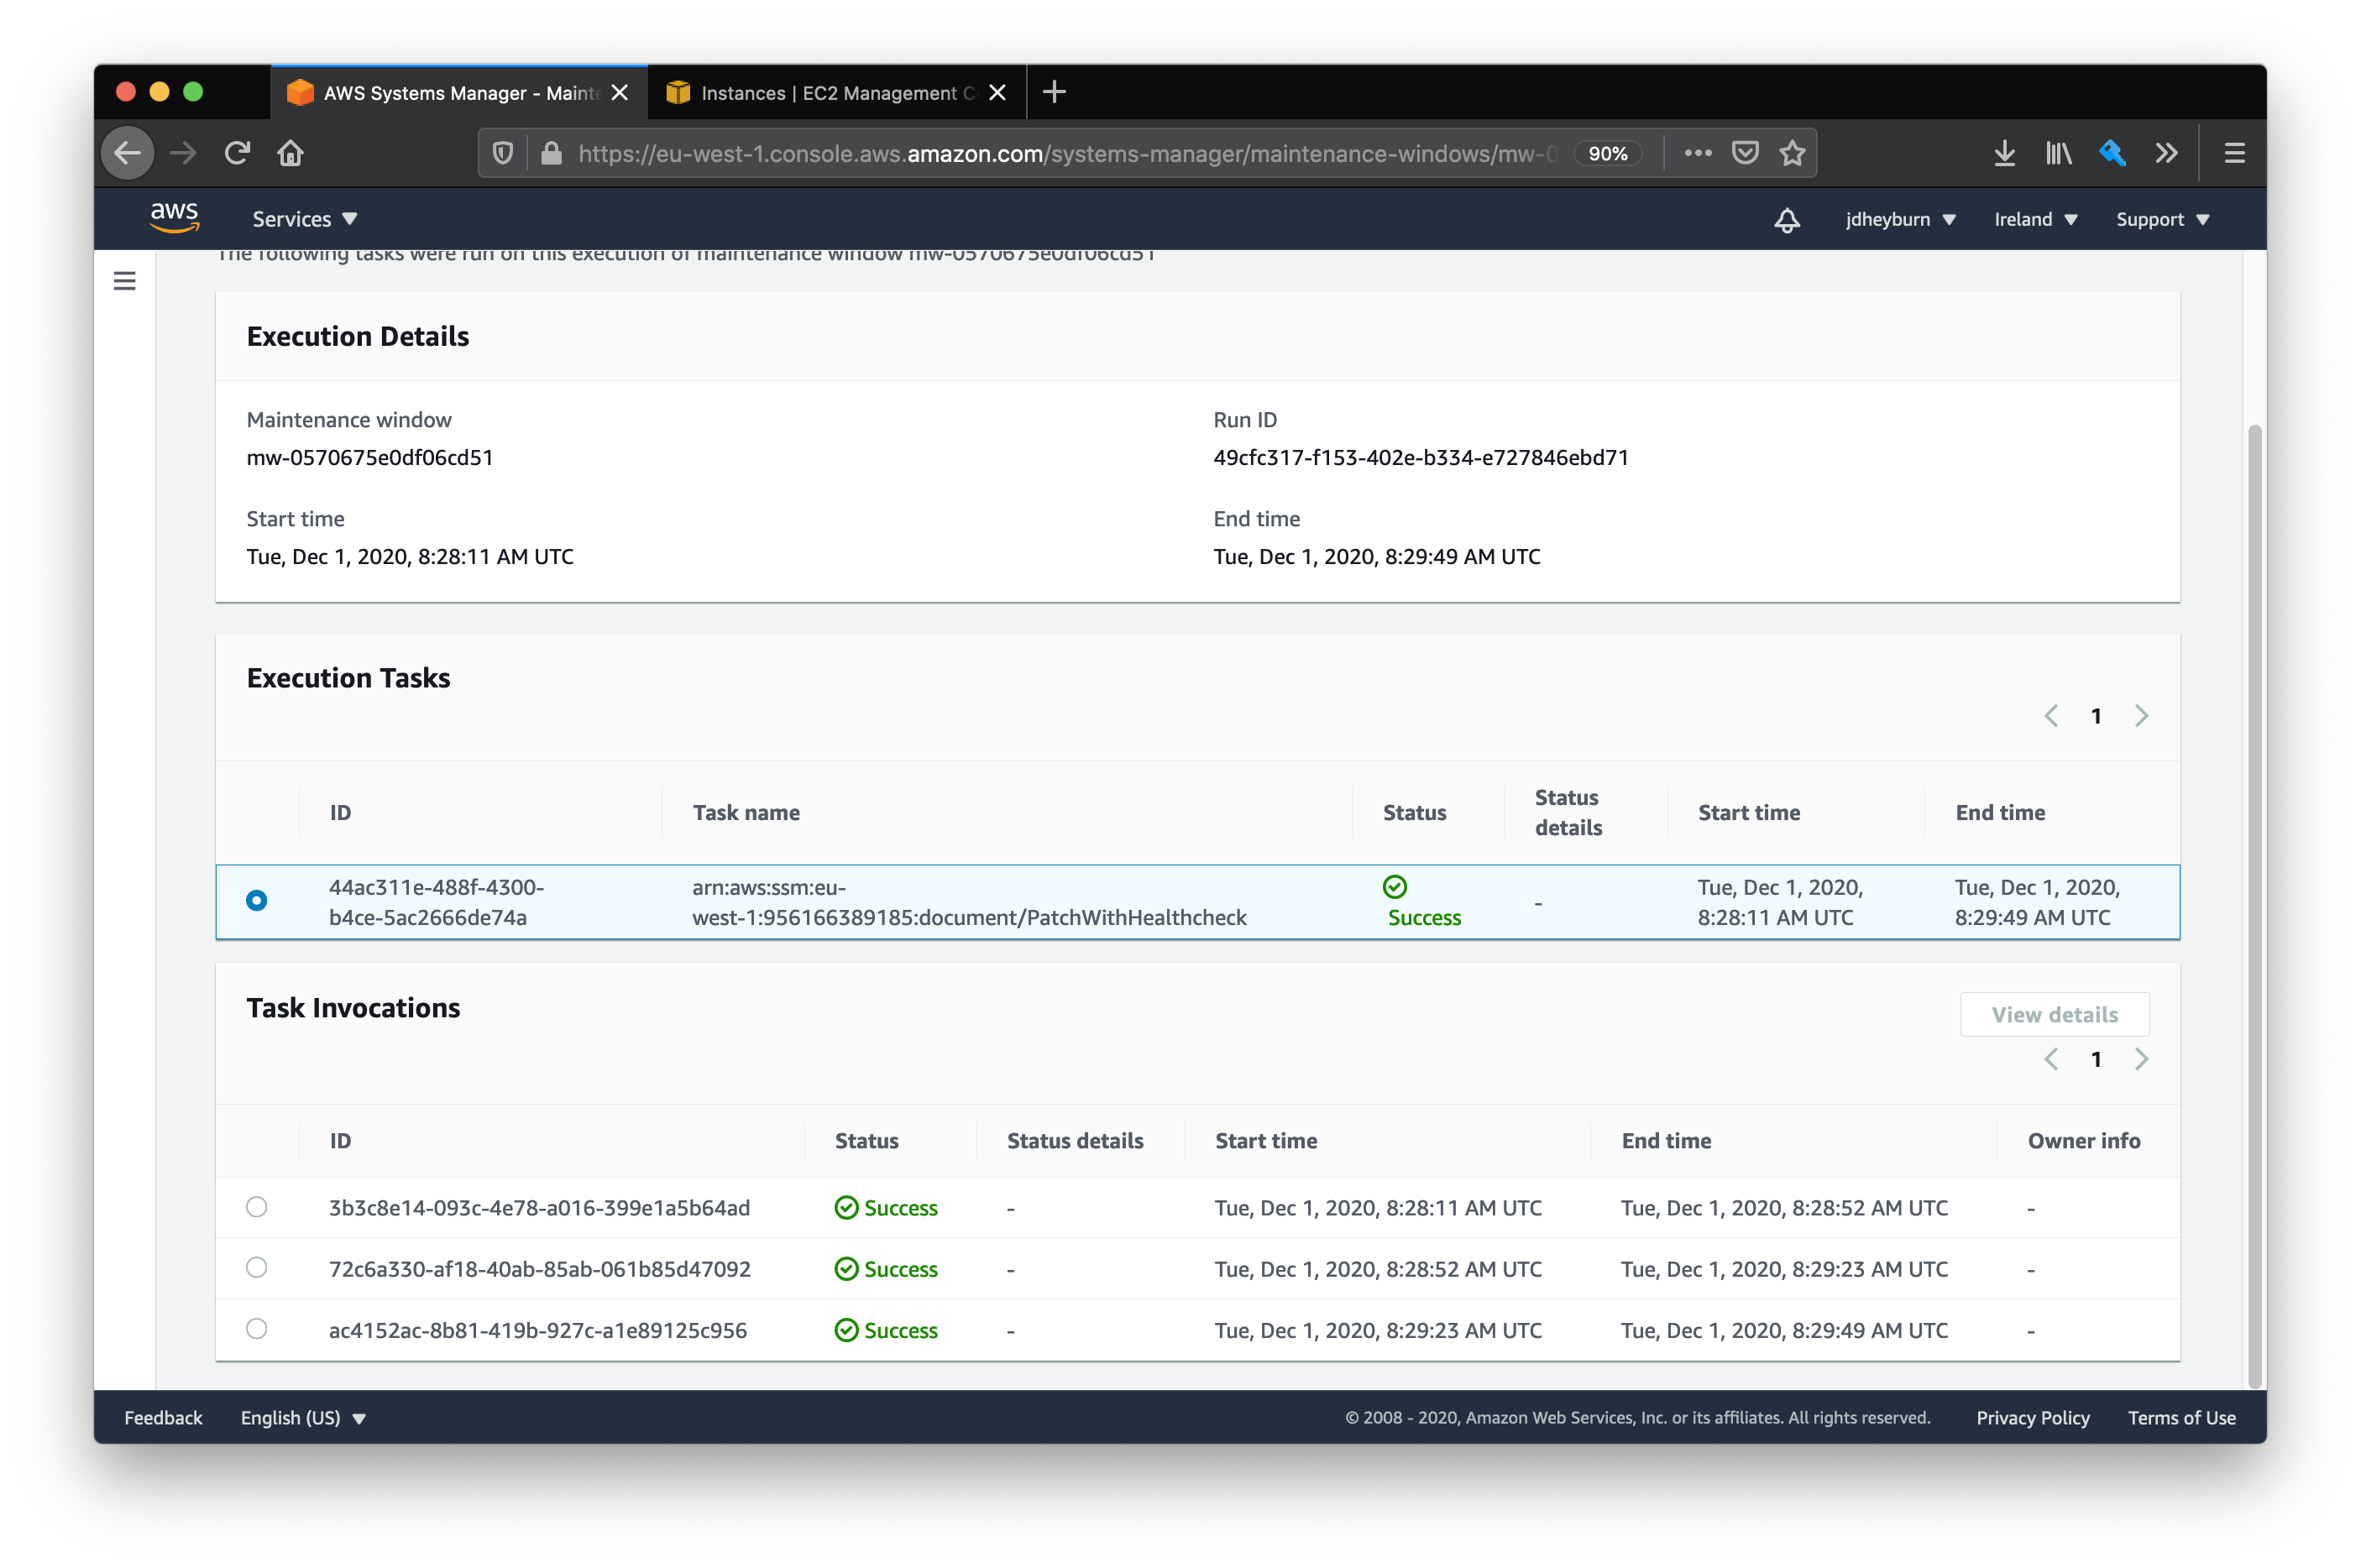
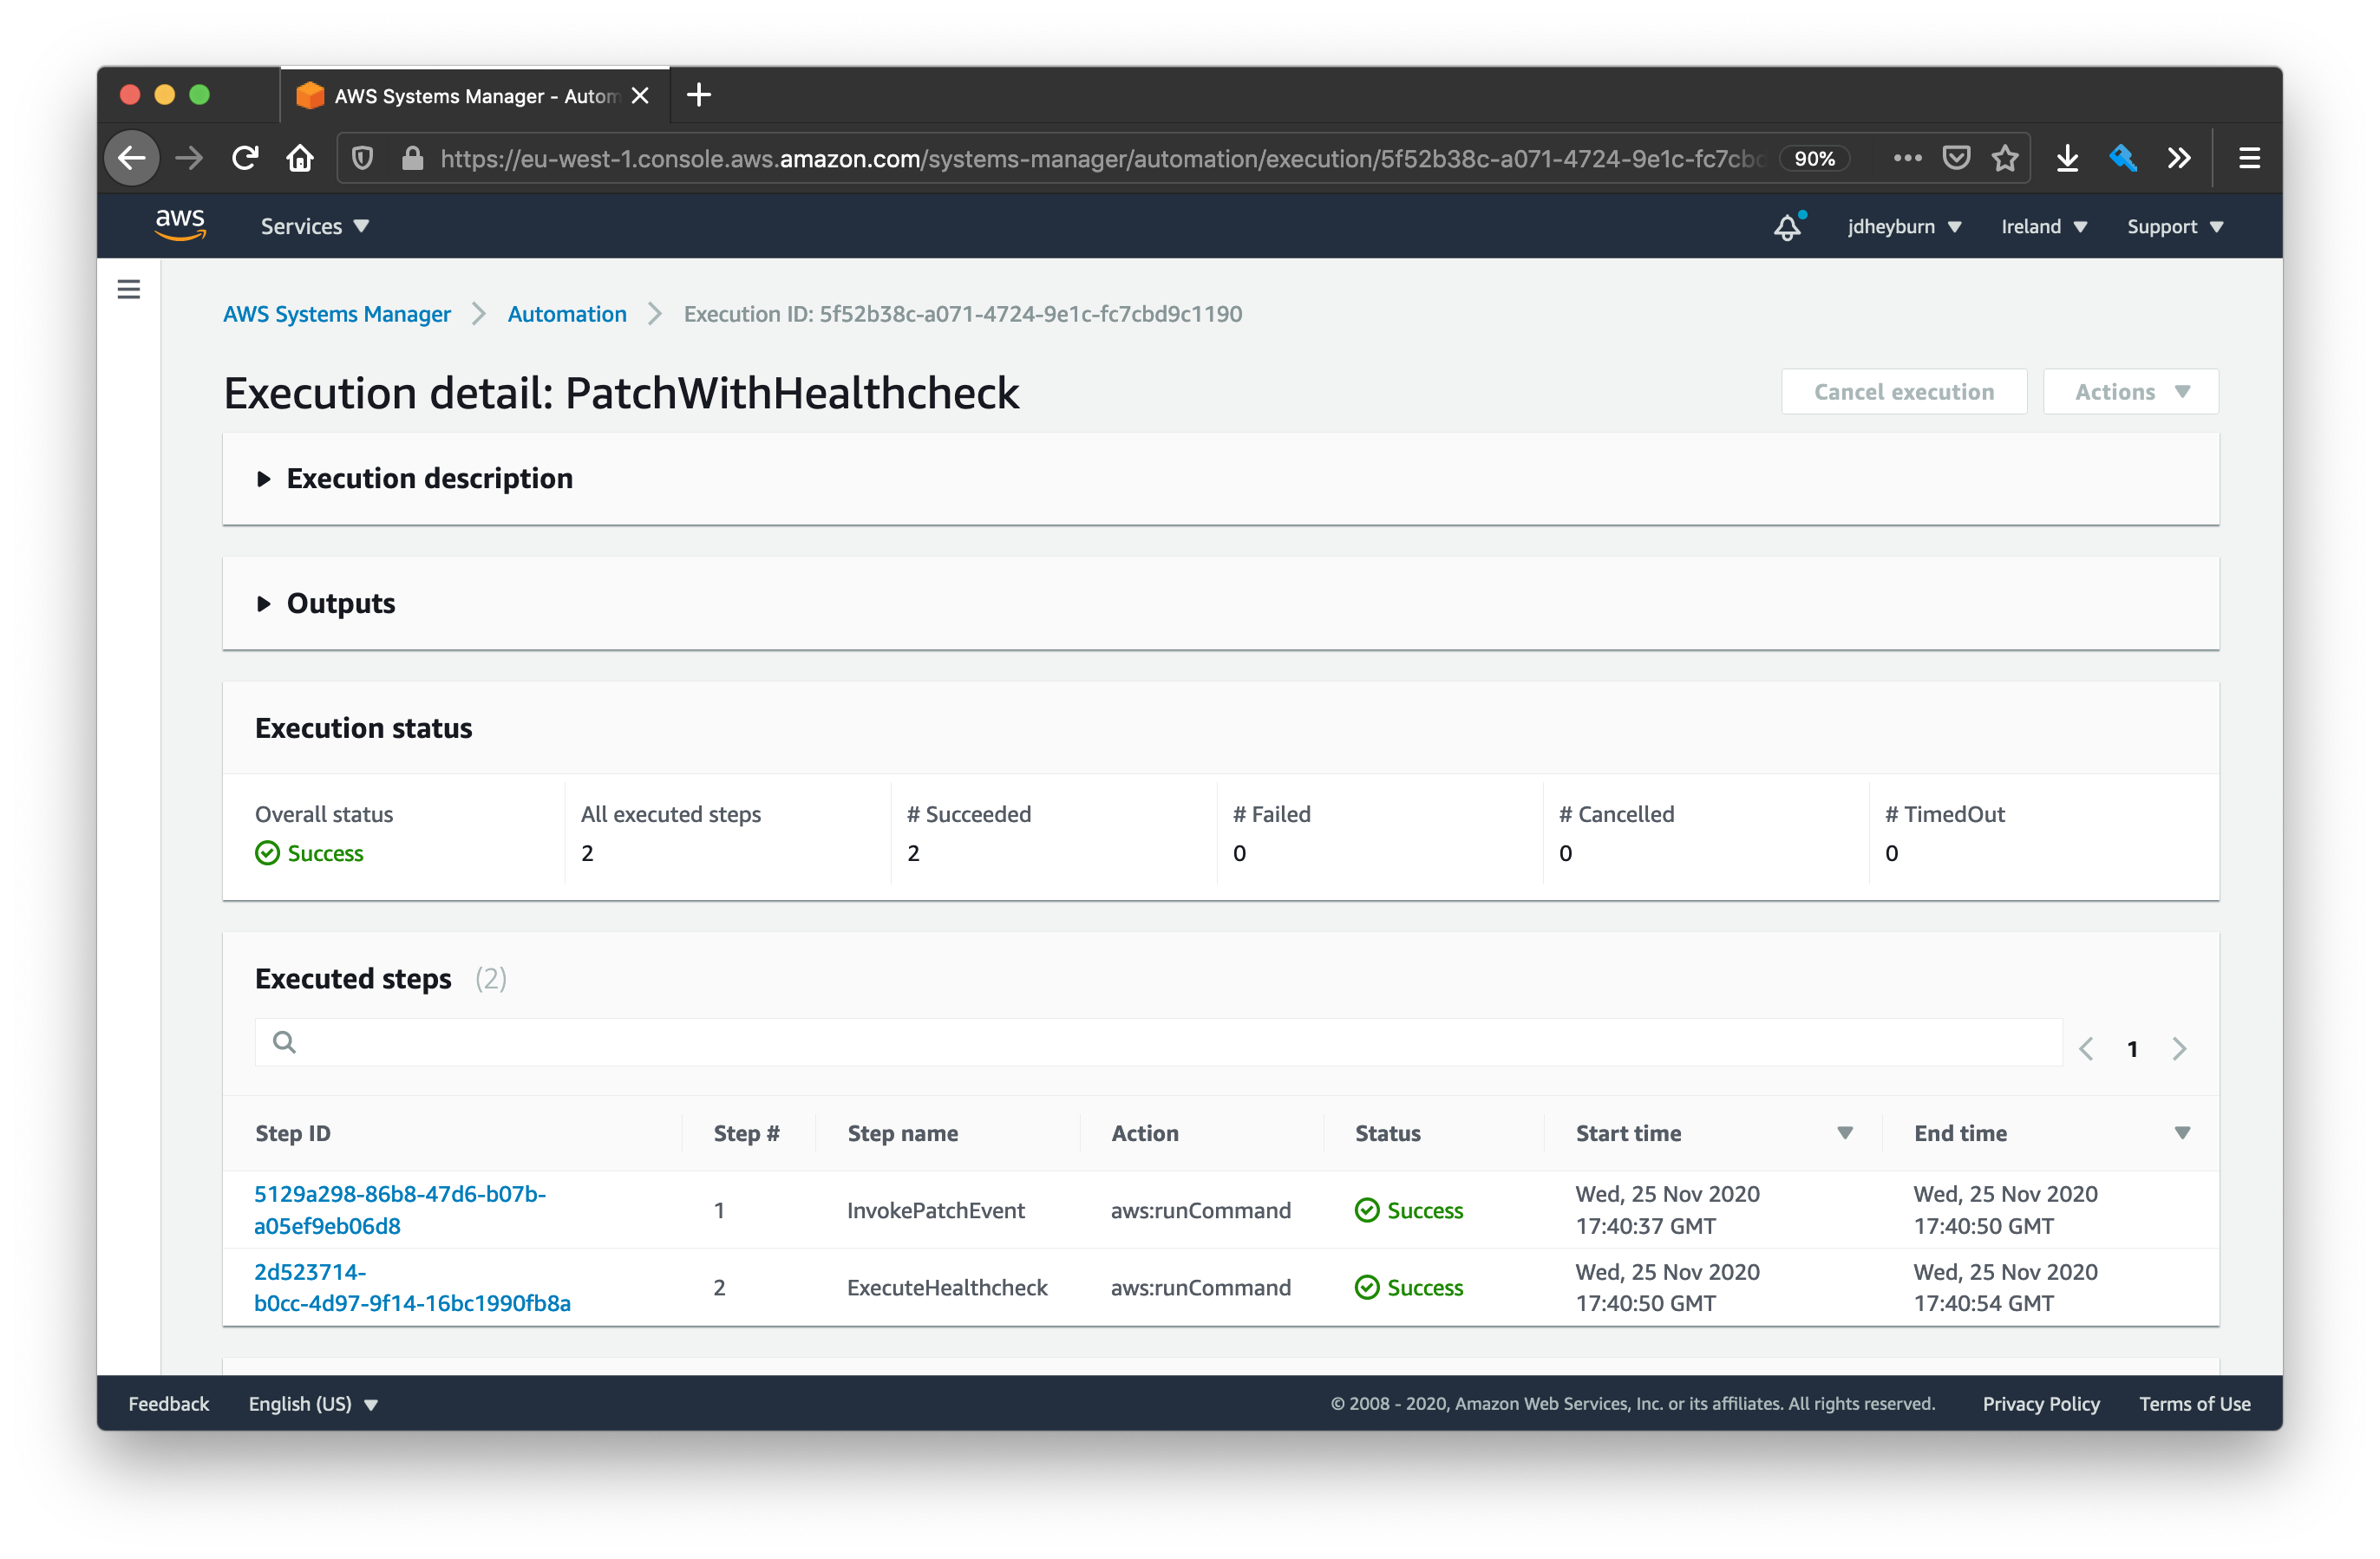
Notice how the start and end times don’t overlap
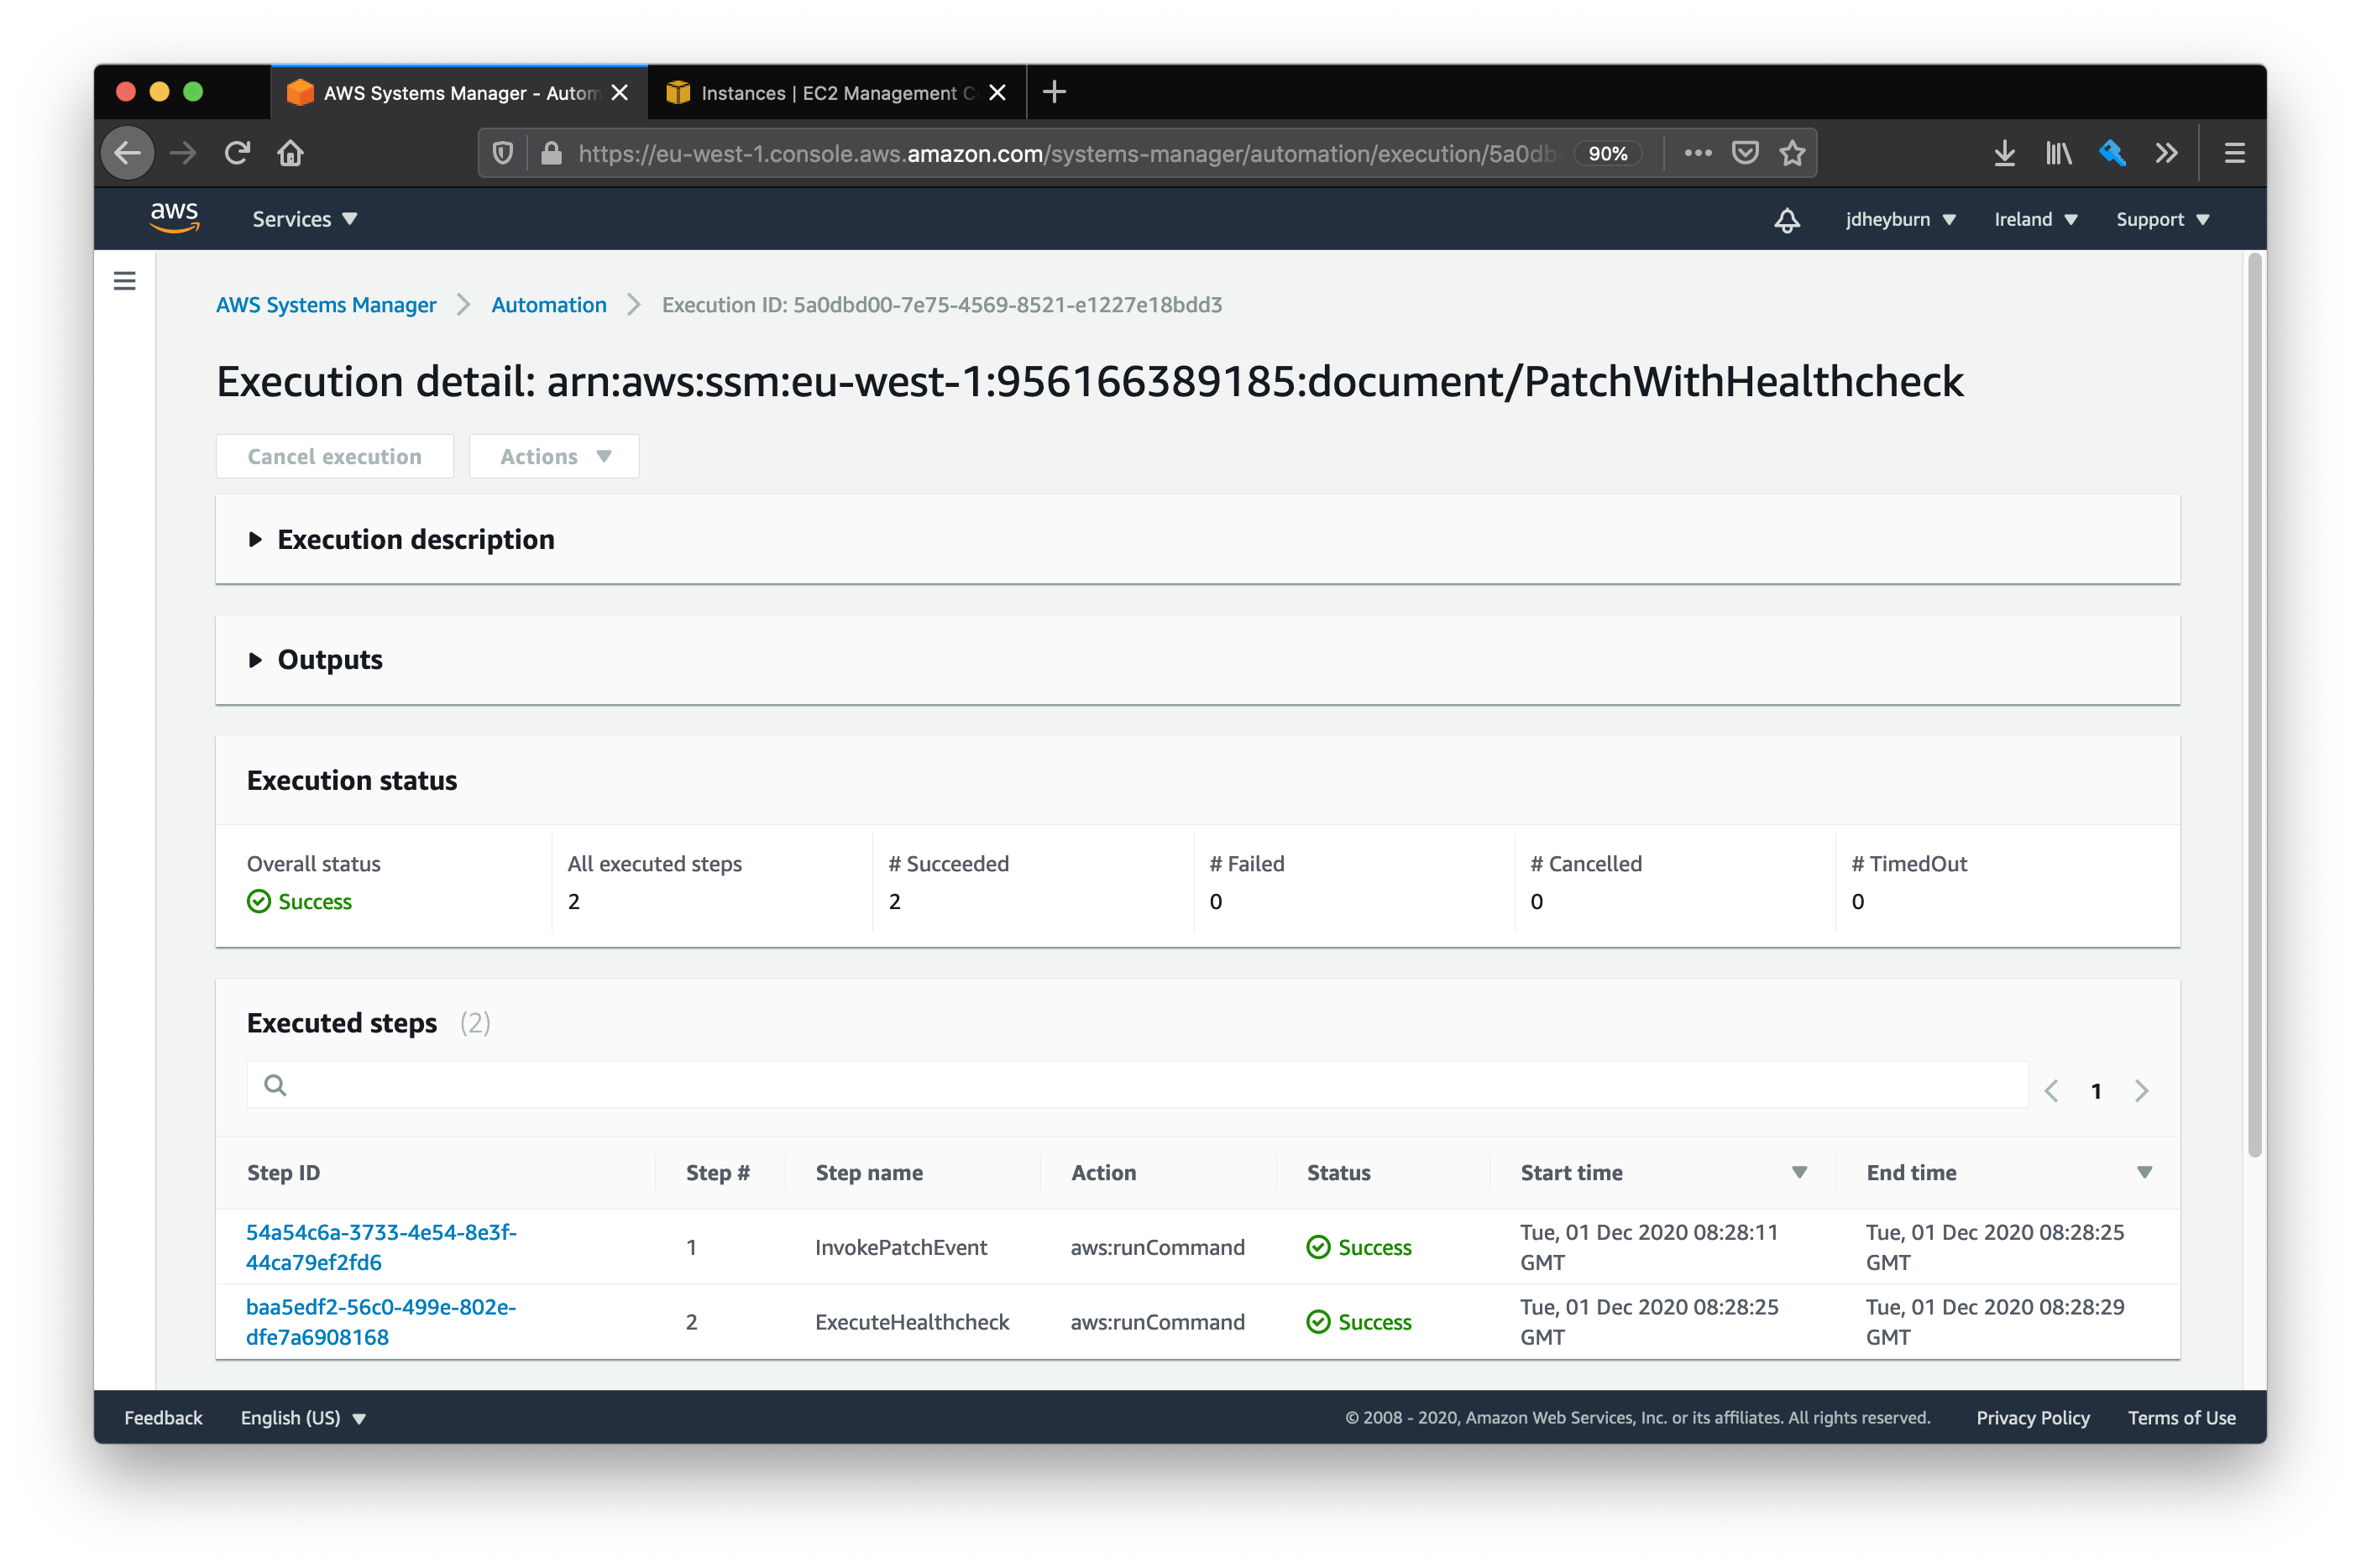
Just like for command documents, you can view the detail for each invocation made on the instance. Here we can see the two steps that make up our newly created command document.
But the whole point of this exercise was to proactively handle errors right? So let’s introduce some by doing what we’ve done before and change the healthcheck script to fail.
Once the new “broken” script is applied we can rerun another test of the maintenance window.
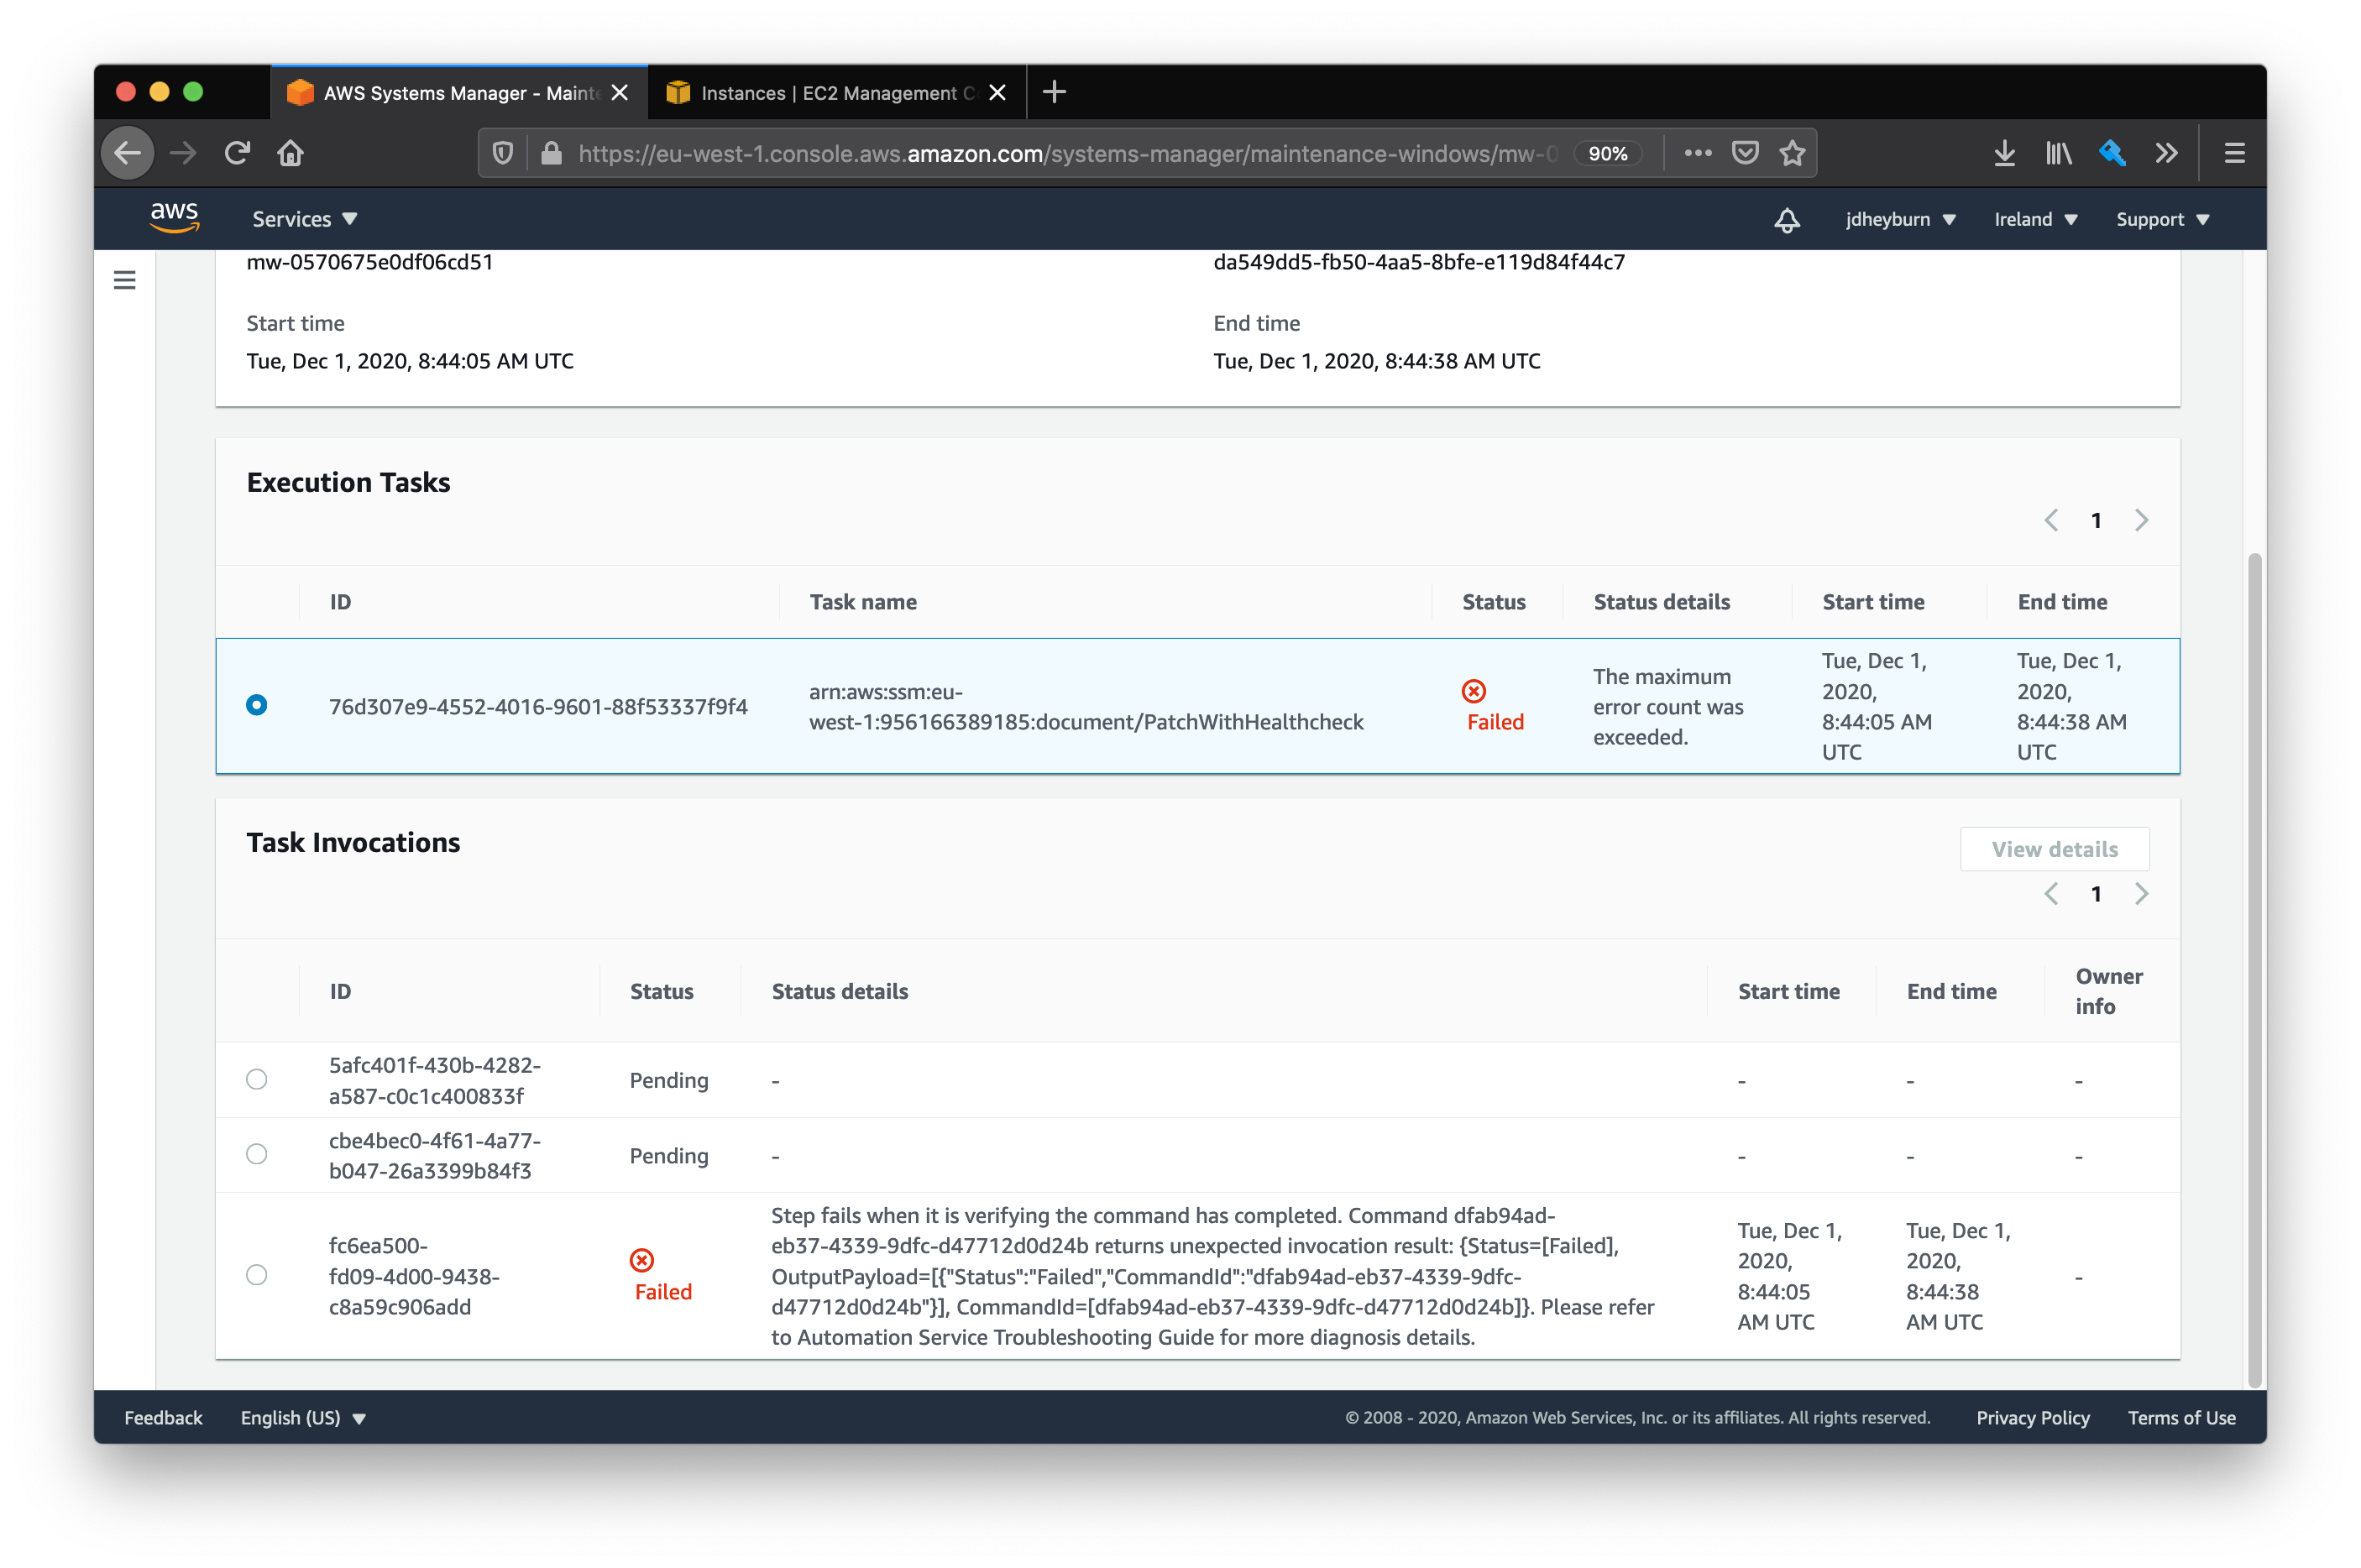
This time round we can see that there was a failure in one task invocation, which then aborted further invocations on the remaining instances! Just as before, we can do a deep dive into the invocation to determine why it had failed.
From here you can follow the command invoked by the step to troubleshoot the failure
Bonus: Using automation to dynamically invoke command documents
In this post we’ve looked at a common maintenance task in the form of an SSM command document called AWS-RunPatchBaseline, and created an automation document that will always invoke our healthcheck script after this invocation.
You may have more command documents that perform some form of maintenance on instances, for which you would also want the healthcheck script to execute after as well.
Instead of copying and pasting these automation documents, we can create just one automation document which takes in the command document ARN as a parameter, dynamically invoke it, and then have a hardcoded step afterward for executing a healthcheck!
In it’s raw YAML form, we would get a document that looks like this:
---
schemaVersion: "0.3"
description: Executes a maintenance event on the instance followed by a healthcheck
parameters:
  InstanceIds:
    type: StringList
    description: The instance to target
  DocumentArn:
    type: String
    description: The document arn to invoke
  InputParameters:
    type: StringMap
    description: Parameters that should be passed to the document specified in DocumentArn
    default: {}
mainSteps:
  - name: InvokeMaintenanceEvent
    action: aws:runCommand
    inputs:
      DocumentName: "{{ DocumentArn }}"
      InstanceIds: "{{ InstanceIds }}"
      OutputS3BucketName: ${output_s3_bucket_name}
      OutputS3KeyPrefix: ${output_s3_key_prefix}
      Parameters: "{{ InputParameters }}"
  - name: ExecuteHealthcheck
    action: aws:runCommand
    inputs:
      DocumentName: ${healthcheck_document_arn}
      InstanceIds: "{{ InstanceIds }}"
      OutputS3BucketName: ${output_s3_bucket_name}
      OutputS3KeyPrefix: ${output_s3_key_prefix}
Just like what we’ve done for InstanceIds, we’re taking in the DocumentArn as a parameter and providing it as the input for the aws:runCommand step. Some documents will also take parameters, so we can allow the caller to specify them using InputParameters, which is defined as a StringMap type - allowing it to then be used in as parameters for the document we are invoking.
When we create this document in the console and then execute it, we can then dynamically add in the document we want to invoke.
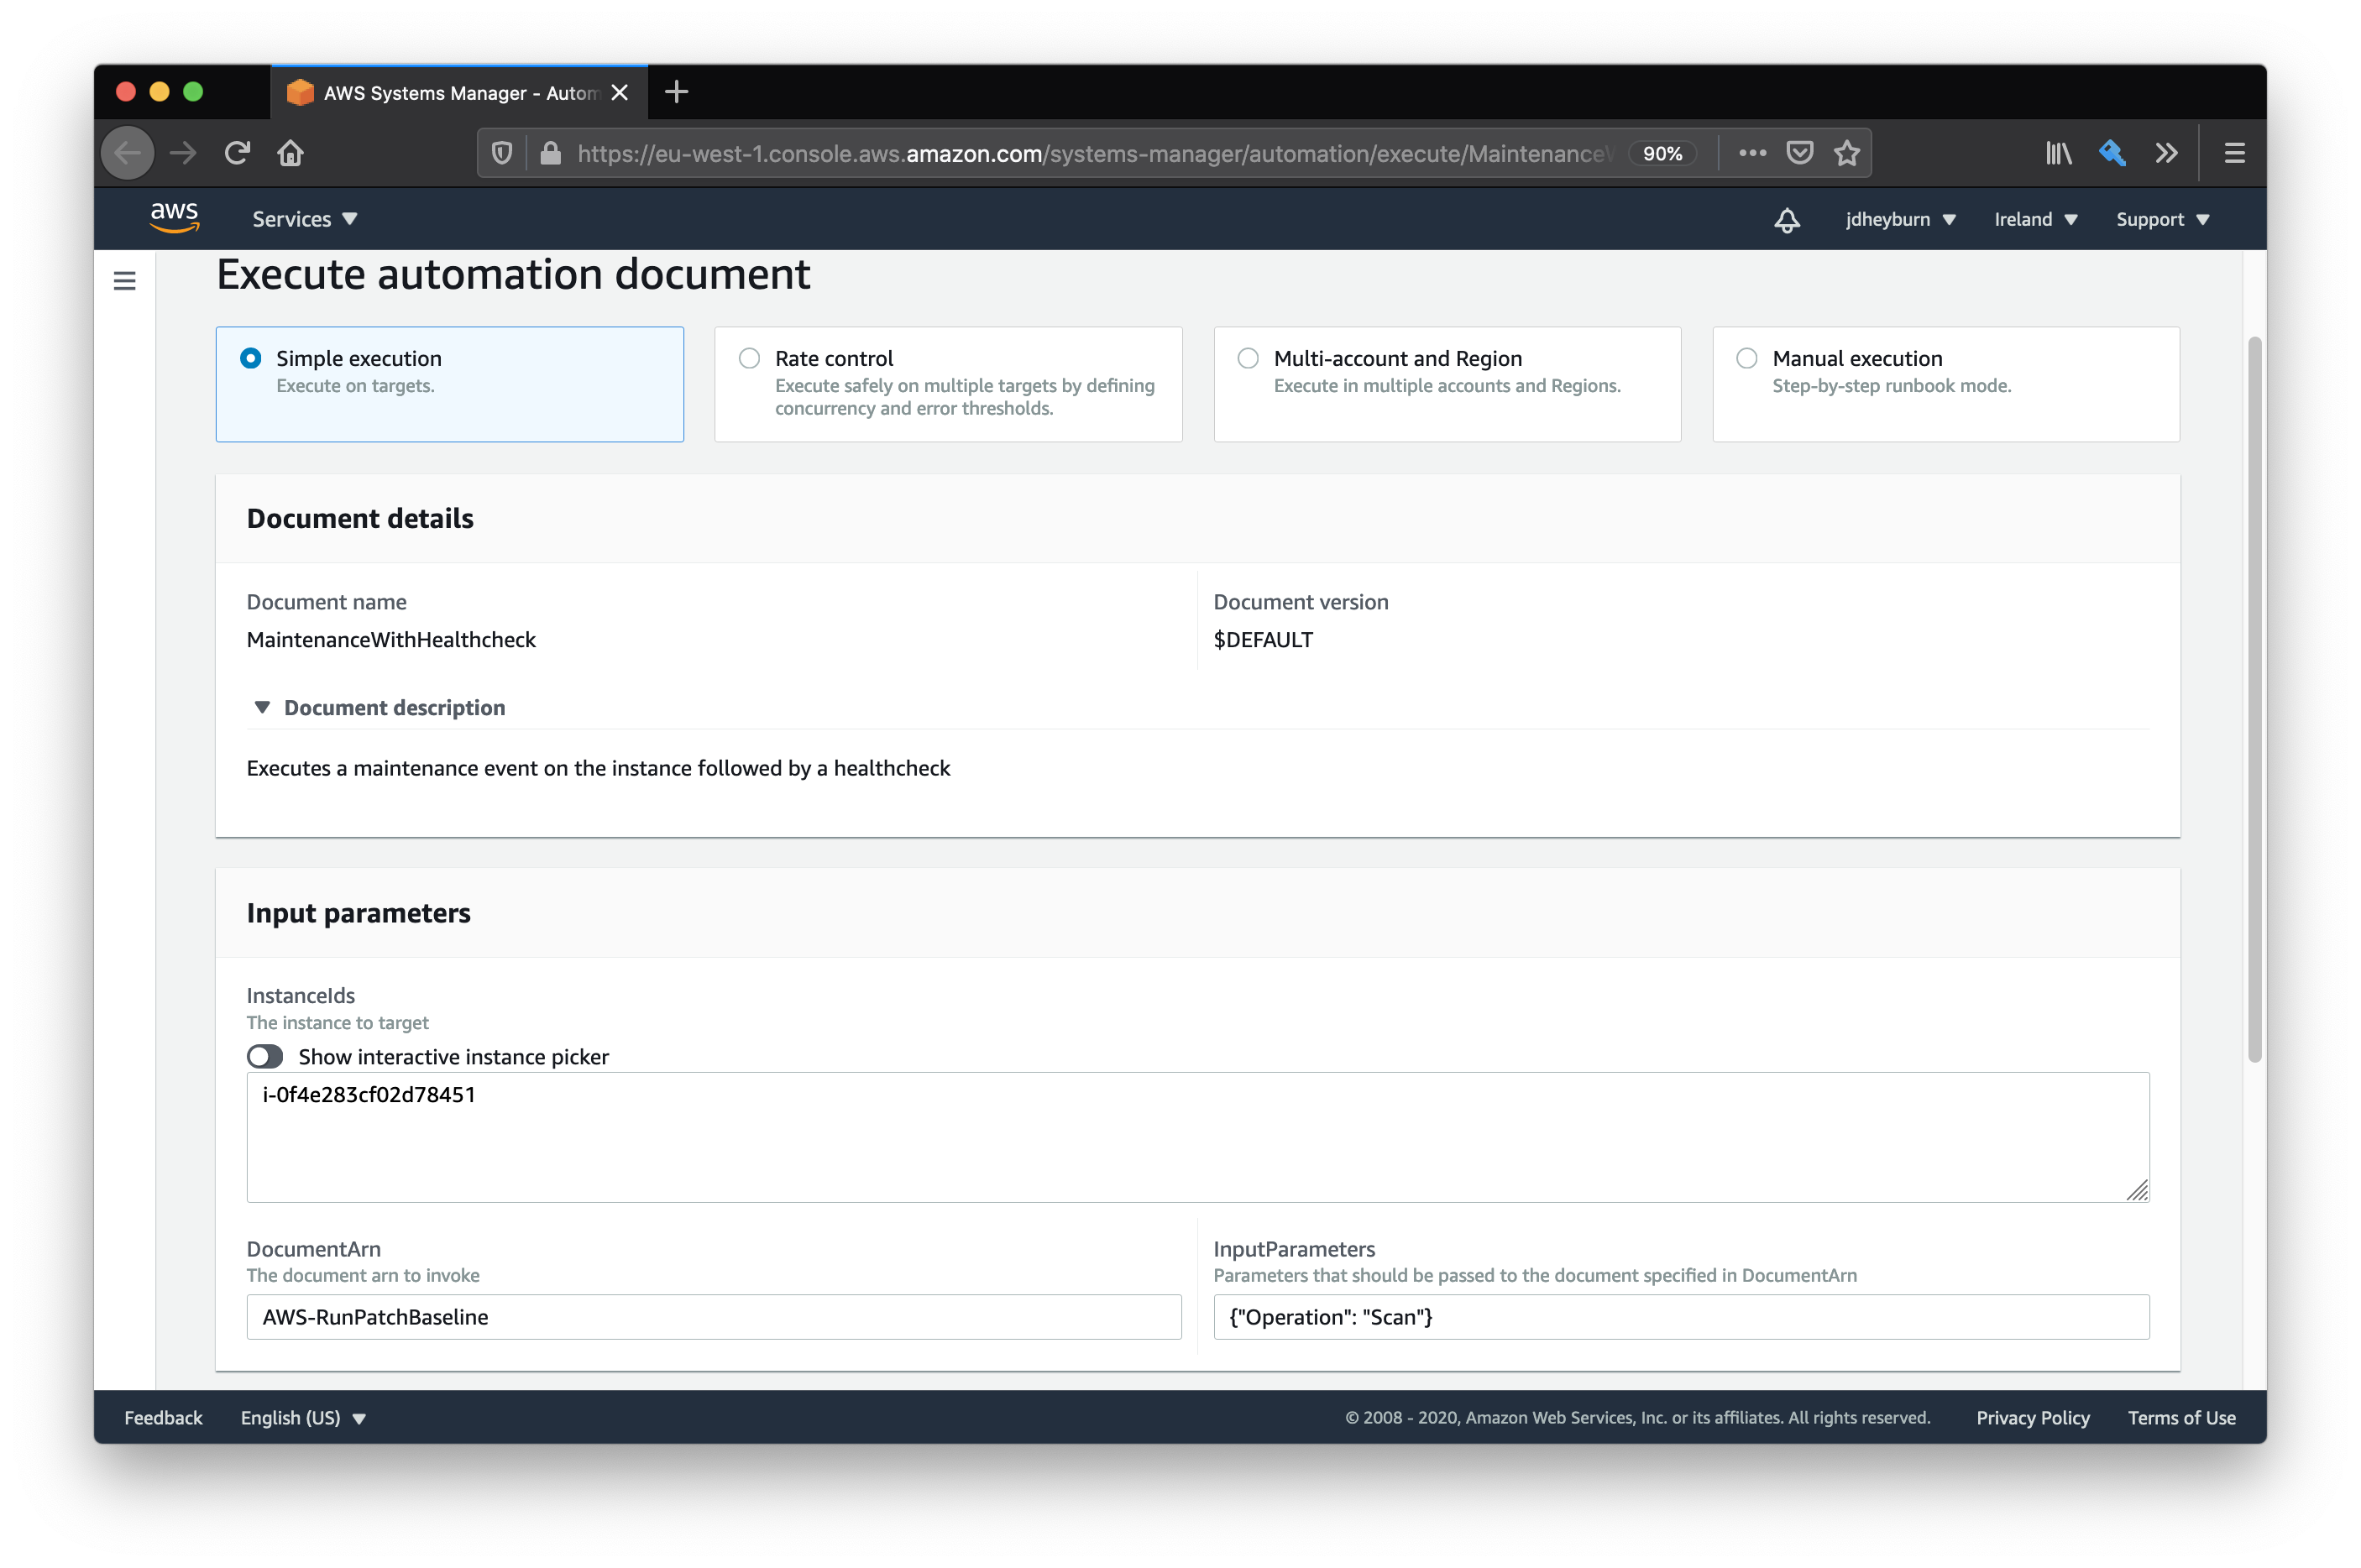
Then just like any other document we can invoke it.
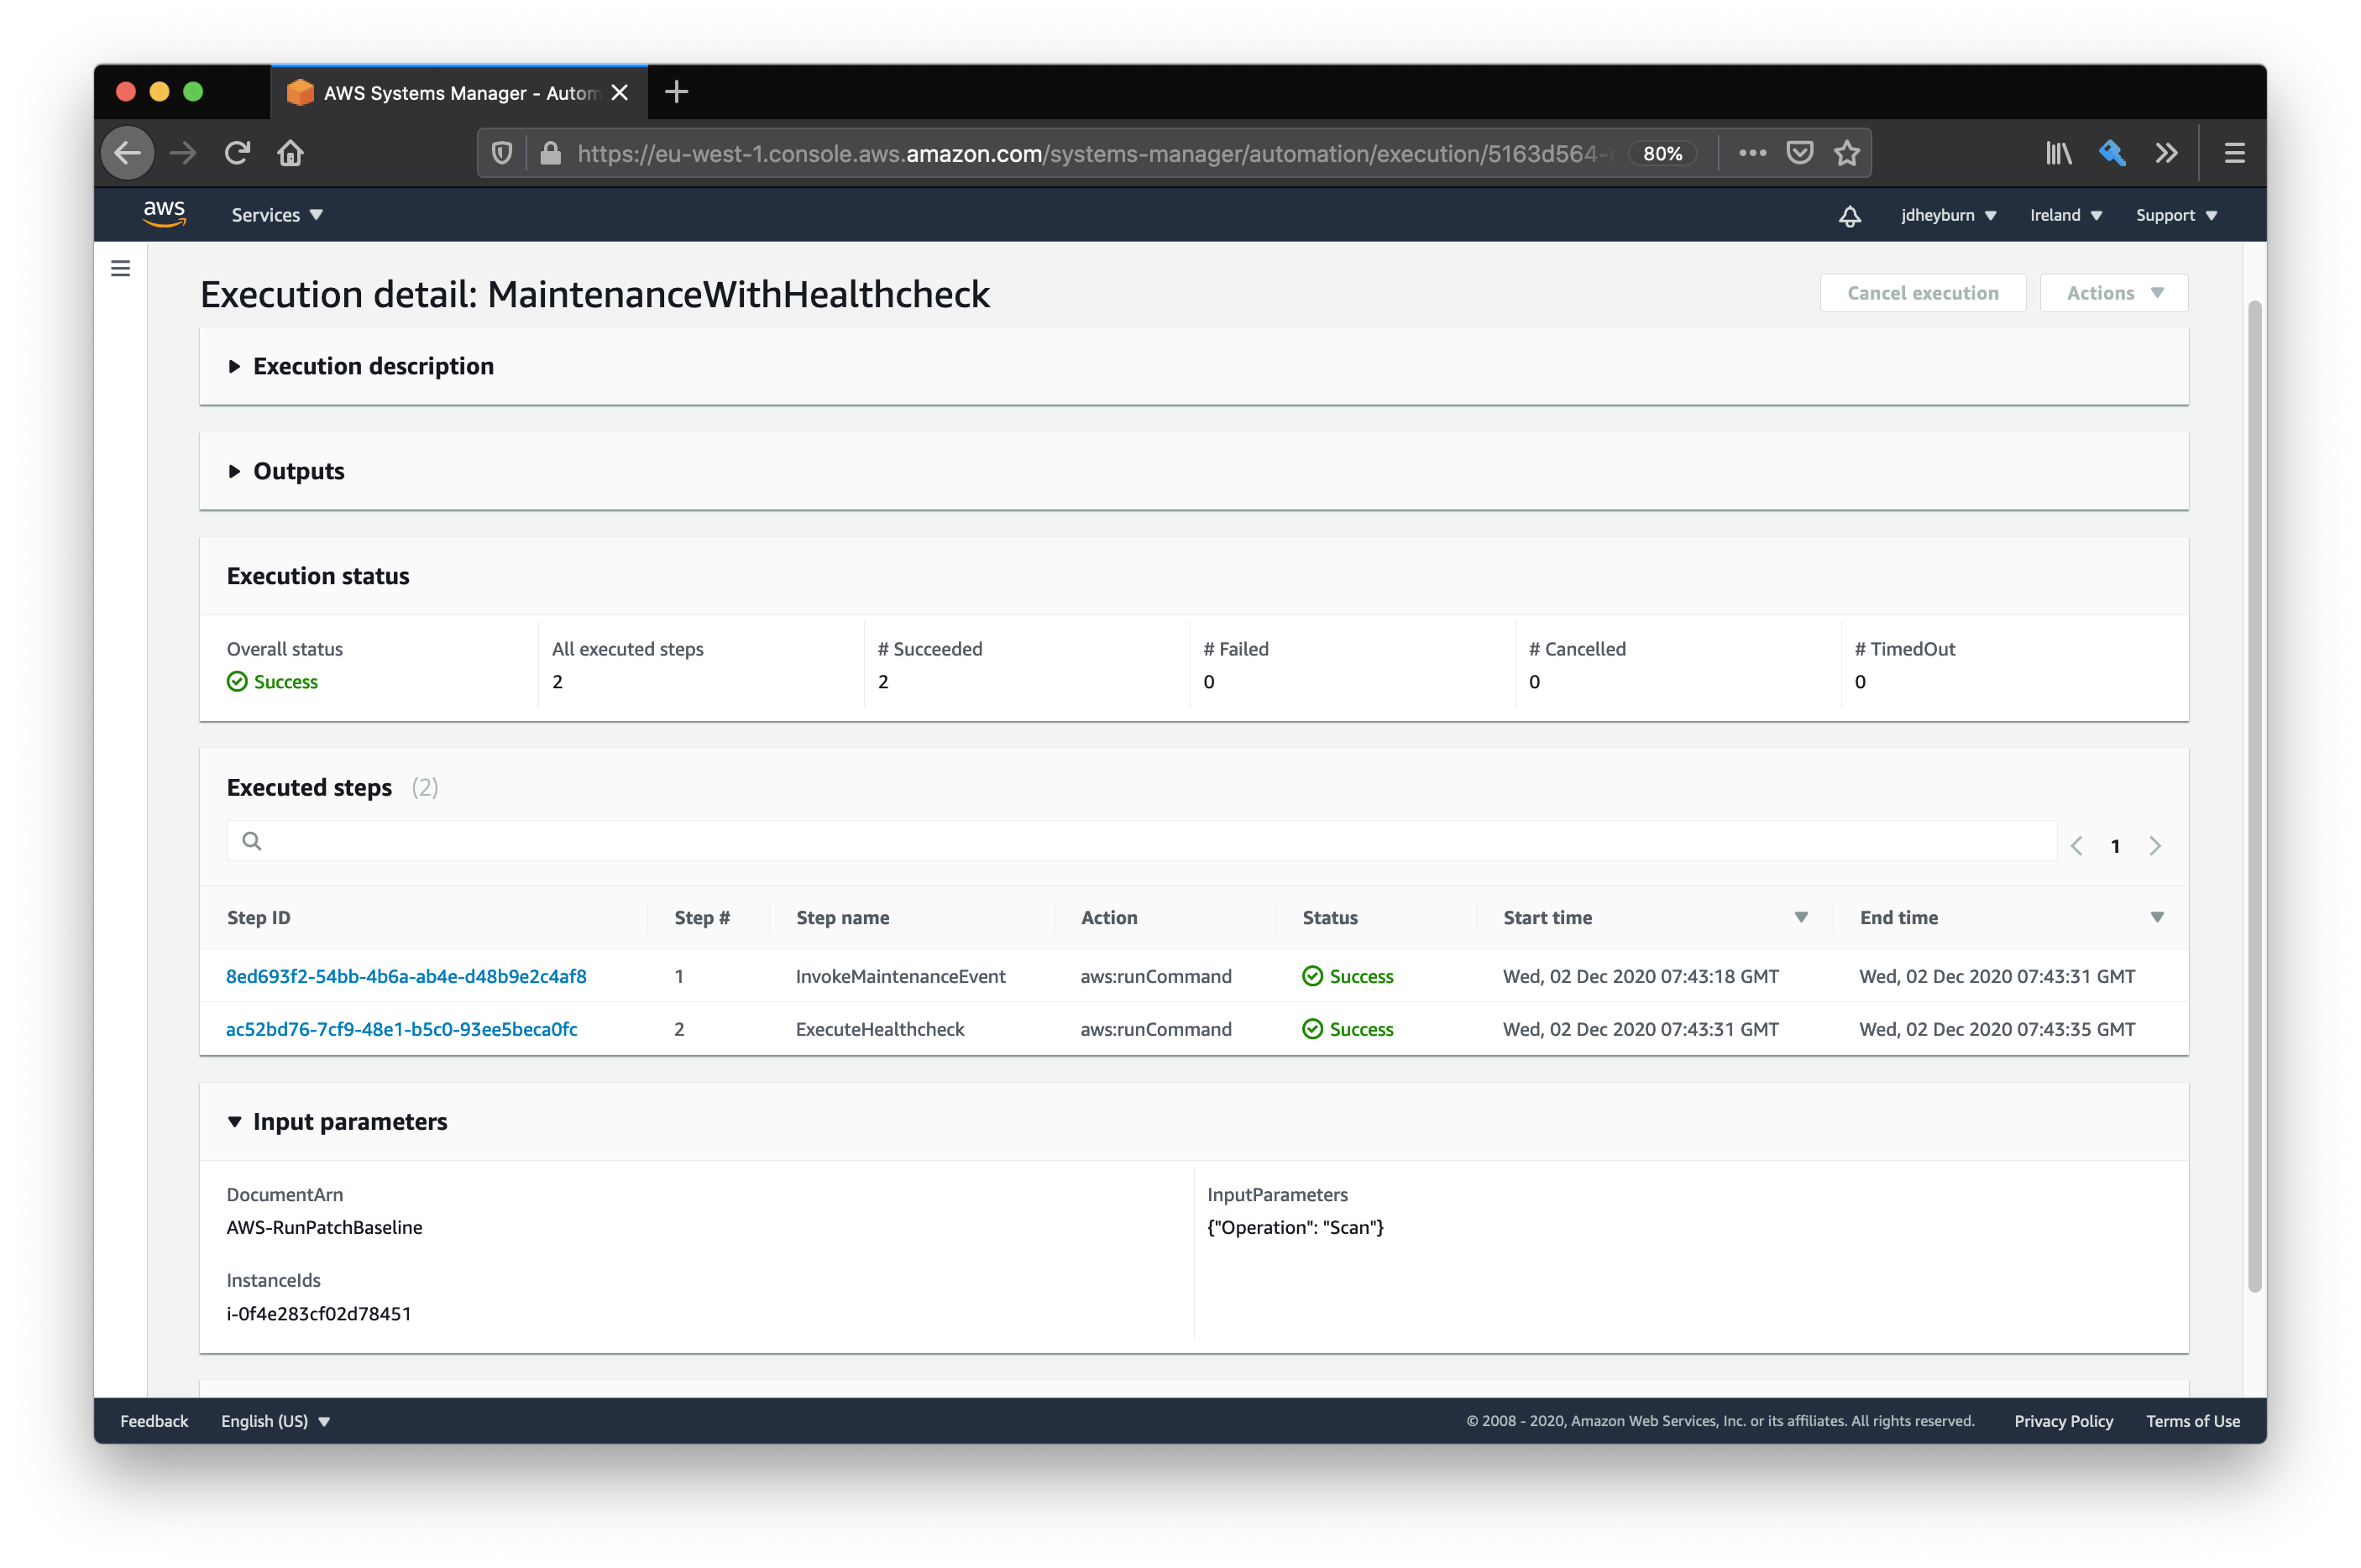
We can see that the input from the previous screen was passed to the step. Let’s keep going until we hit the command invocation.
The document name was dynamically passed to the command execution
Terraforming dynamic command documents
So now we’ve confirmed that documents can be dynamically invoked, let’s get this Terraformed. You can view this in GitHub.
resource "aws_ssm_document" "maintenance_wrapper" {
  name            = "MaintenanceWithHealthcheck"
  document_type   = "Automation"
  document_format = "YAML"

  content = templatefile(
    "documents/maintenance_wrapper_template.yml",
    {
      healthcheck_document_arn = aws_ssm_document.perform_healthcheck_s3.arn,
      output_s3_bucket_name    = aws_s3_bucket.script_bucket.id,
      output_s3_key_prefix     = "ssm_output/",
    }
  )
}
Not a lot has really changed in this when we compare it to our one from earlier, but the difference is in the parameters field for the document.
And then you can include it as a maintenance window task as below; I’m reusing the same maintenance window task as before.
resource "aws_ssm_maintenance_window_task" "patch_with_healthcheck" {
  window_id        = aws_ssm_maintenance_window.patch_with_healthcheck.id
  task_type        = "AUTOMATION"
  task_arn         = aws_ssm_document.maintenance_wrapper.arn
  priority         = 10
  service_role_arn = aws_iam_role.patch_mw_role.arn

  max_concurrency = "1"
  max_errors      = "0"

  targets {
    key    = "WindowTargetIds"
    values = [aws_ssm_maintenance_window_target.patch_with_healthcheck_target.id]
  }

  task_invocation_parameters {
    automation_parameters {
      document_version = "$LATEST"

      parameter {
        name   = "InstanceIds"
        values = ["{{ TARGET_ID }}"]
      }

      parameter {
        name   = "DocumentArn"
        values = ["AWS-RunPatchBaseline"]
      }

      parameter {
        name   = "InputParameters"
        values = [jsonencode({ Operation = "Scan" })]
      }
    }
  }
}
You can then copy and paste the same task resource, only changing the values for the InputParameters and DocumentArn parameters accordingly. If the document you are calling doesn’t take any parameters, then you can just omit that block.
You’ll have to ensure that the IAM role the maintenance window task is assuming has the correct IAM permissions as required by the document you’re calling.
Conclusion
What we’ve done in this post is taken our rudimentary command document, prone to introducing errors into our estate, and converted it to an automation document. With the right SSM maintenance window settings, you can ensure that any maintenance tasks you need to perform on your EC2 instances are done so in a manner that reduces the risk of errors in your environment.
Next time, we’ll be taking this a step further to proactively remove EC2 instances from circulation when behind a load balancer for maintenance activities.